Lab Users
These guides walk you through the most common tasks for Lab Users. For the background and the reasoning behind the feature, see Features > Lab Tooling > Lab Users.
Most actions need the Configure Lab Users permission. With only View Lab Users, you can open groups and see their details, but you cannot change anything.
Open Lab Users
- Navigate to Lab Tooling > Lab Configuration.
- Select the Lab Users tab.
- The table lists all lab user groups with their number of users, status, and sync status.
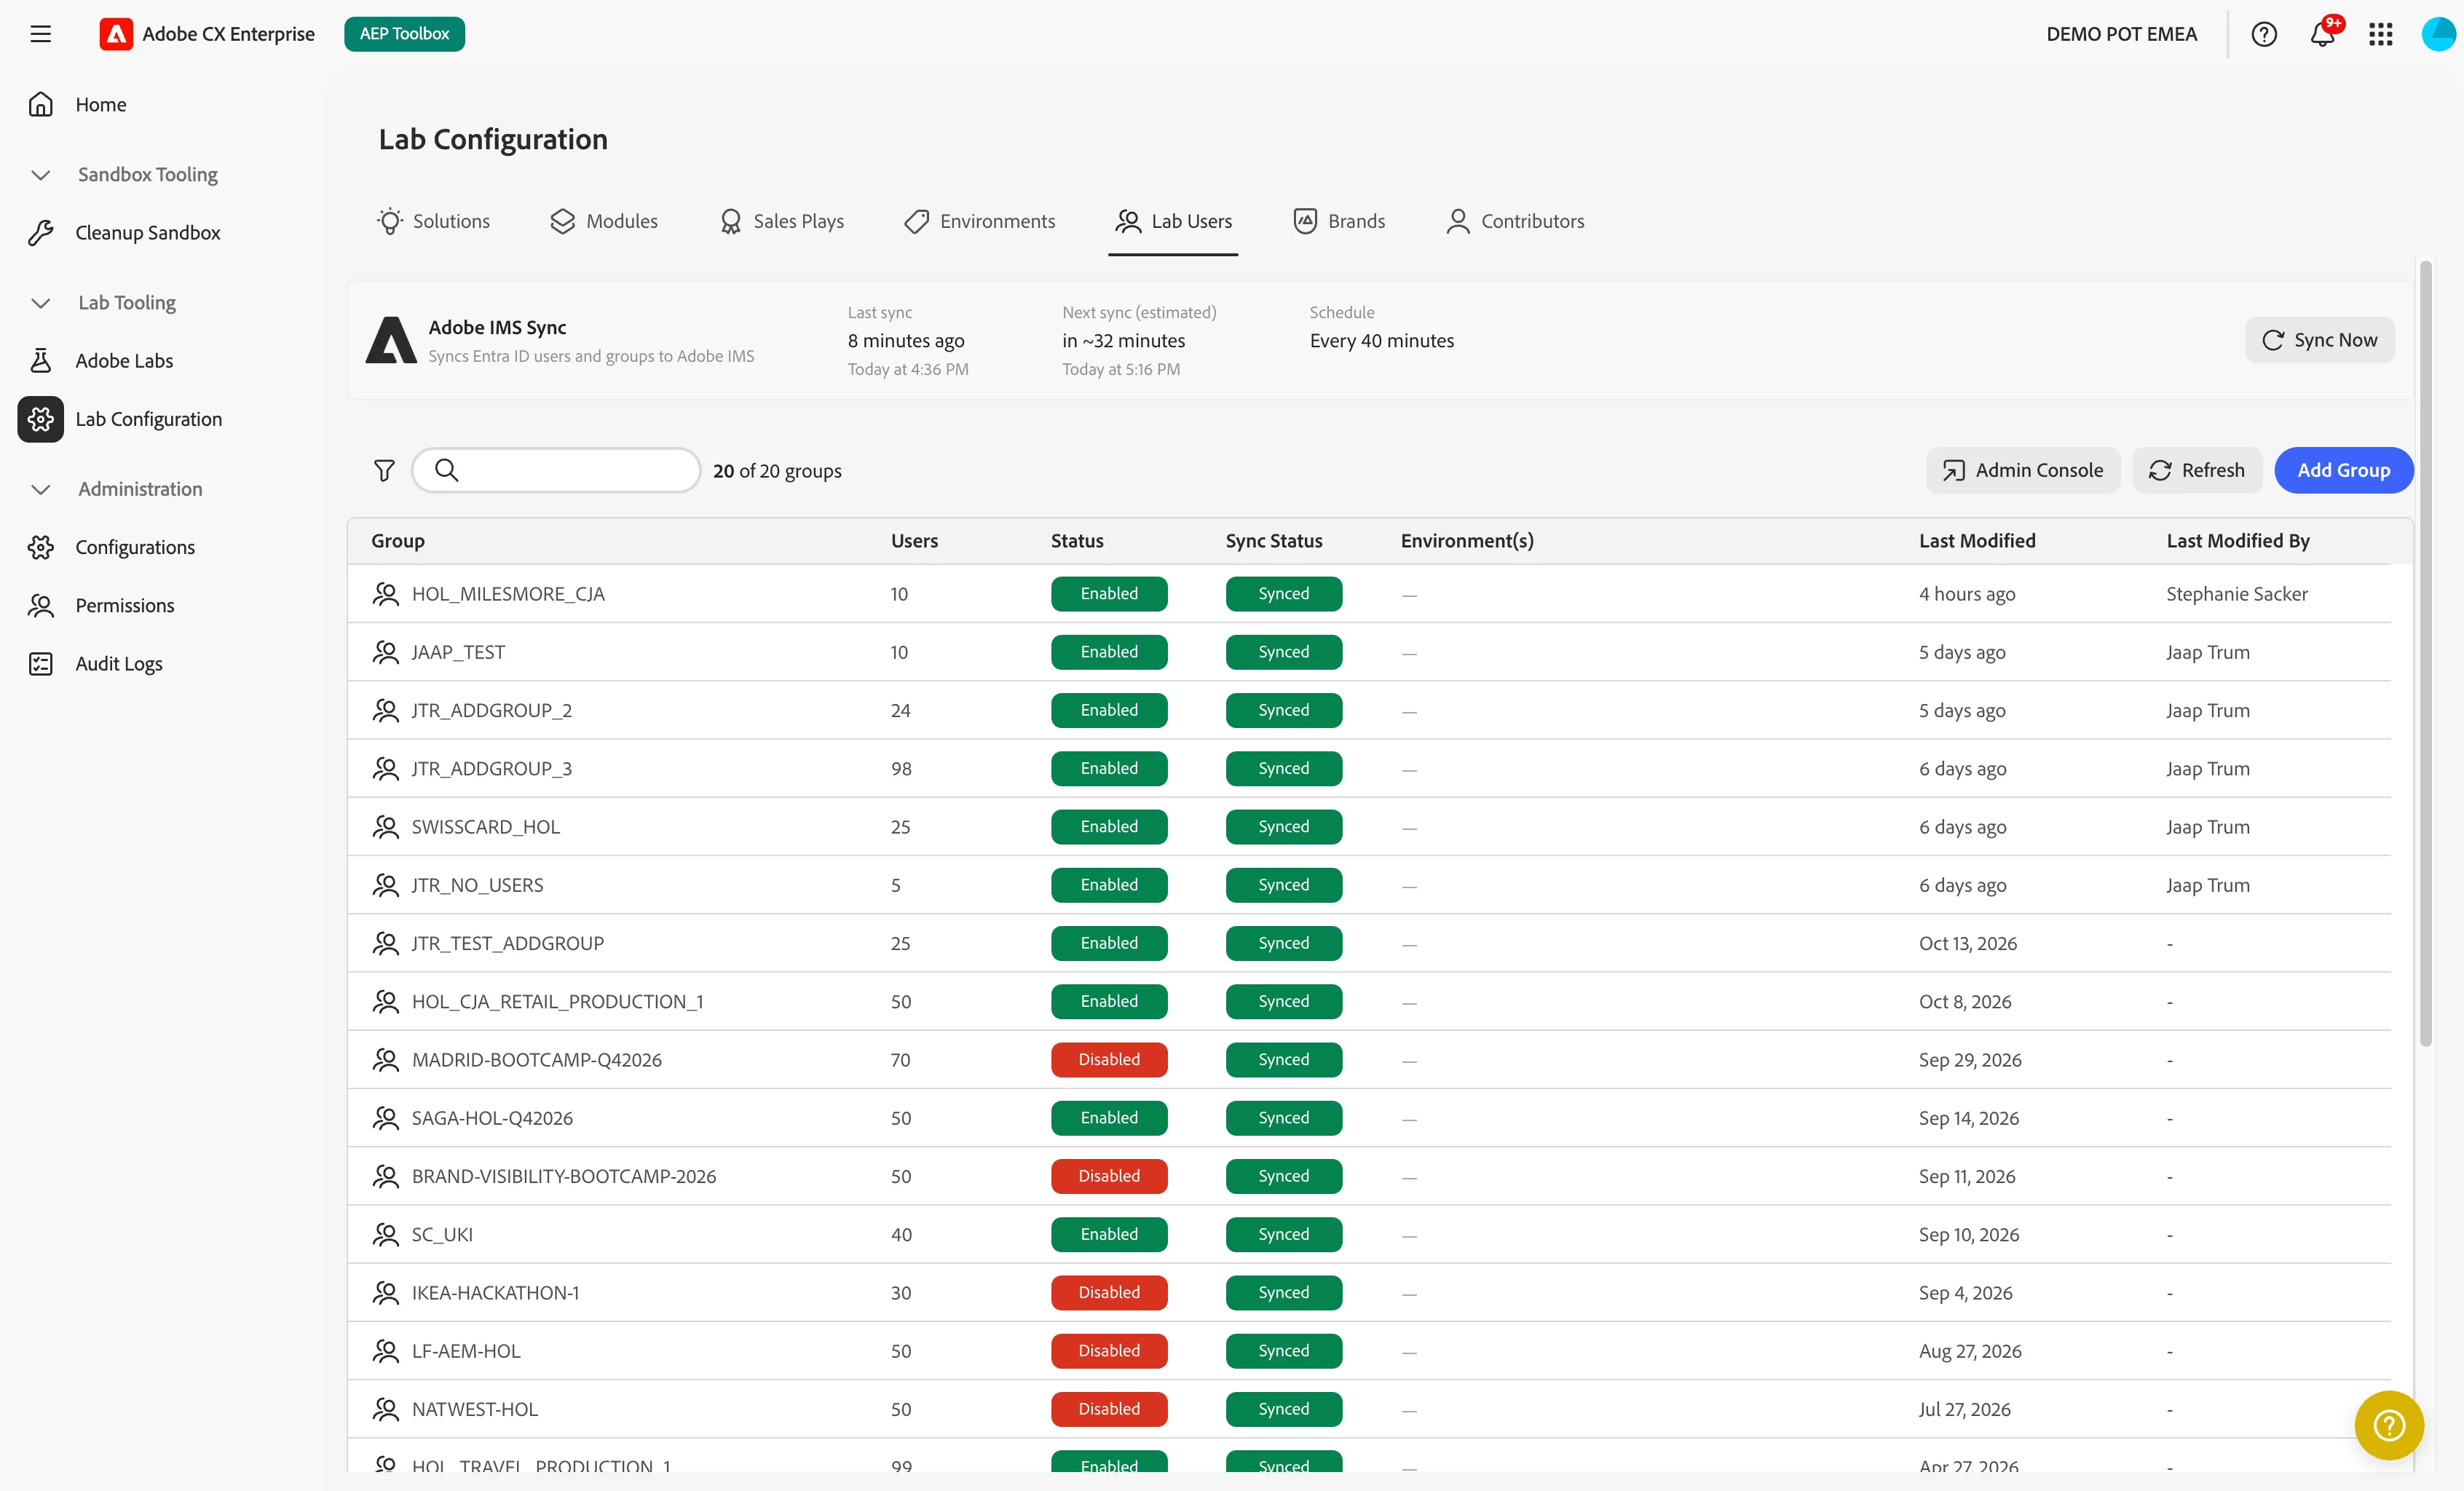
If you see a "User Group settings not configured" message, an admin still needs to finish the Lab Tooling configuration. See the Configurations guides.
Create a lab user group
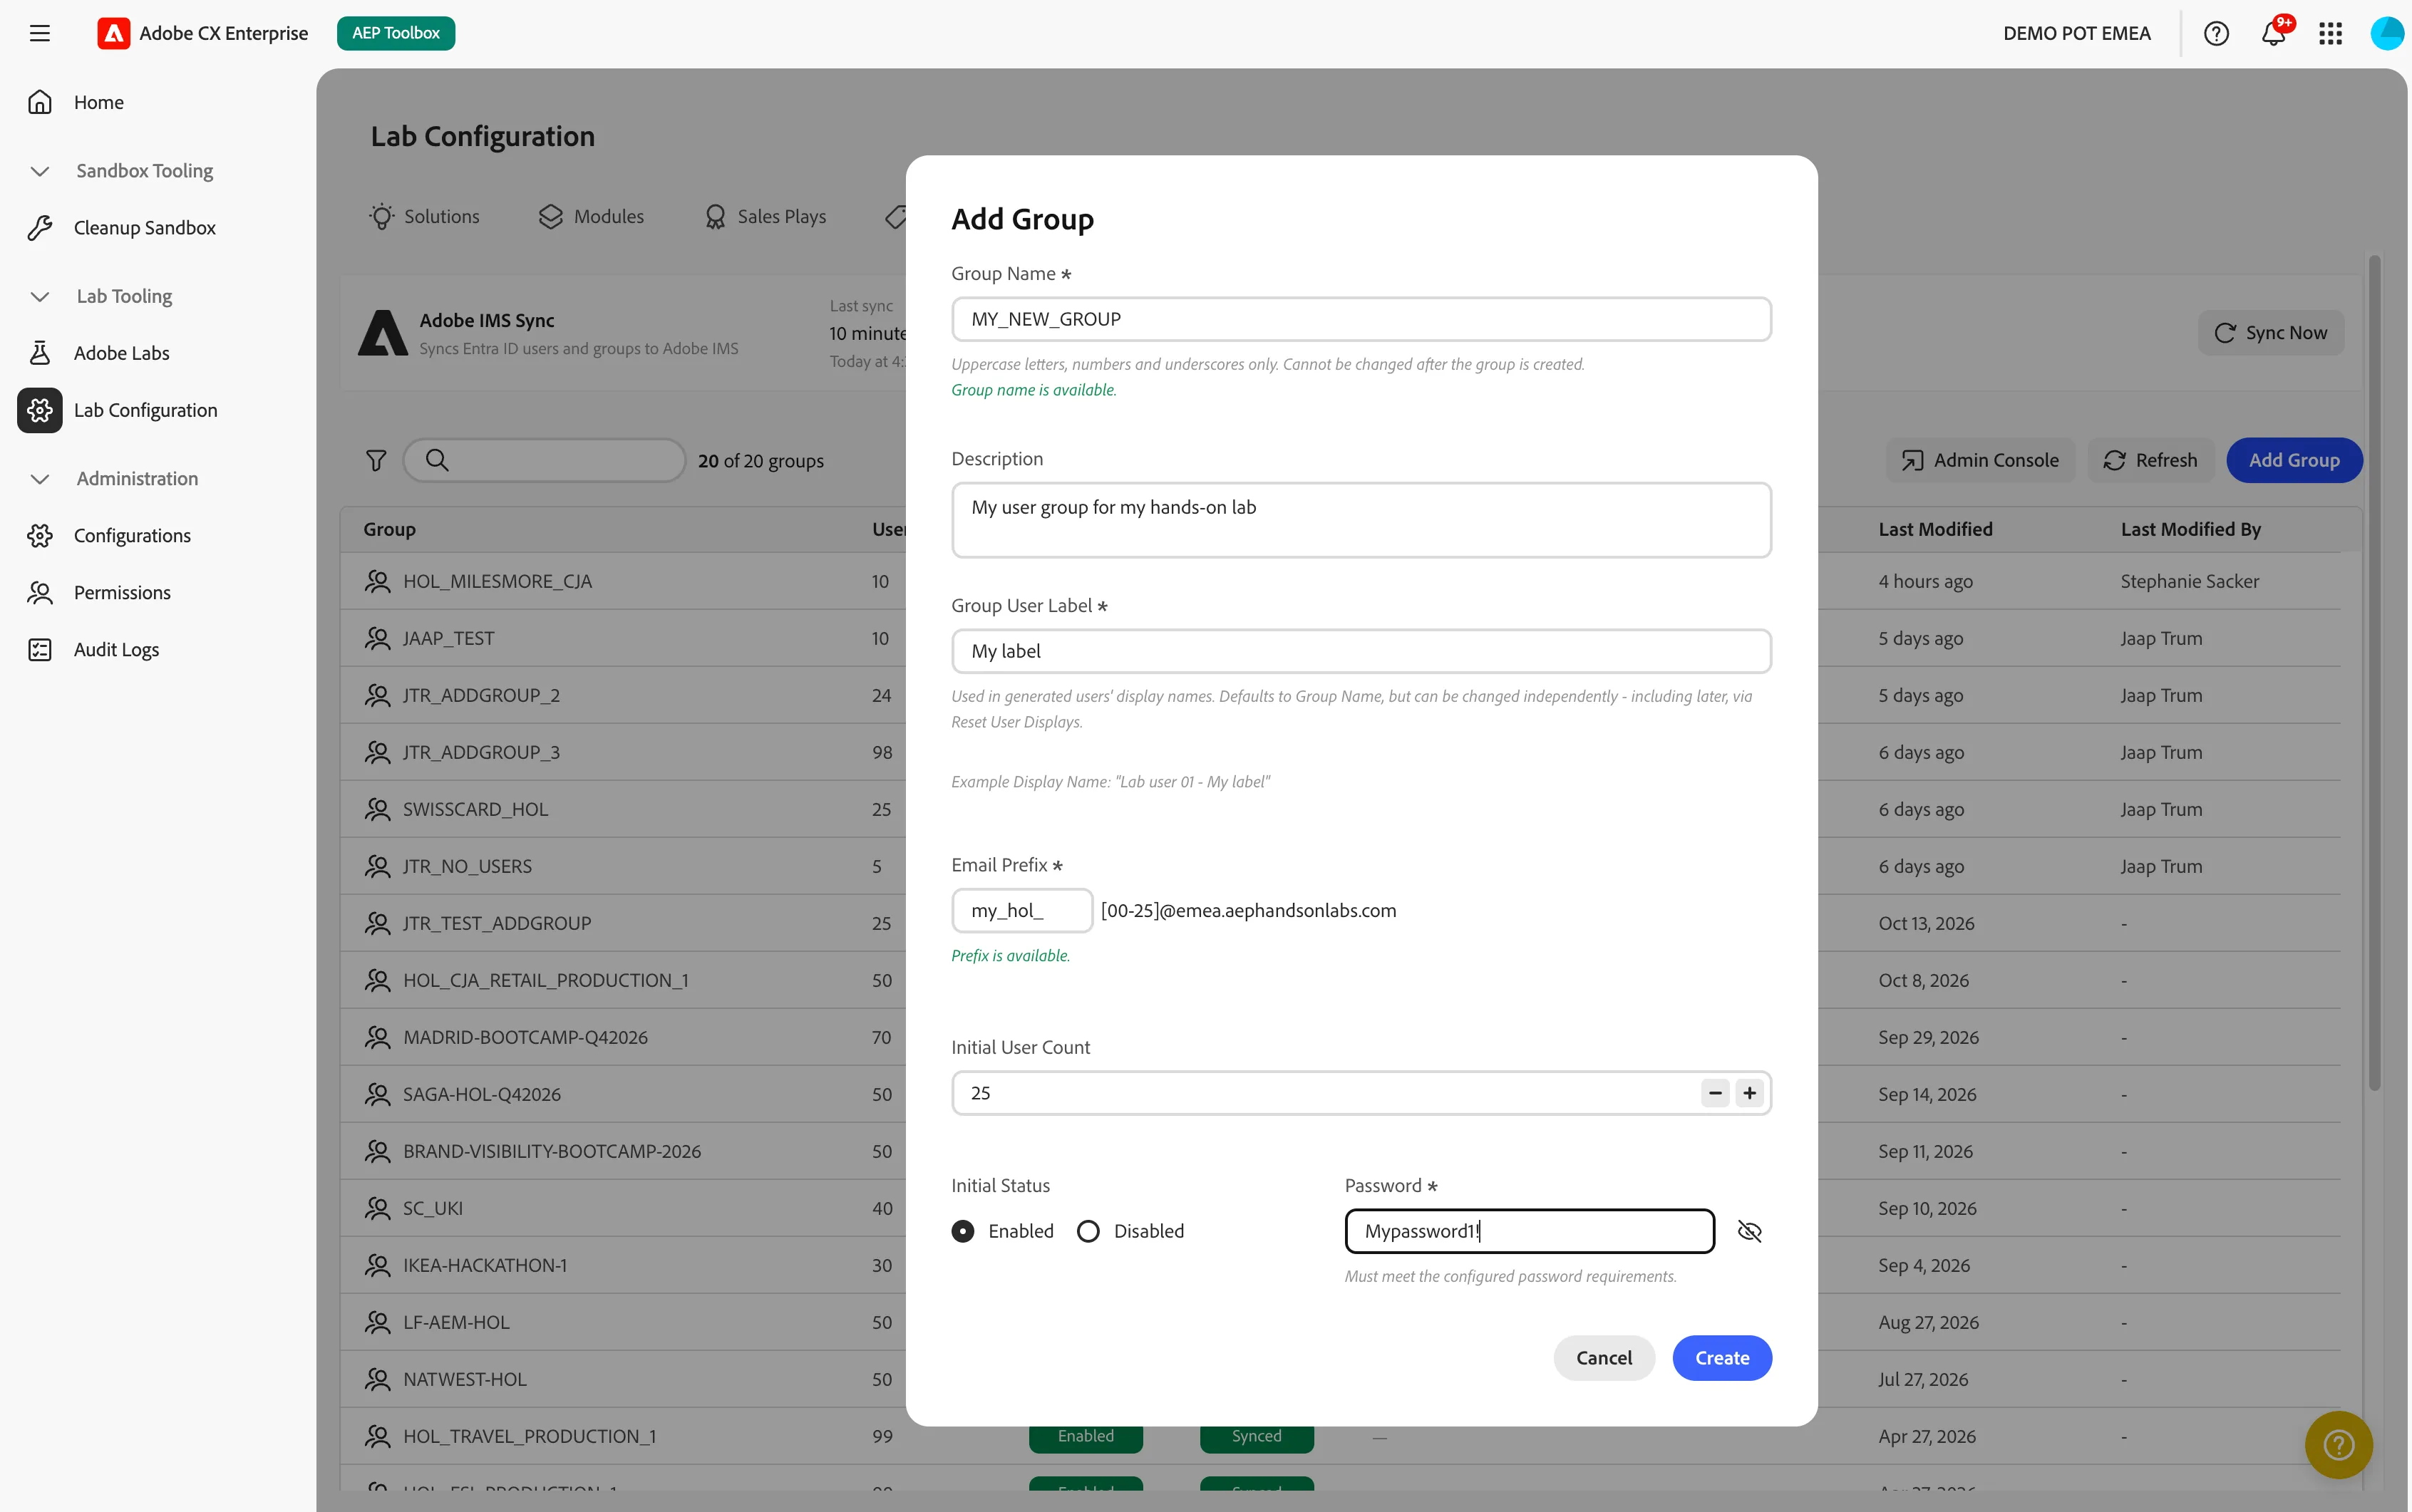
- On the Lab Users tab, click the Add Group button.
- Enter a group name. Use only uppercase letters, numbers, and underscores. The name cannot be changed later.
- Optionally enter a Description to describe what the group is going to be used for.
- Enter a Group User Label. This is the text that follows the user number in every display name.
- Enter an email prefix. It must be unique, because it creates the email addresses (for example travel-hol-01@...).
- Enter the number of users you need in this group, between 0 and 99.
- Enter a Group User Label. This is the text that follows the user number in every display name.
- Choose whether the group is created as Enabled or Disabled.
- Enter a password that meets the password policy. If the group is created as Disabled, the default disabled password is used.
- Click Create to start the creation of your new group.
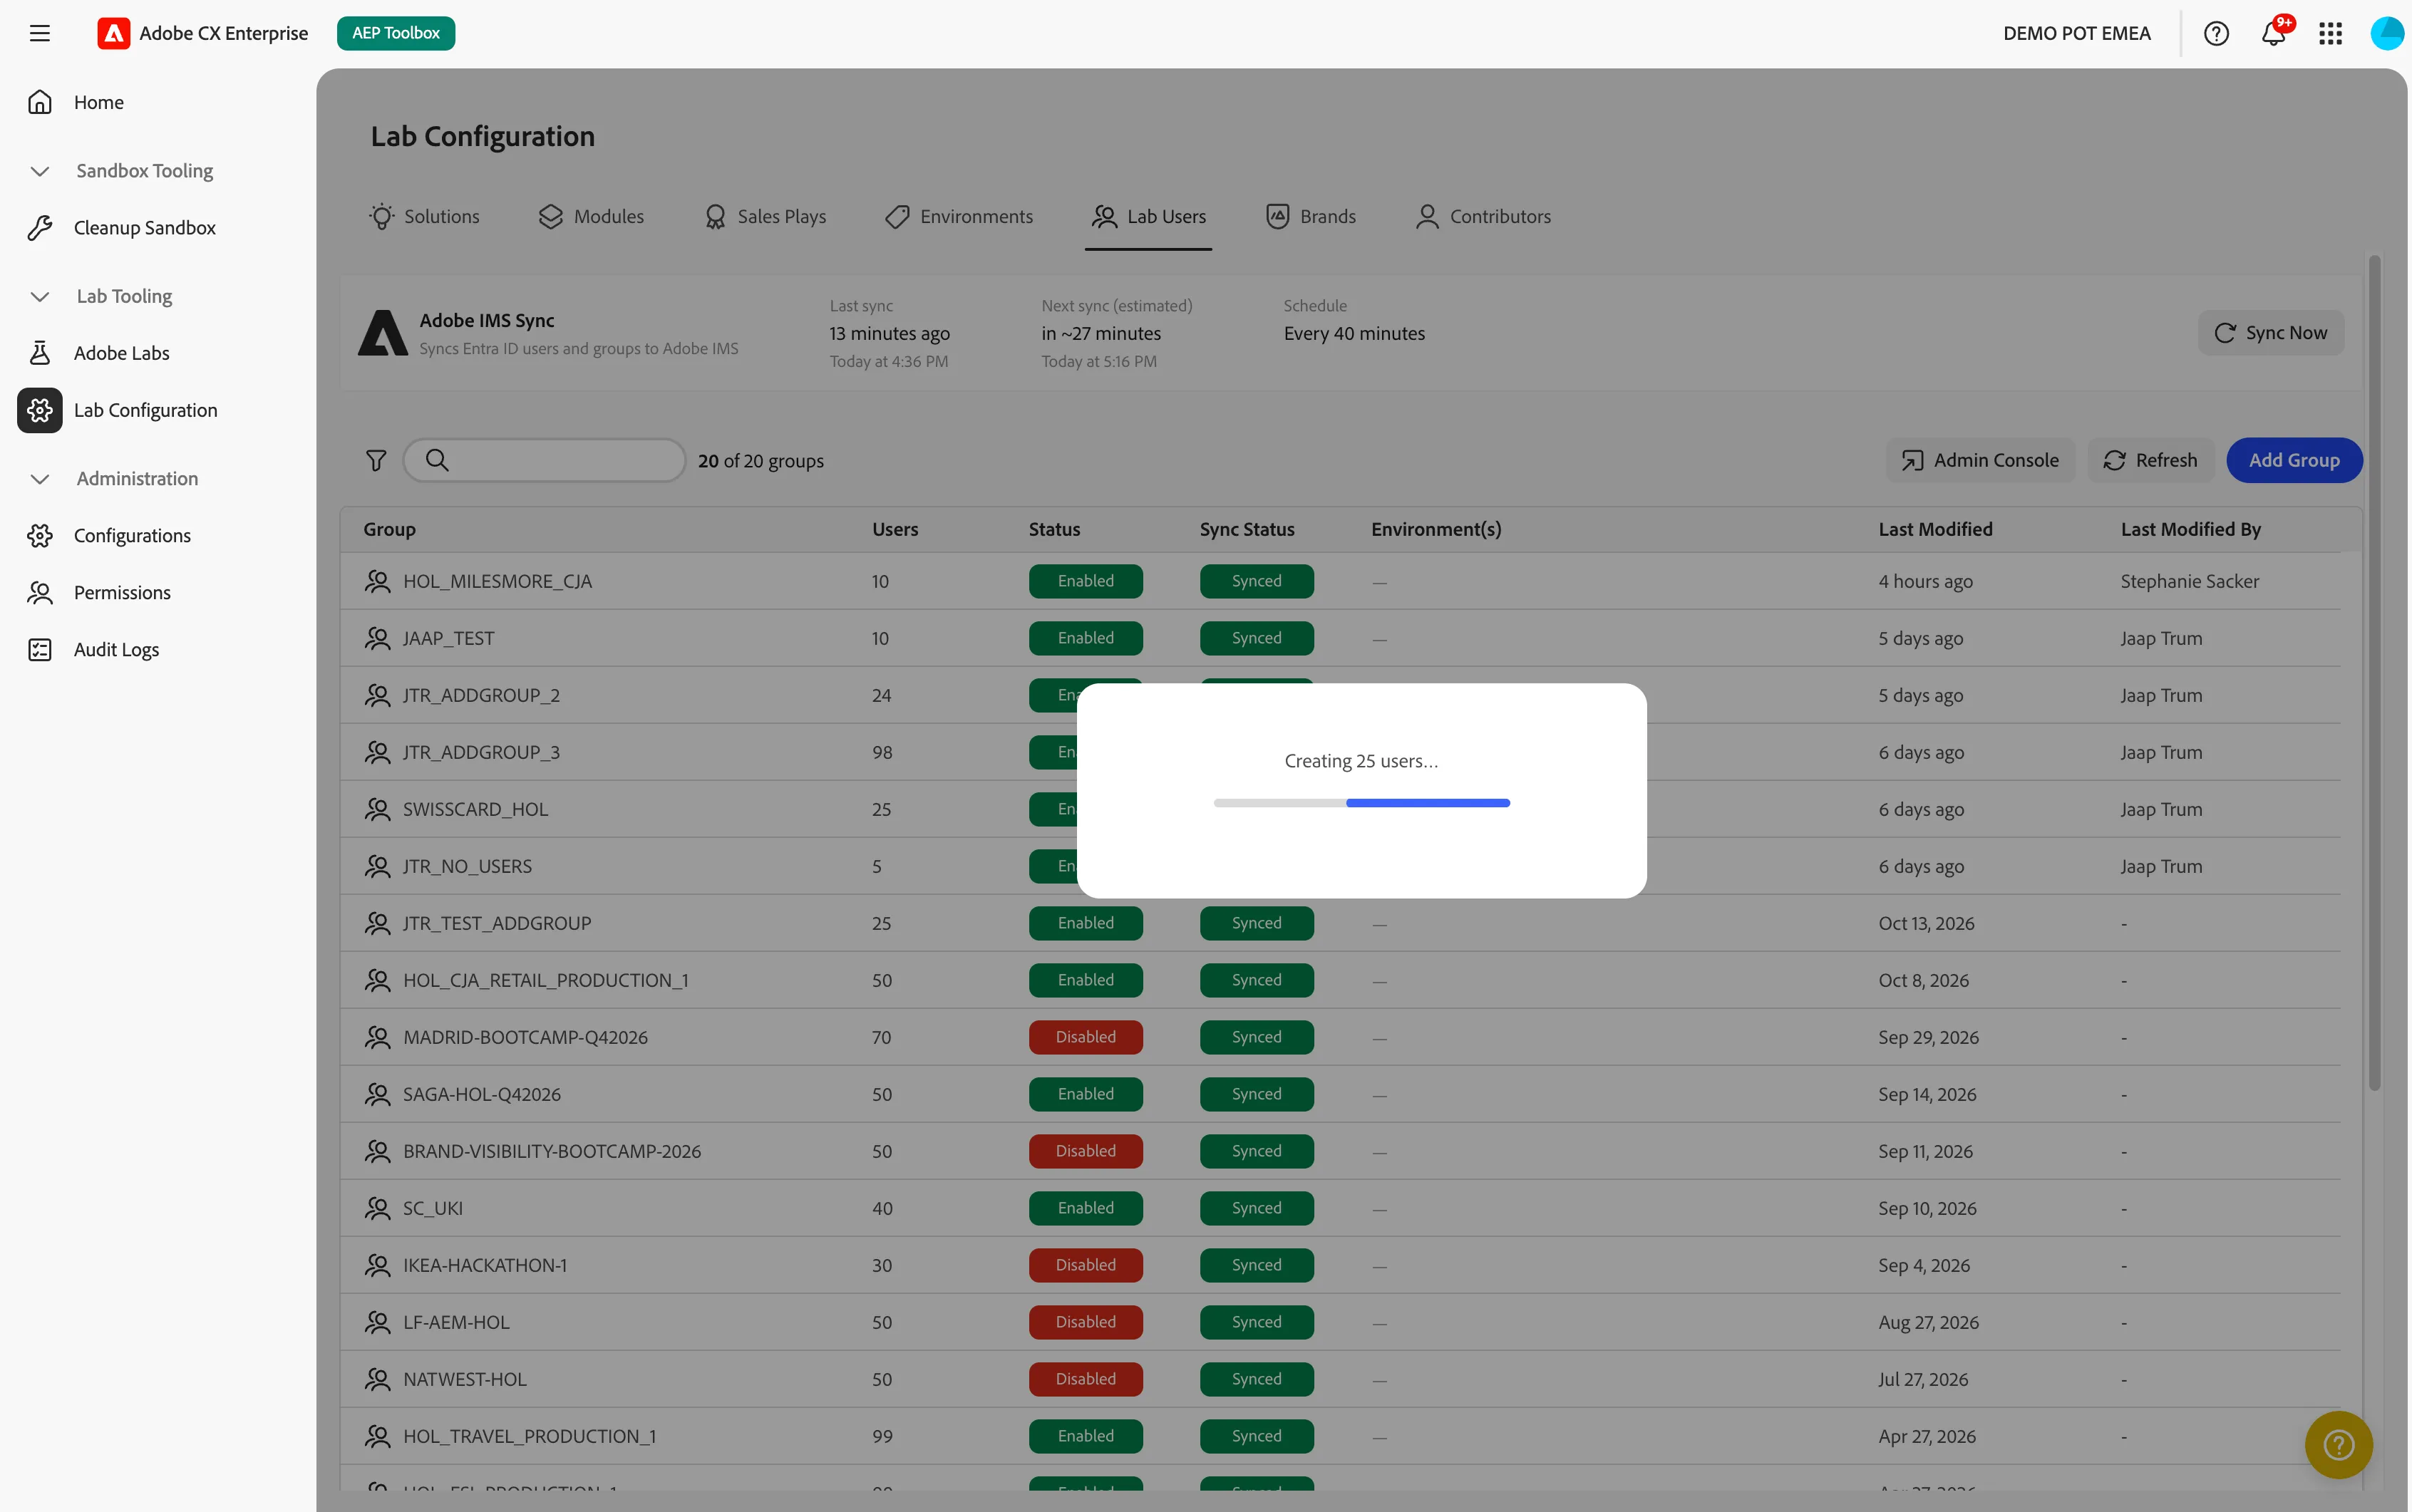
The group appears in the table. Its Sync Status will show as Pending, indicating that Adobe has not received the change yet. Participants can sign in once the status shows Synced.
If the lab is not open yet, create the group as Disabled and enable it on the day.
View group details and the lab password
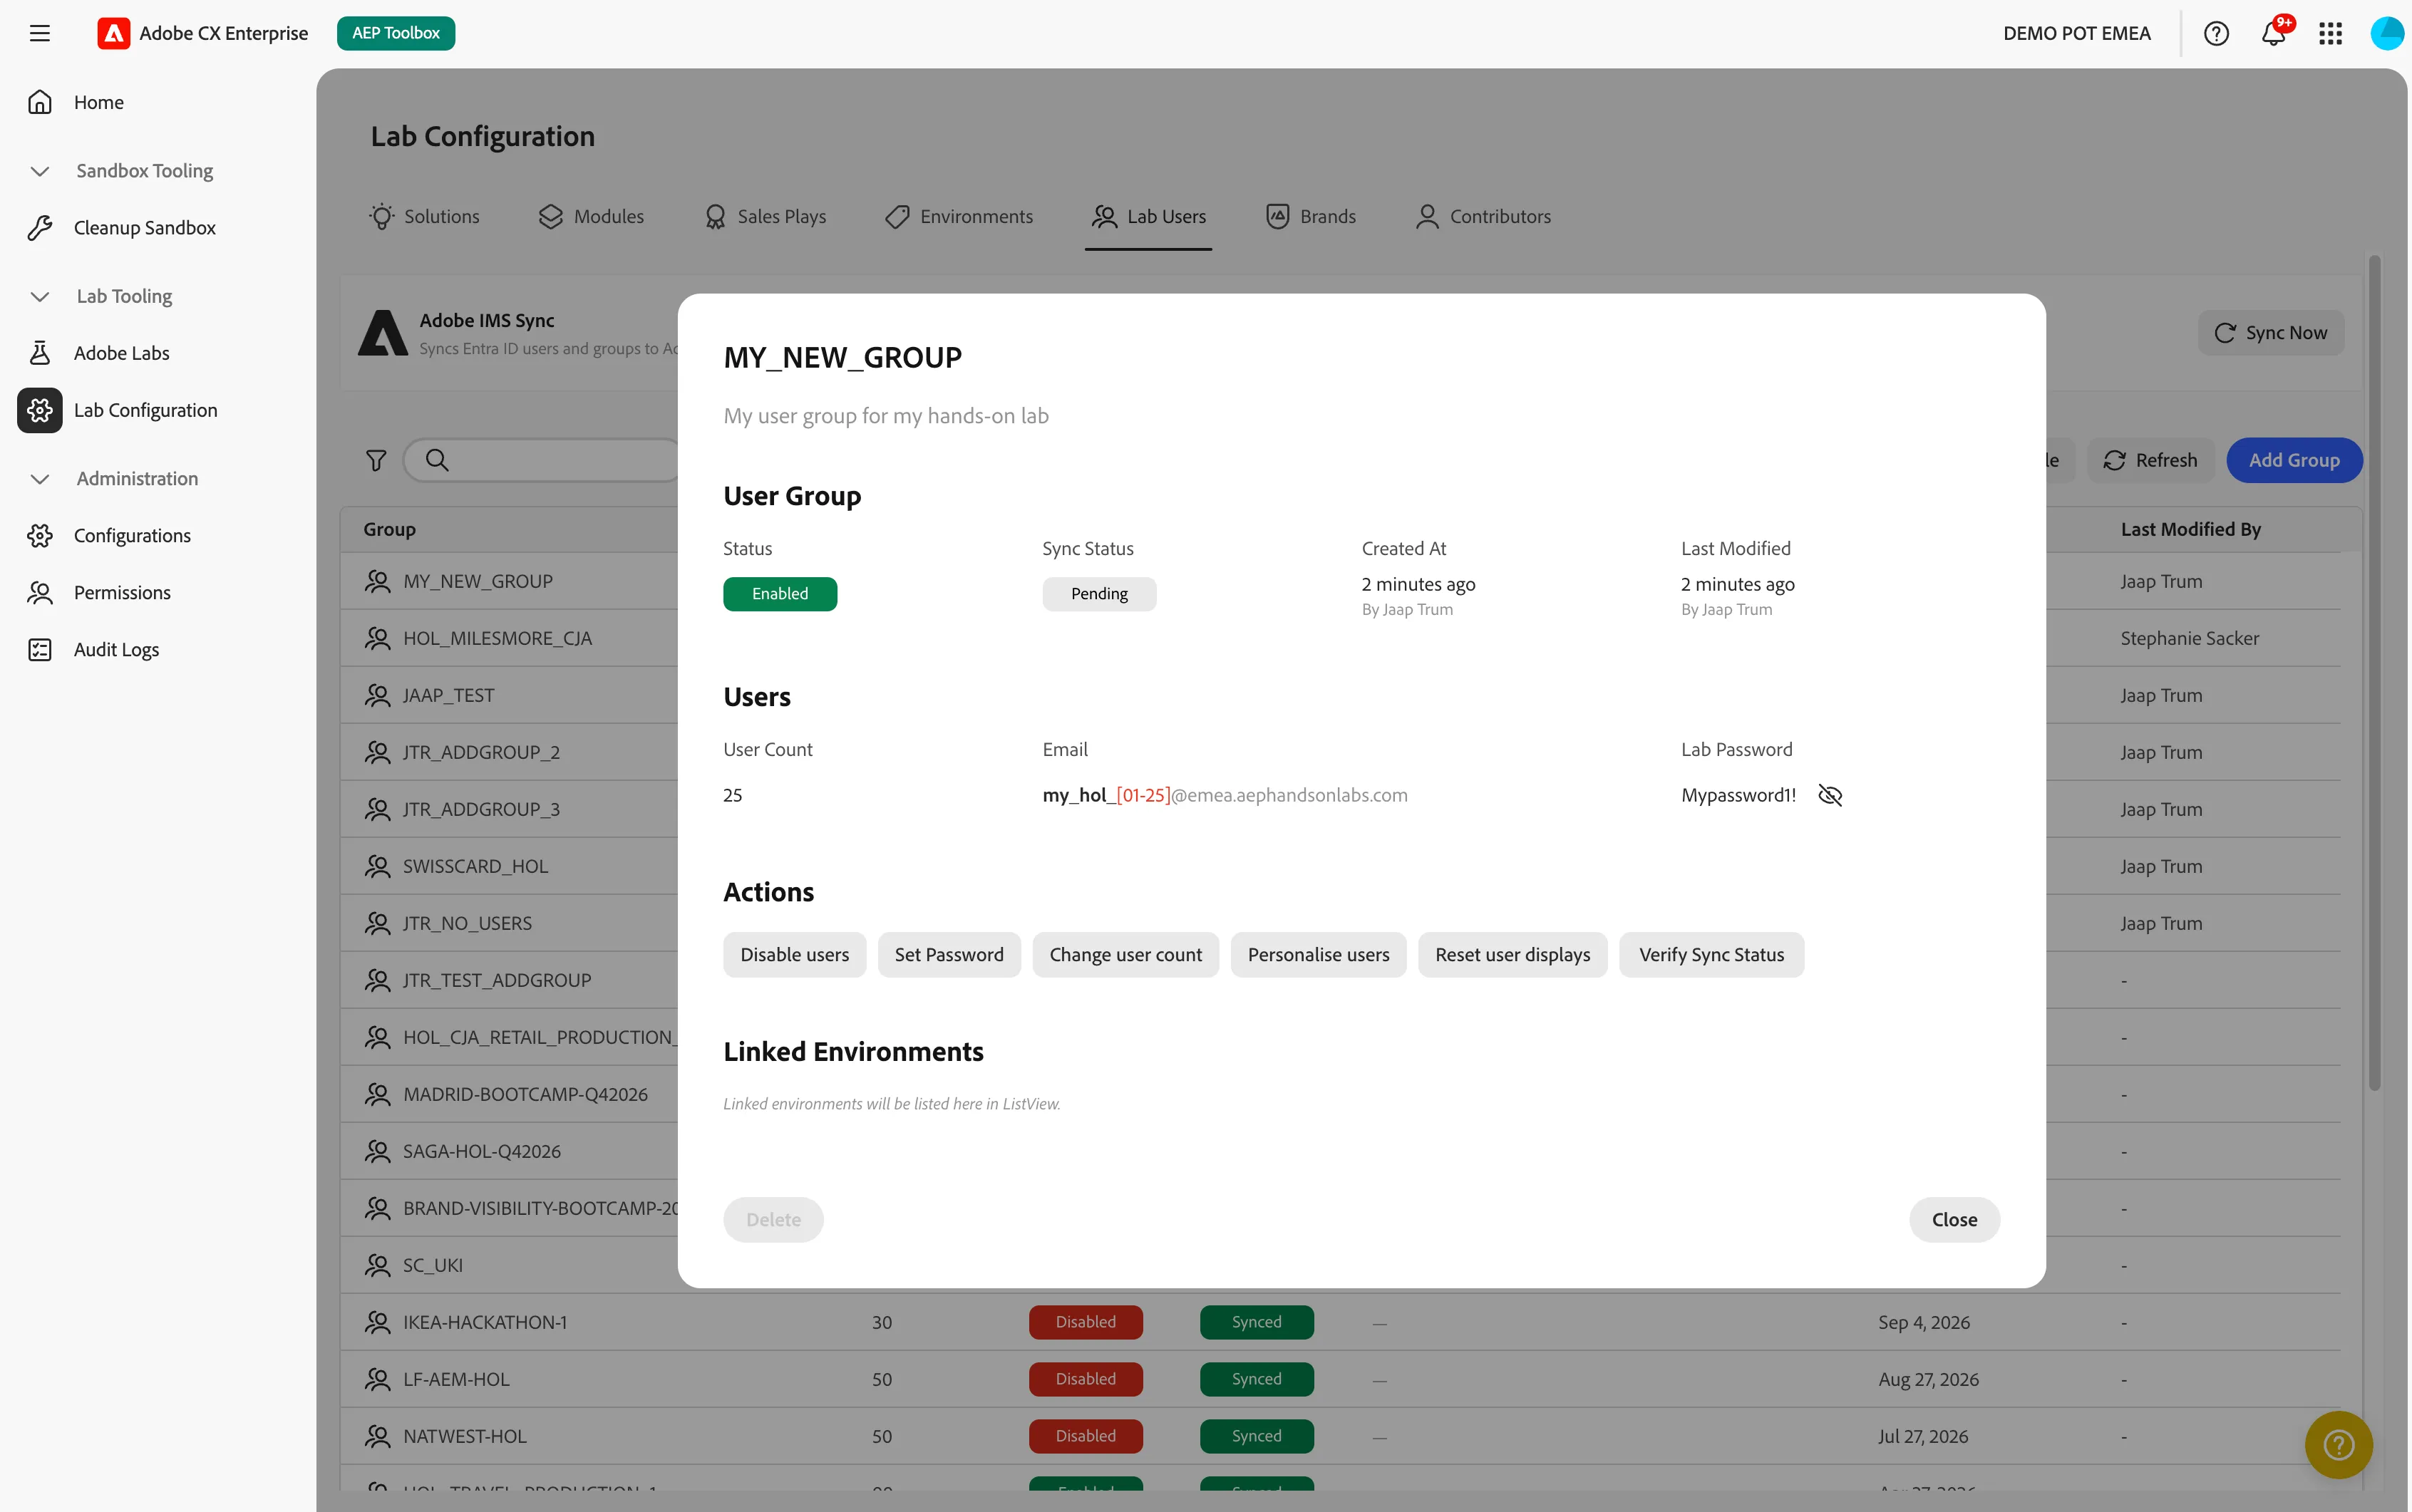
- In the table, click on the group you want to update.
- The detail dialog shows the User Group section (status, sync status, created at, last modified) and the Users section (user count, email, lab password).
- To see the password, select the option to reveal it next to Lab Password.
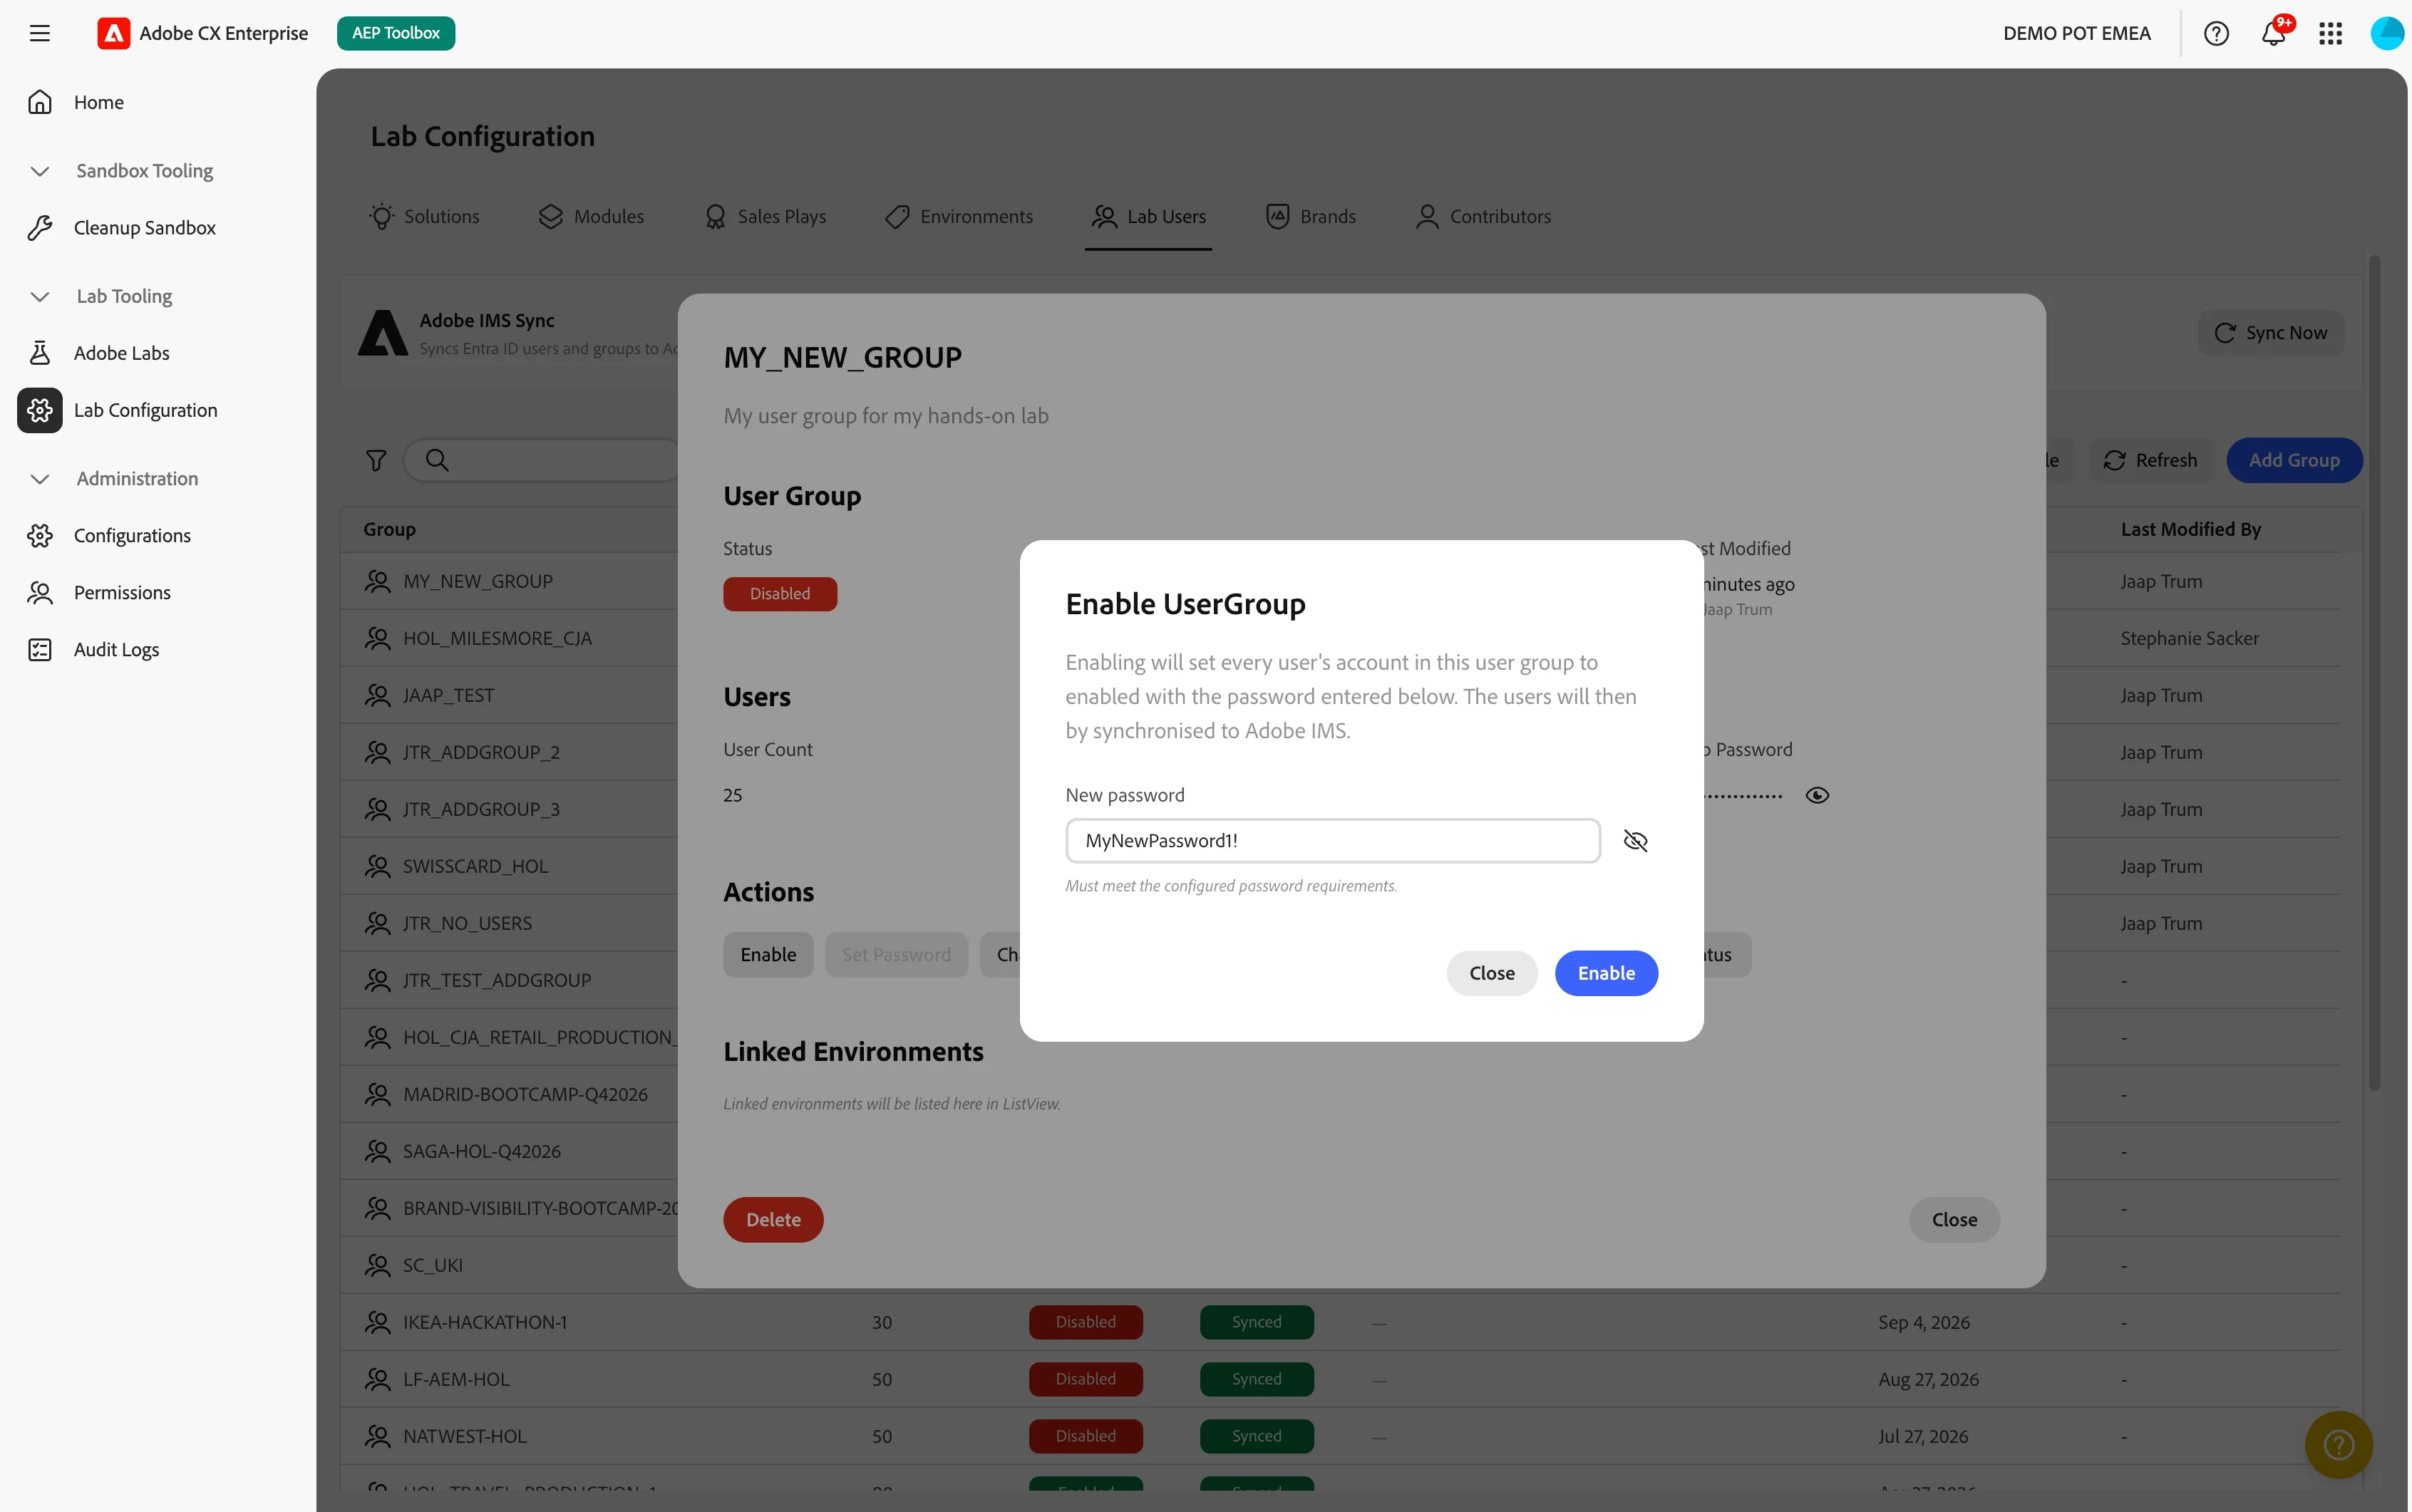
Enable a group
- Open the group.
- In the Actions row, select Enable.
- Enter the lab password and confirm.
- Check the Sync Status. Participants can sign in once it shows Synced. To speed this up, see Request a sync.
Request a sync
Changes are made in Microsoft Entra ID right away and reach Adobe on a schedule. If you cannot wait, request a sync.
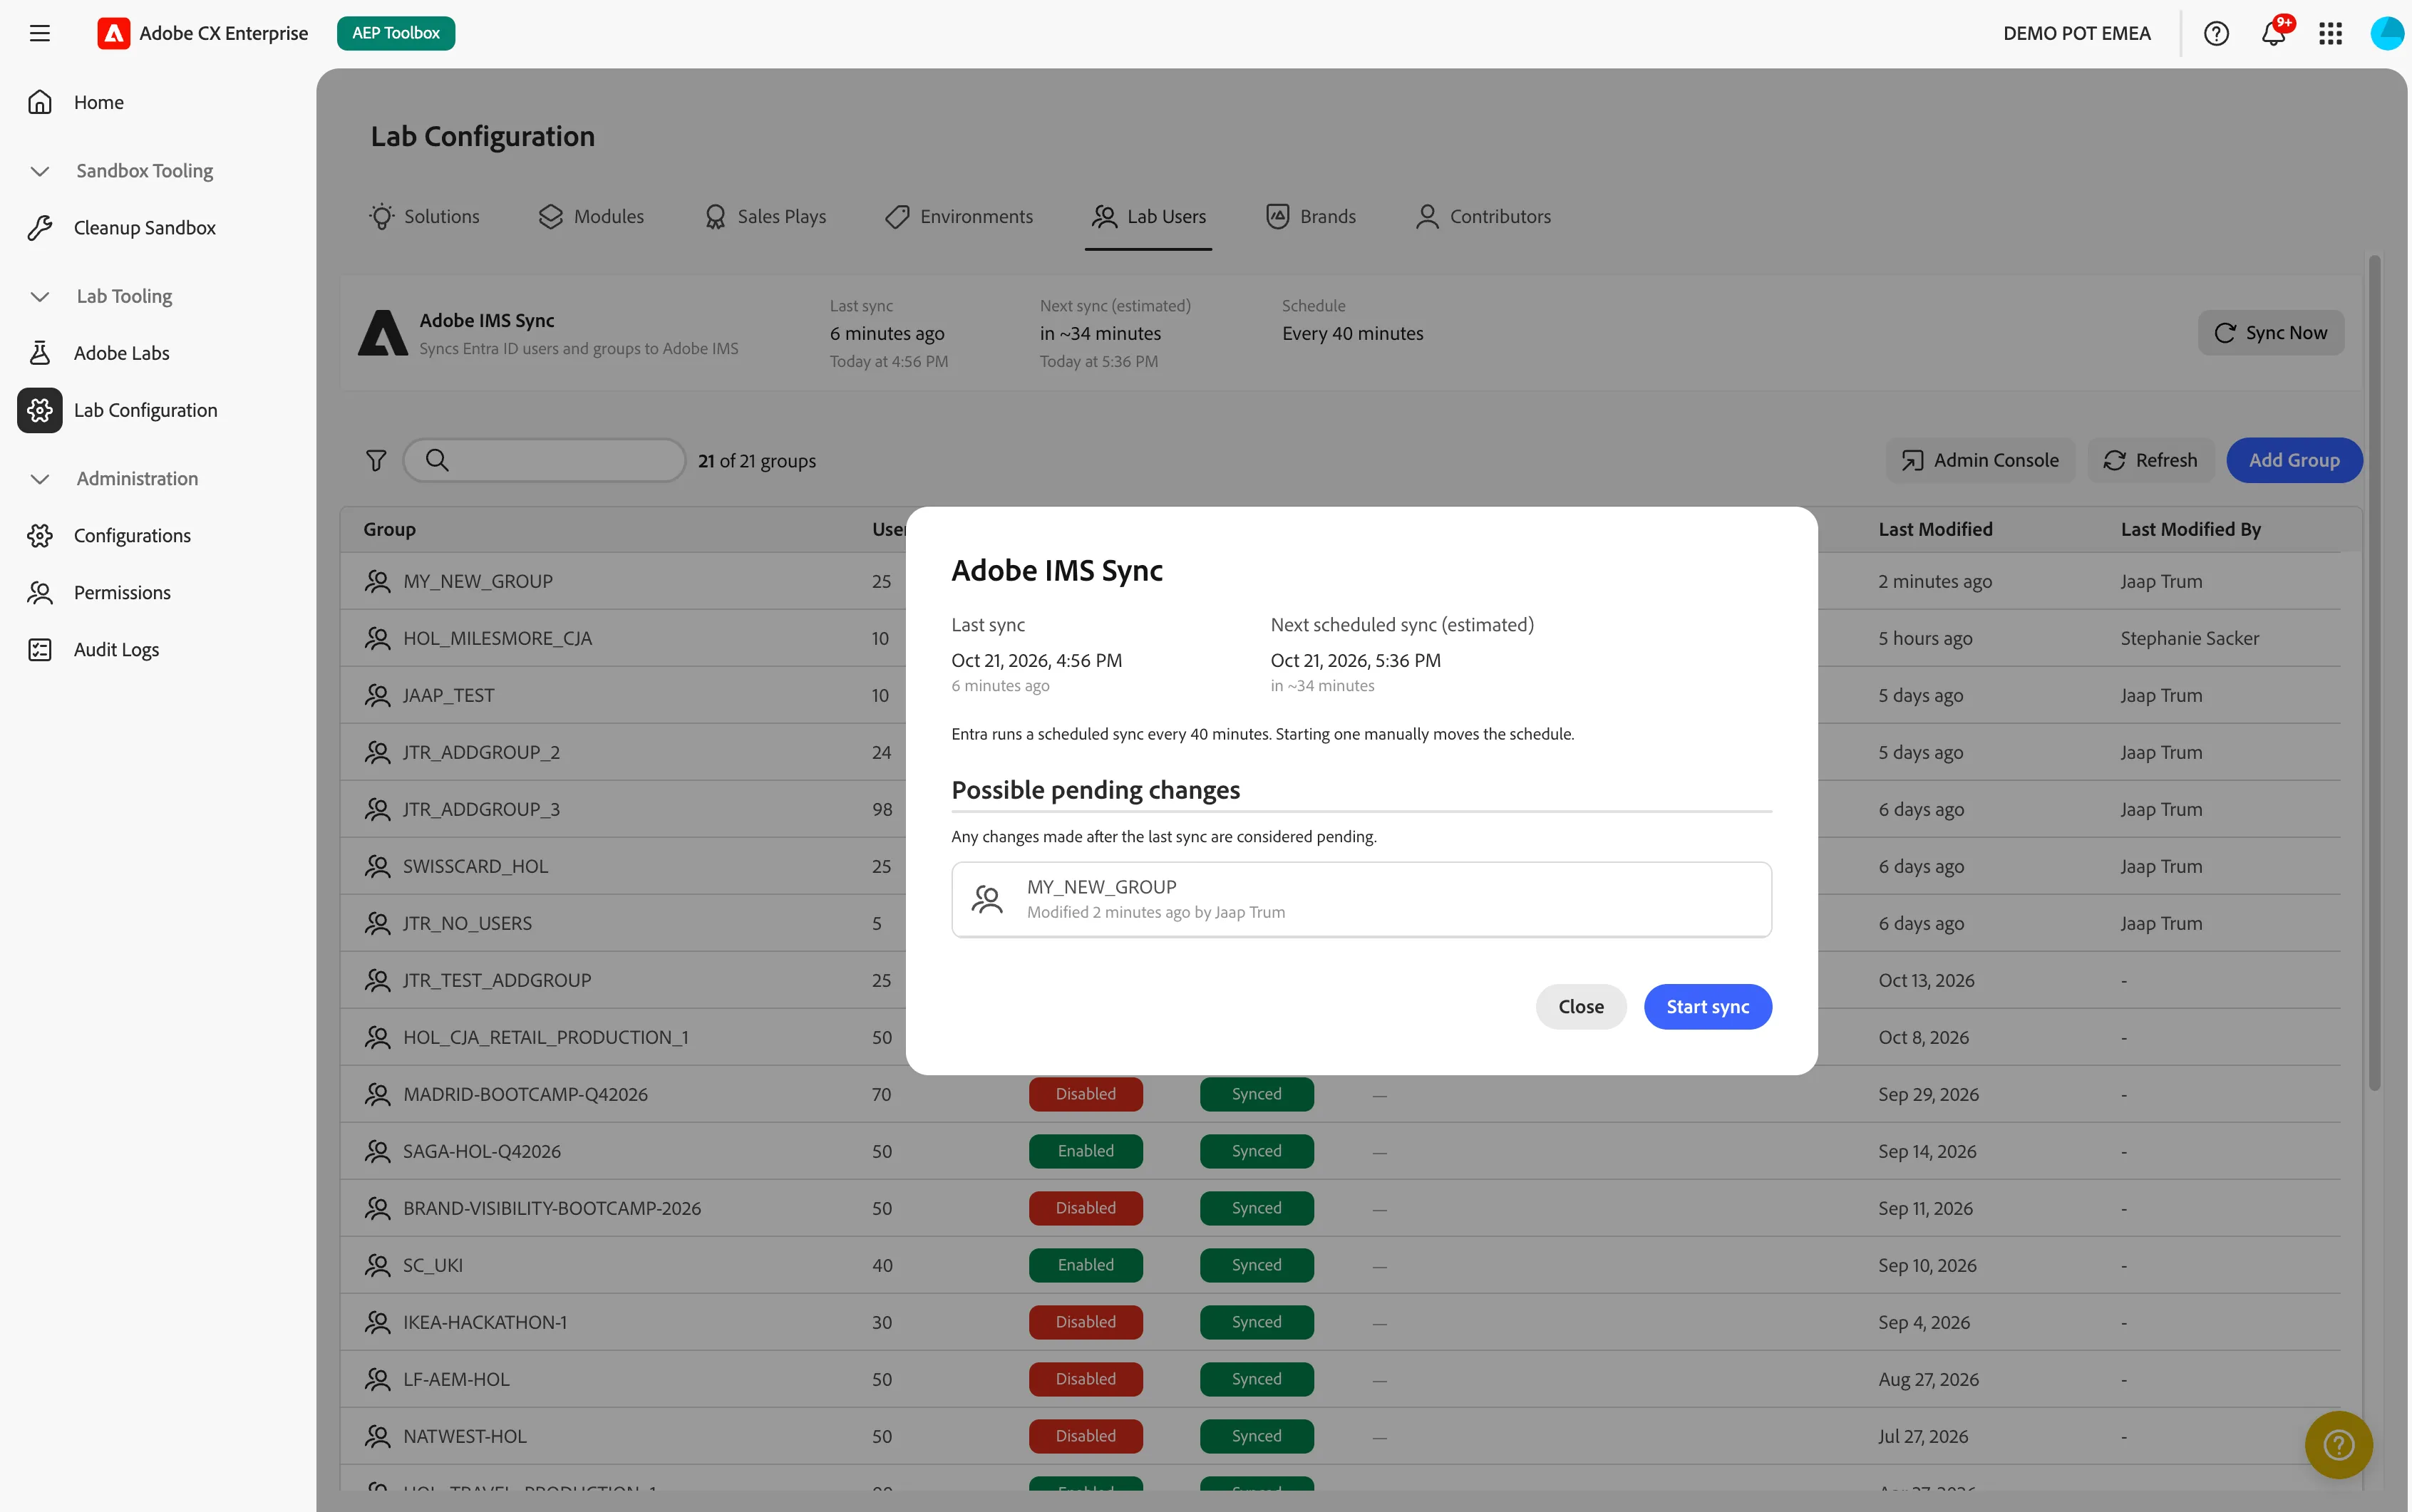
- At the top of the Lab Users tab, check the sync bar. It shows the last sync, the estimated next sync, and the schedule.
- Select Sync Now.
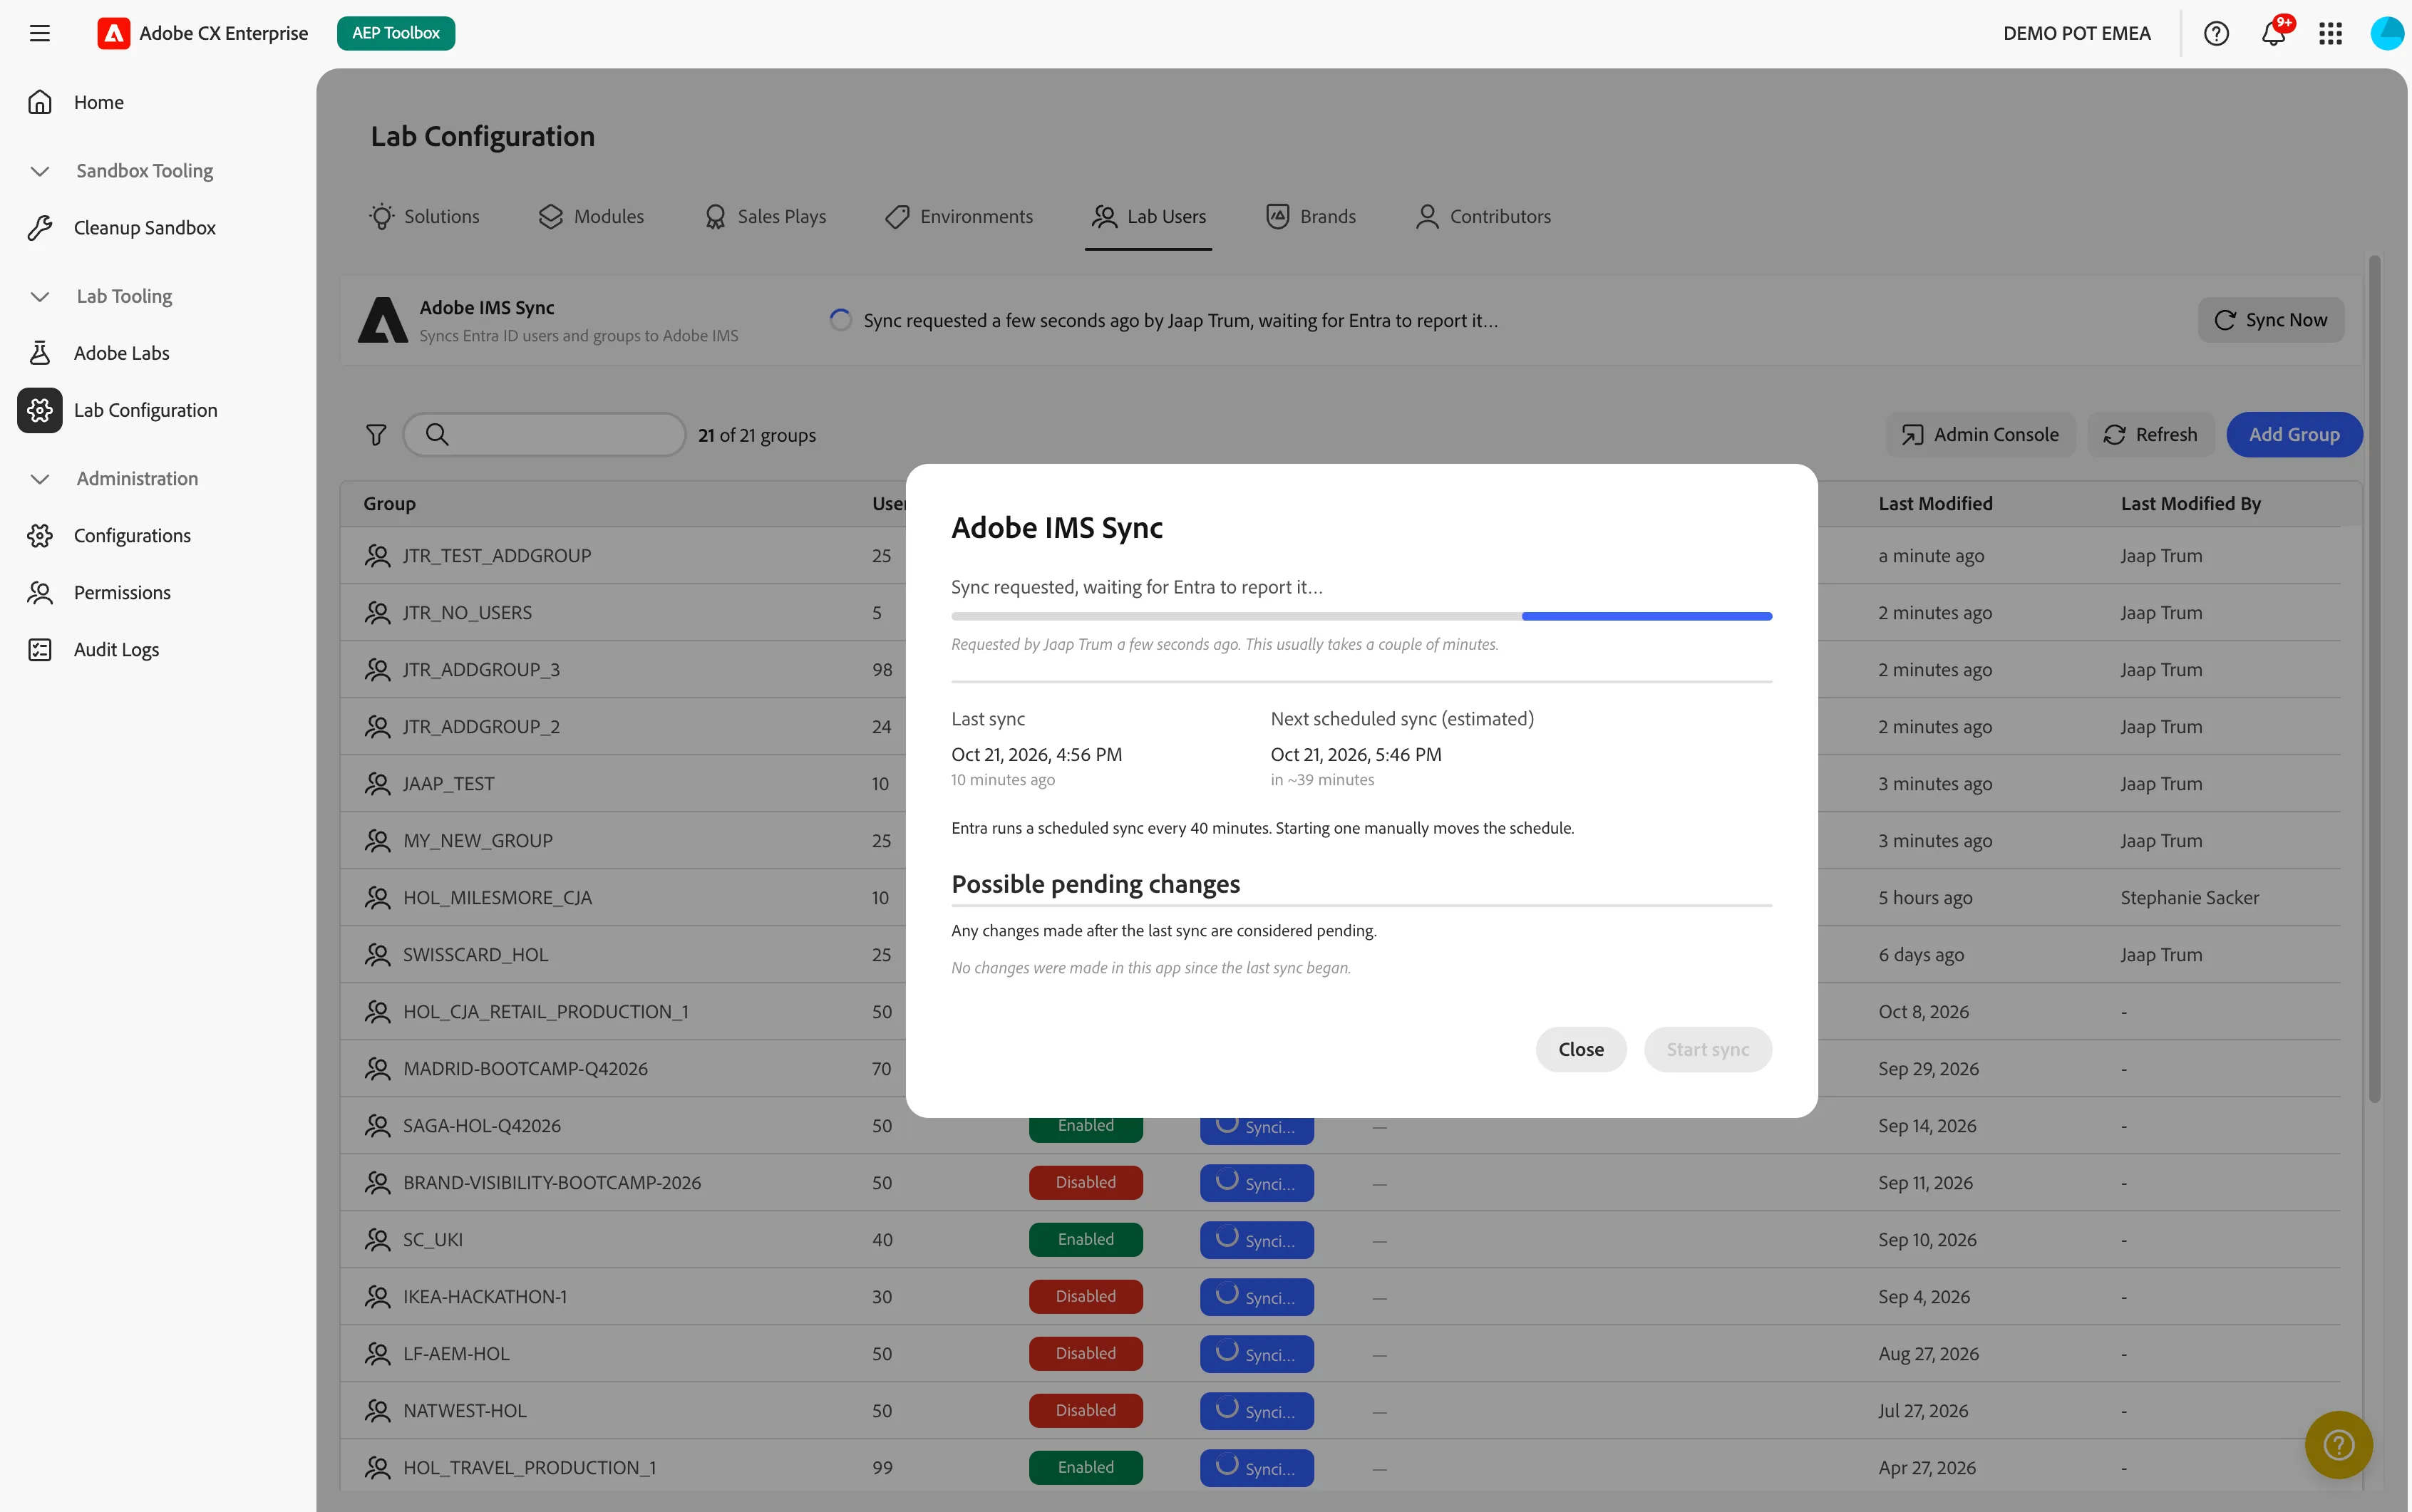
- A dialog will open to allow you to start a sync directly.
- Wait a couple of minutes, then check the sync status of your group again.

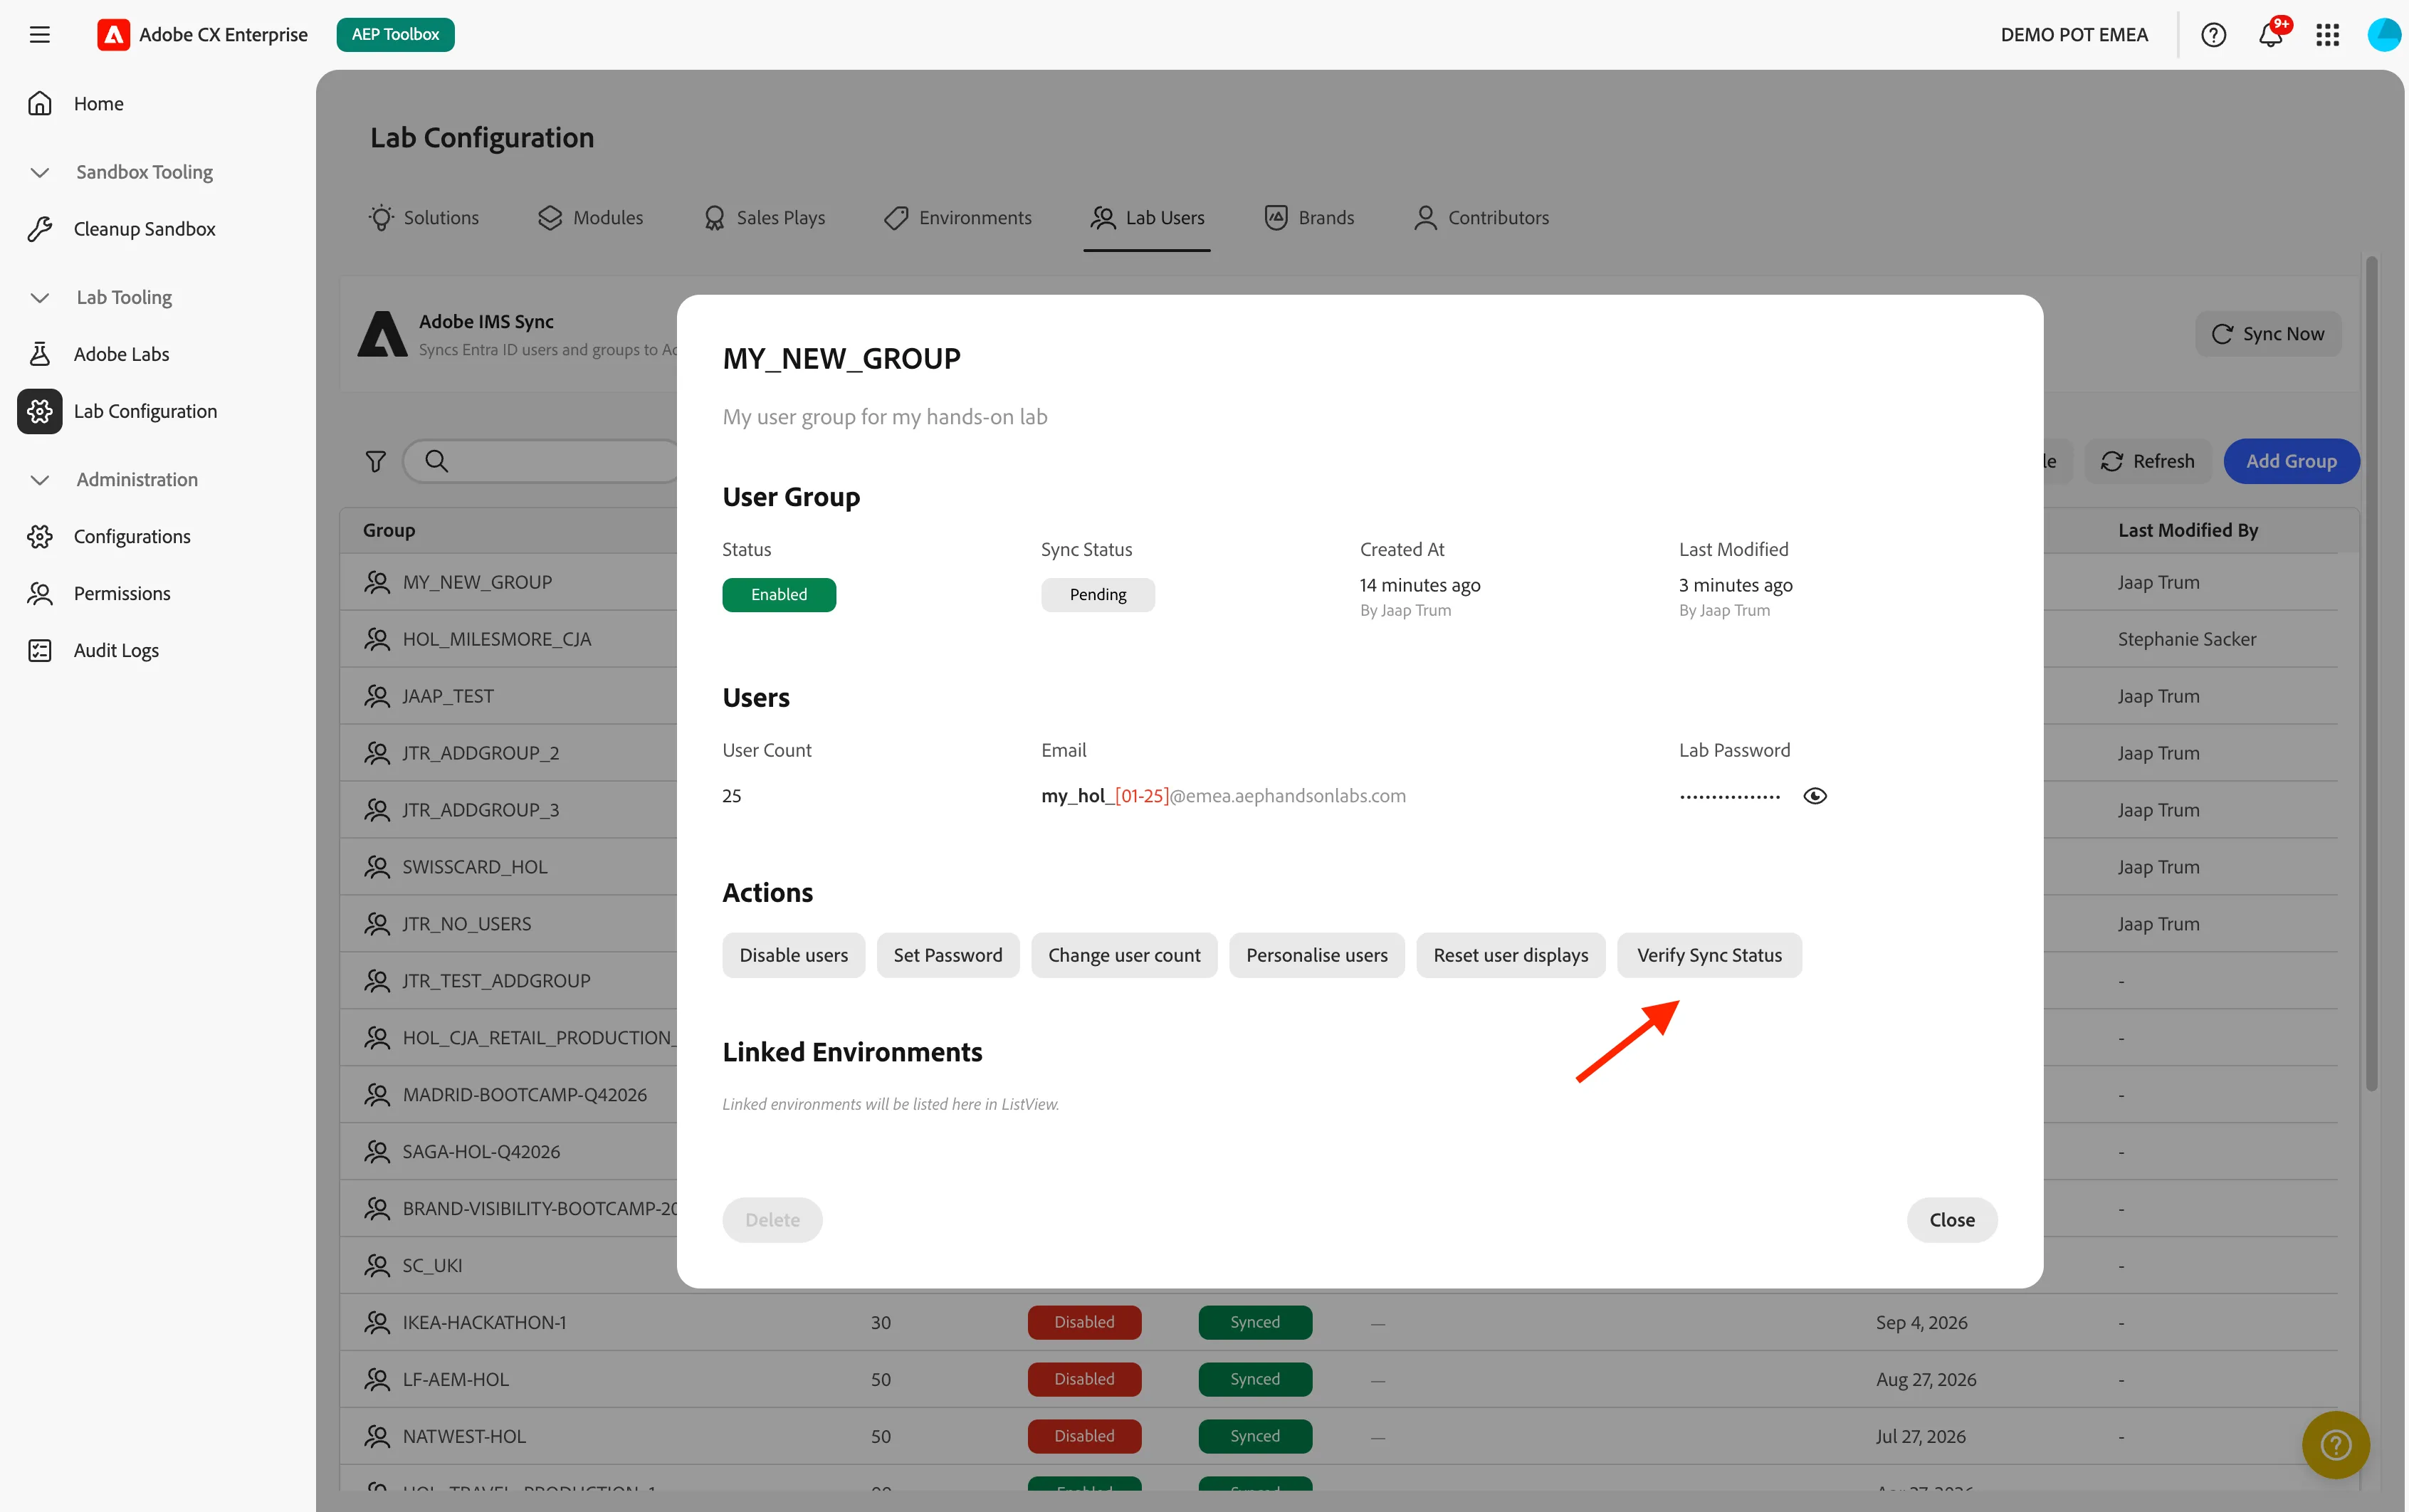
To check whether a specific group has reached Adobe, open the group and select Verify Sync Status.
Add or remove users
- Open the group.
- Select the option to change the number of users.
- Enter the new total (between 0 and 99) and confirm.
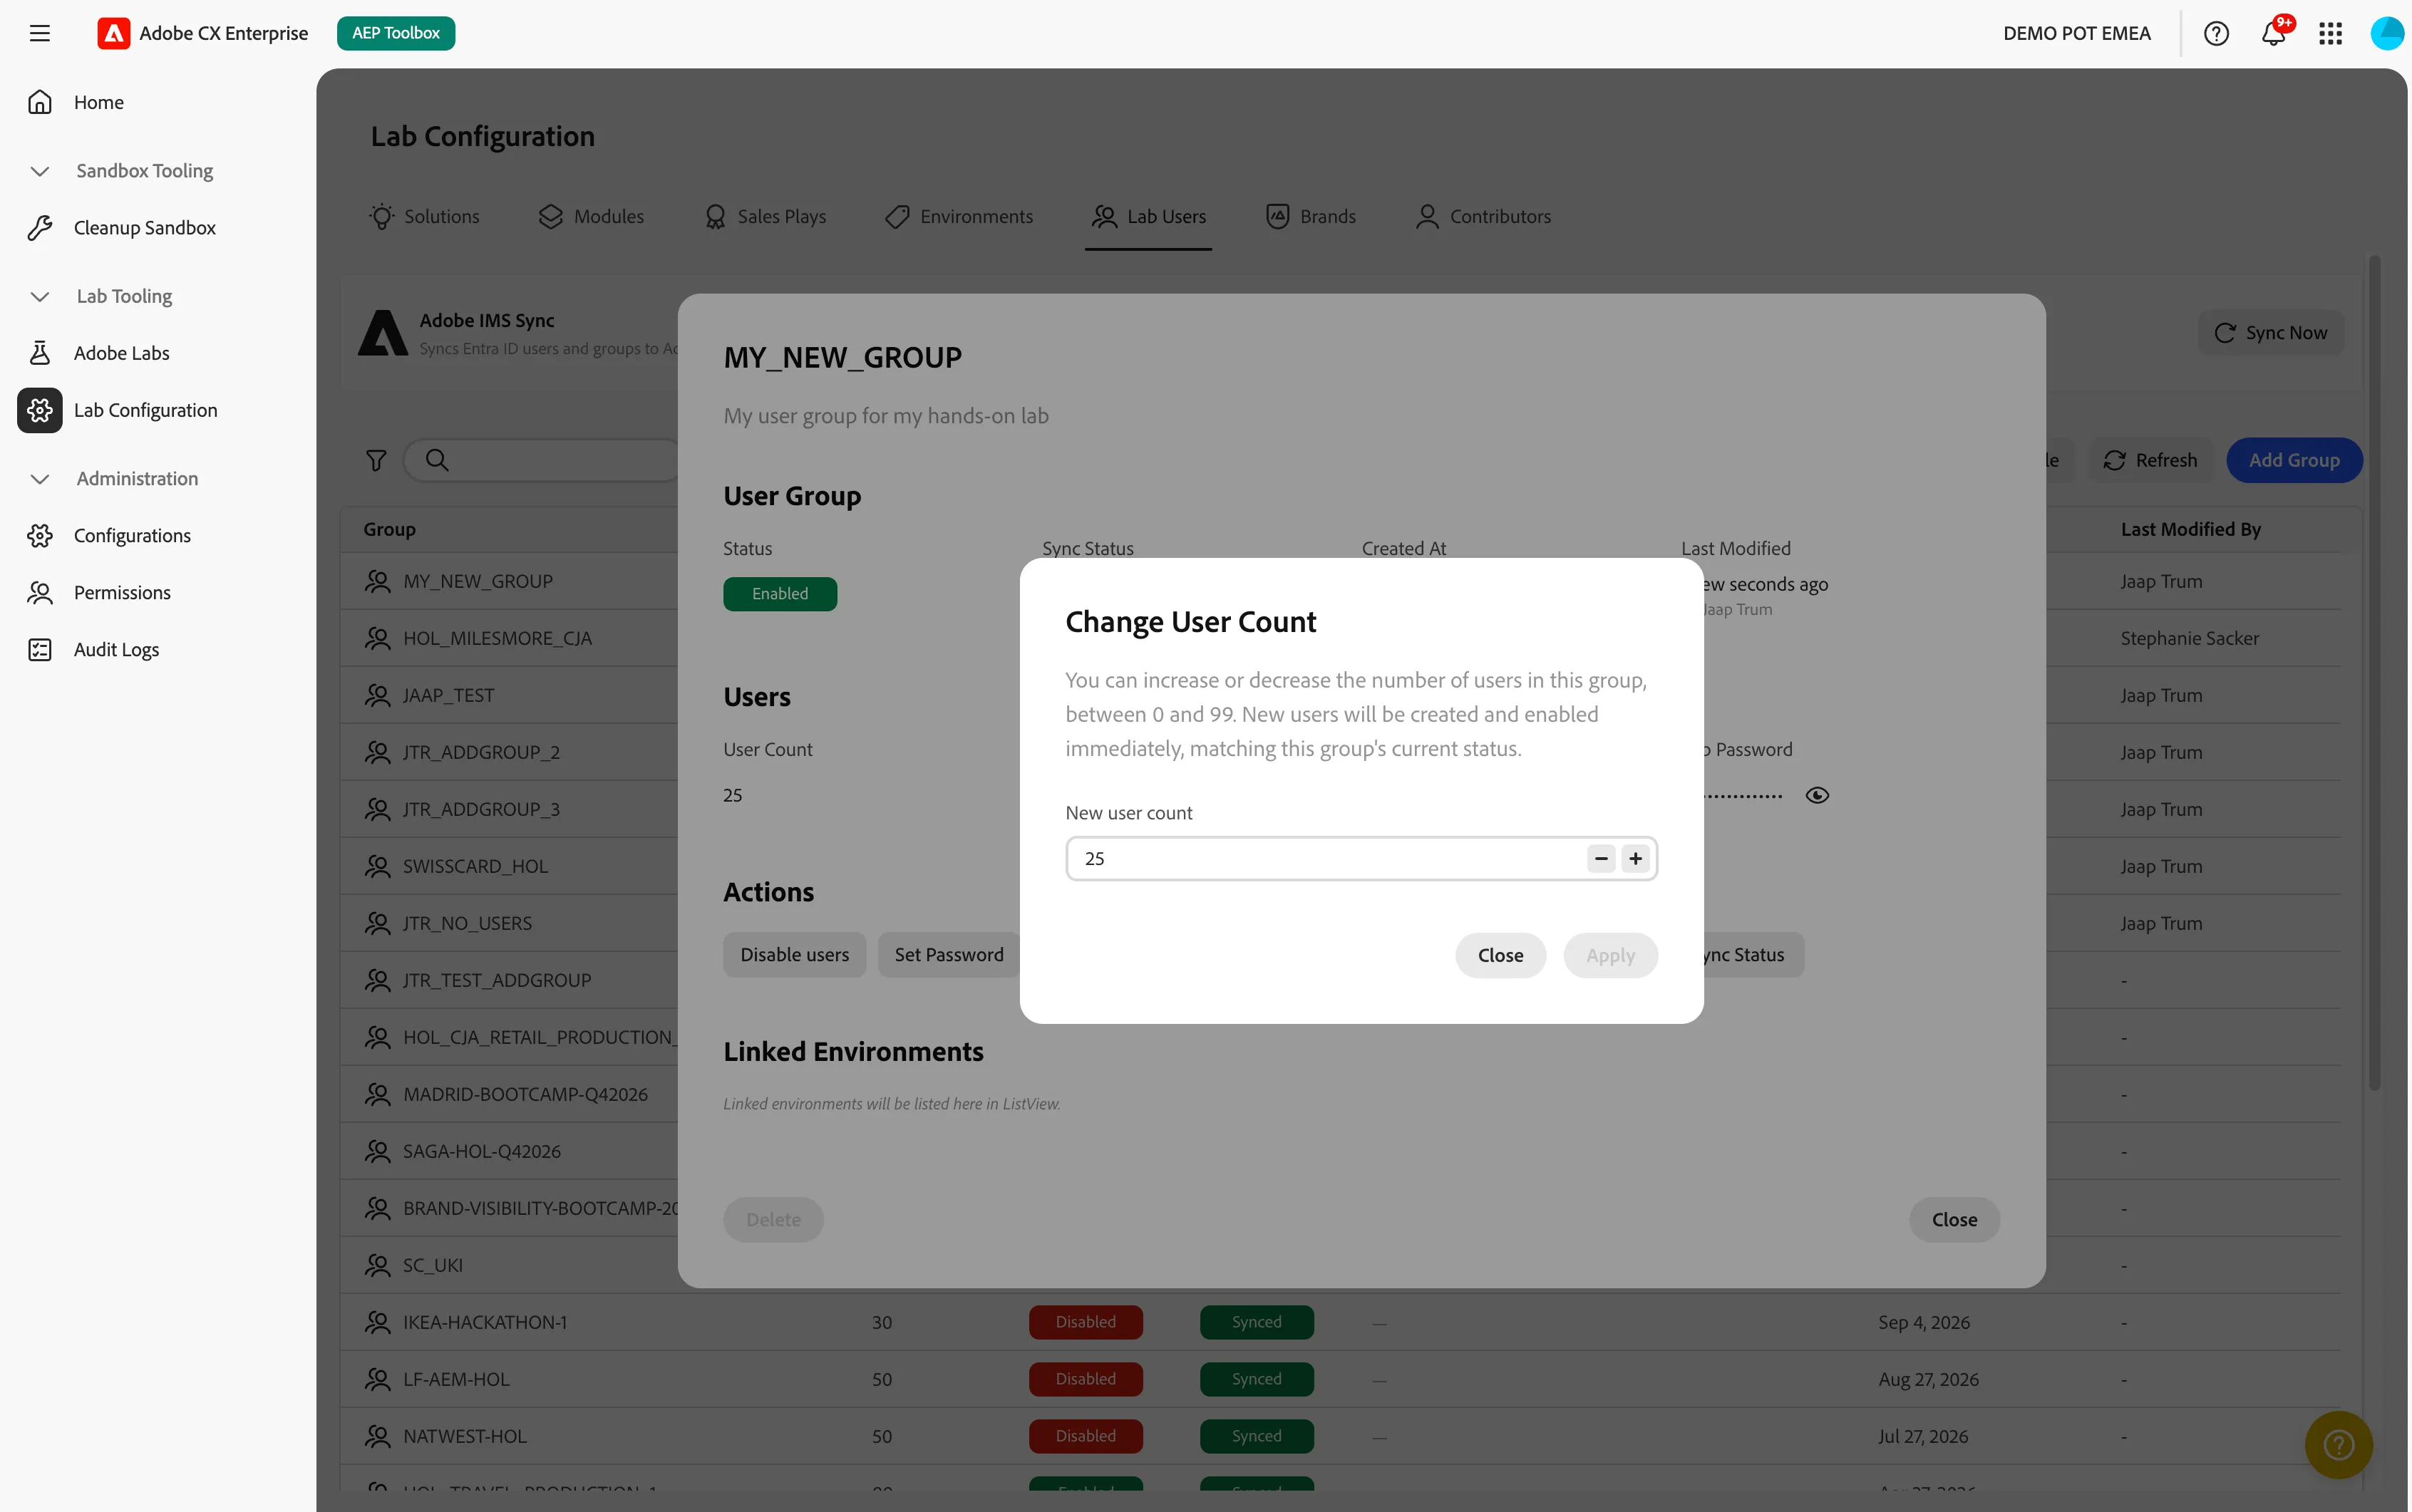
When you lower the user count, the highest-numbered users are removed first. This cannot be undone.
New users get the group's current password and the next available numbers.
Change the lab password
- Open the group.
- Select the option to set a new password.
- Enter a password that meets the password policy and confirm.
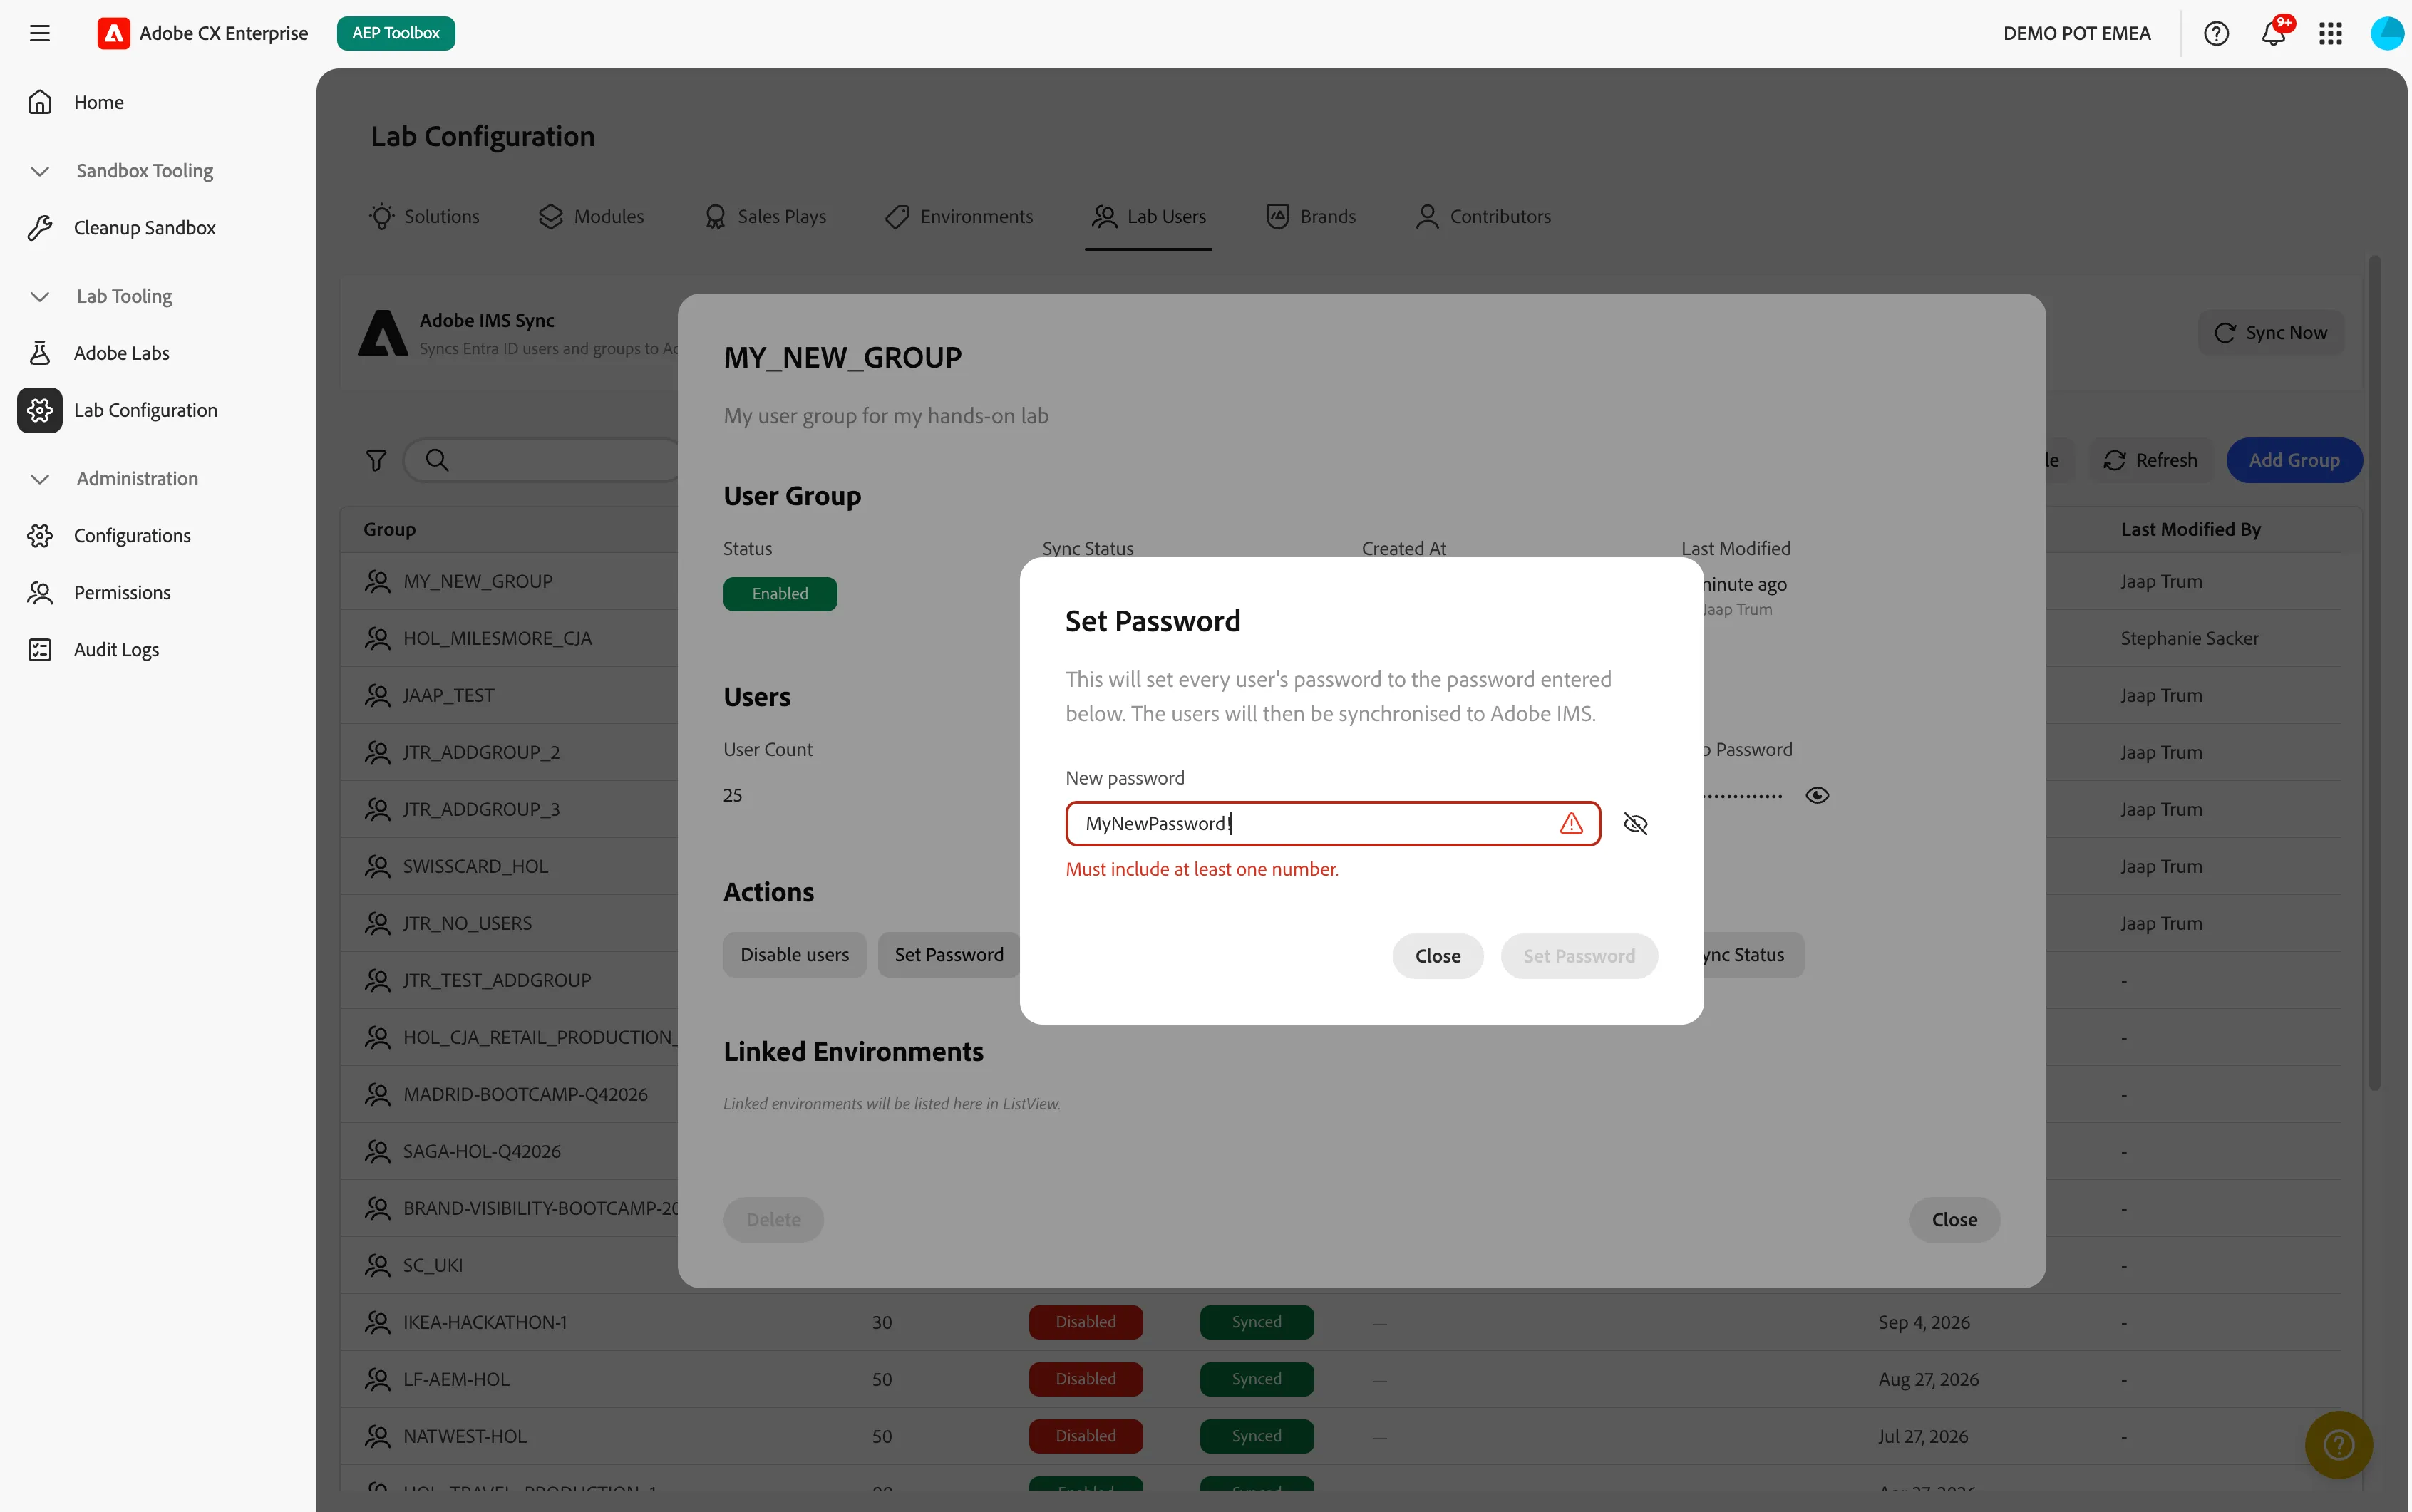
The new password applies to every user in the group.
Personalise users with real names
By default, users are named Lab user 01, Lab user 02, and so on. Use this guide to give them real names.
- Prepare a CSV file with a first name and a last name on each row.
- Open the group and select Personalise Users.
- Upload your CSV file.
- Review the preview table. Each row shows a badge:
- New: the user has no personal name yet and will get this one.
- Overwrite: the user already has a name that will be replaced.
- Existing: the user keeps the current name.
- Select Apply to confirm.
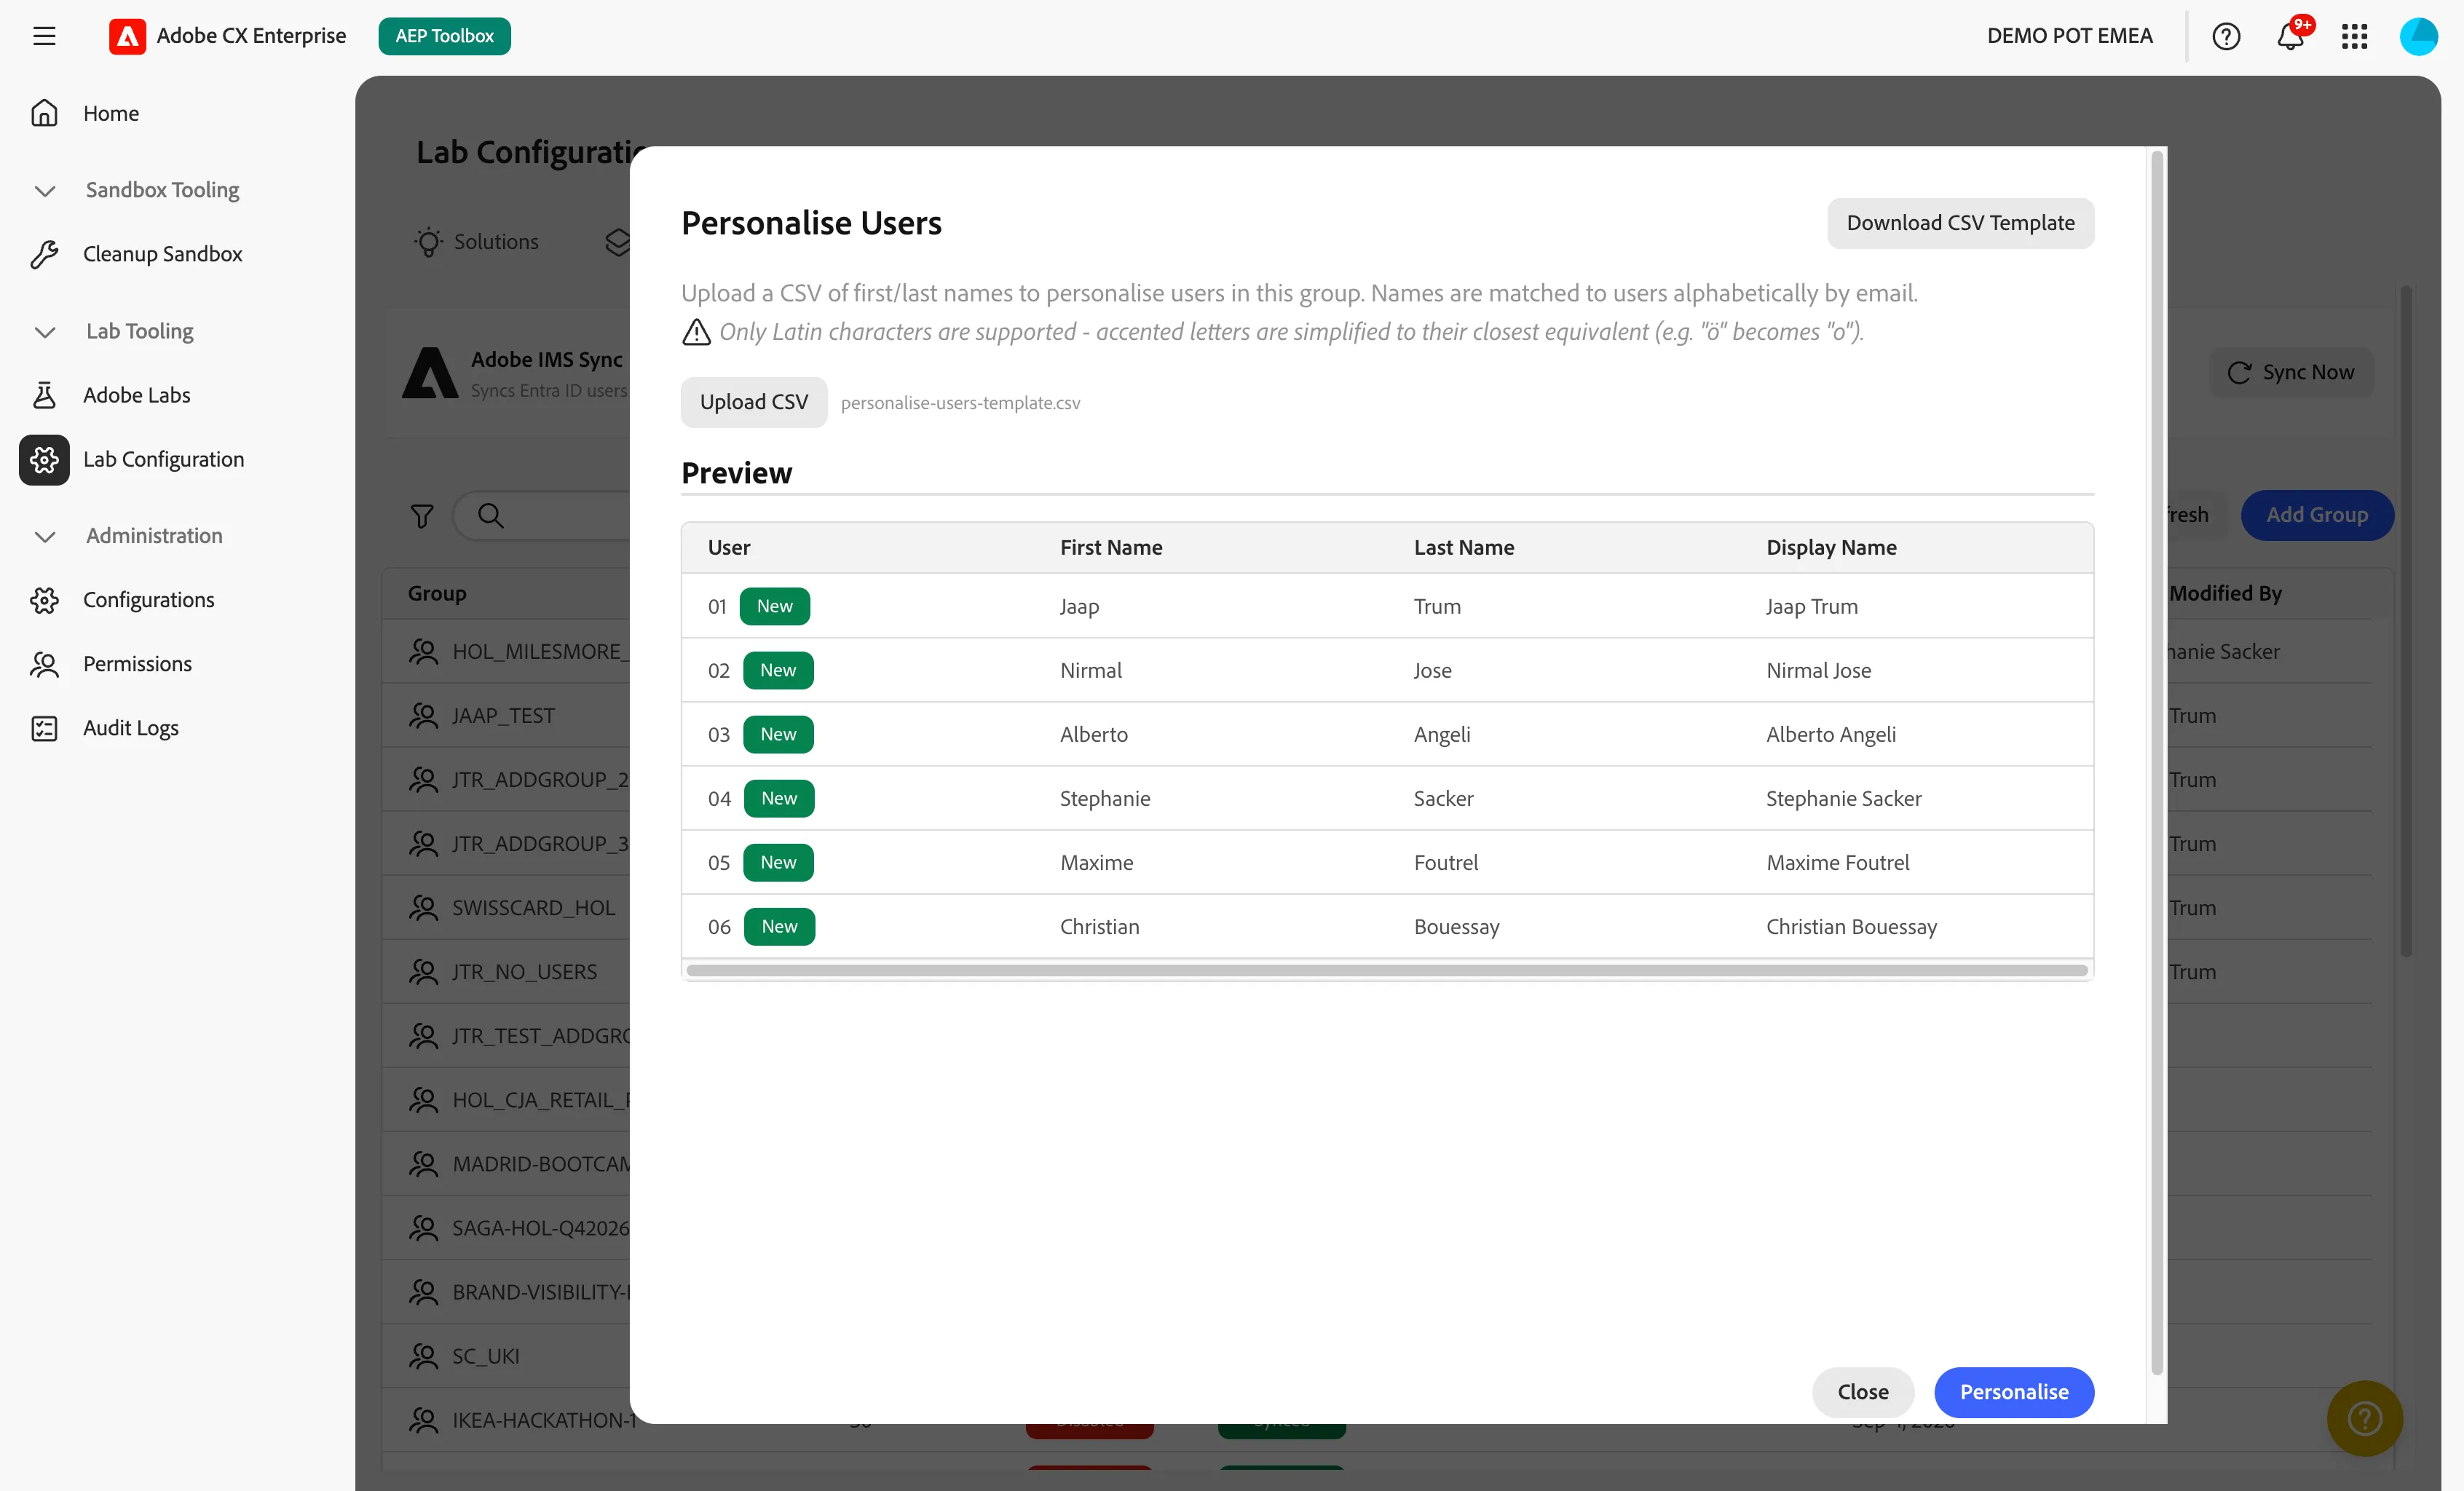
Names are assigned in alphabetical order of the email address. Only Latin characters are supported, and accented letters are simplified (for example, "ö" becomes "o").
You can personalise part of a group and add more names later.
Reset personalisation or change the Group User Label
- Open the group.
- Select the option to reset the users' names.
- If needed, enter a new Group User Label.
- Confirm.
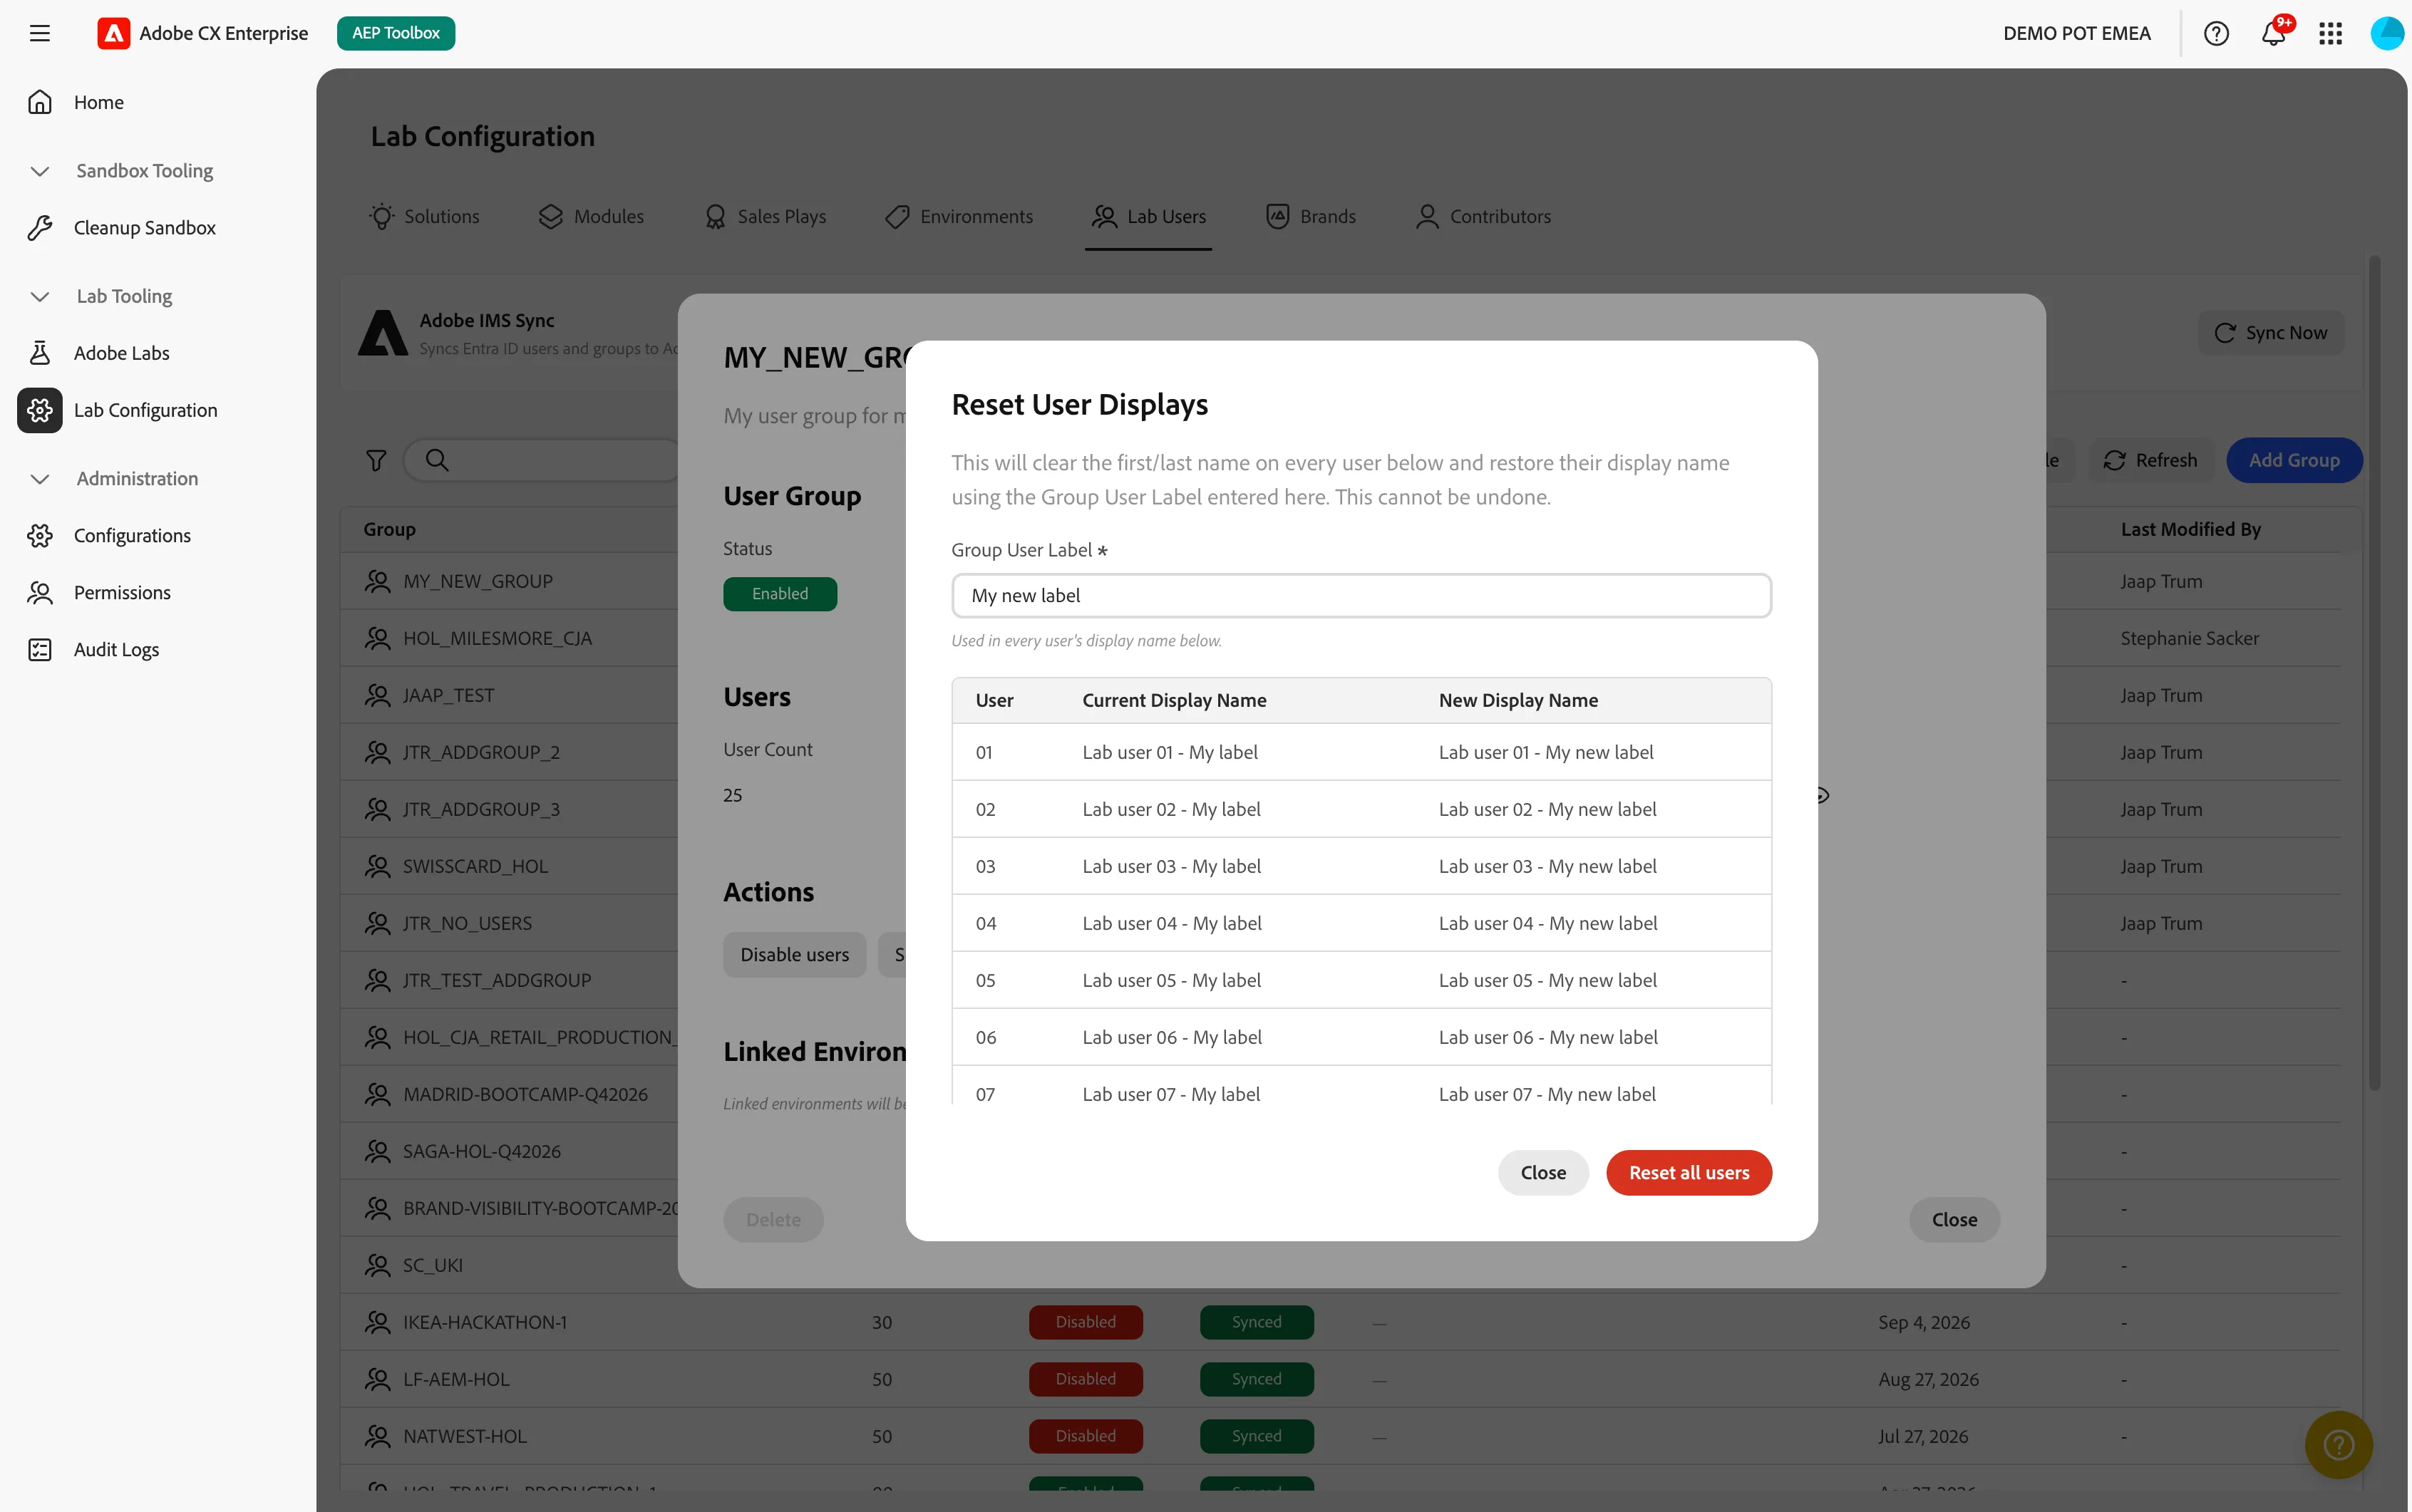
All display names return to the generic format, with the new label if you entered one.
Disable a group after the lab
- Open the group.
- In the Actions row, select Disable.
- Confirm.
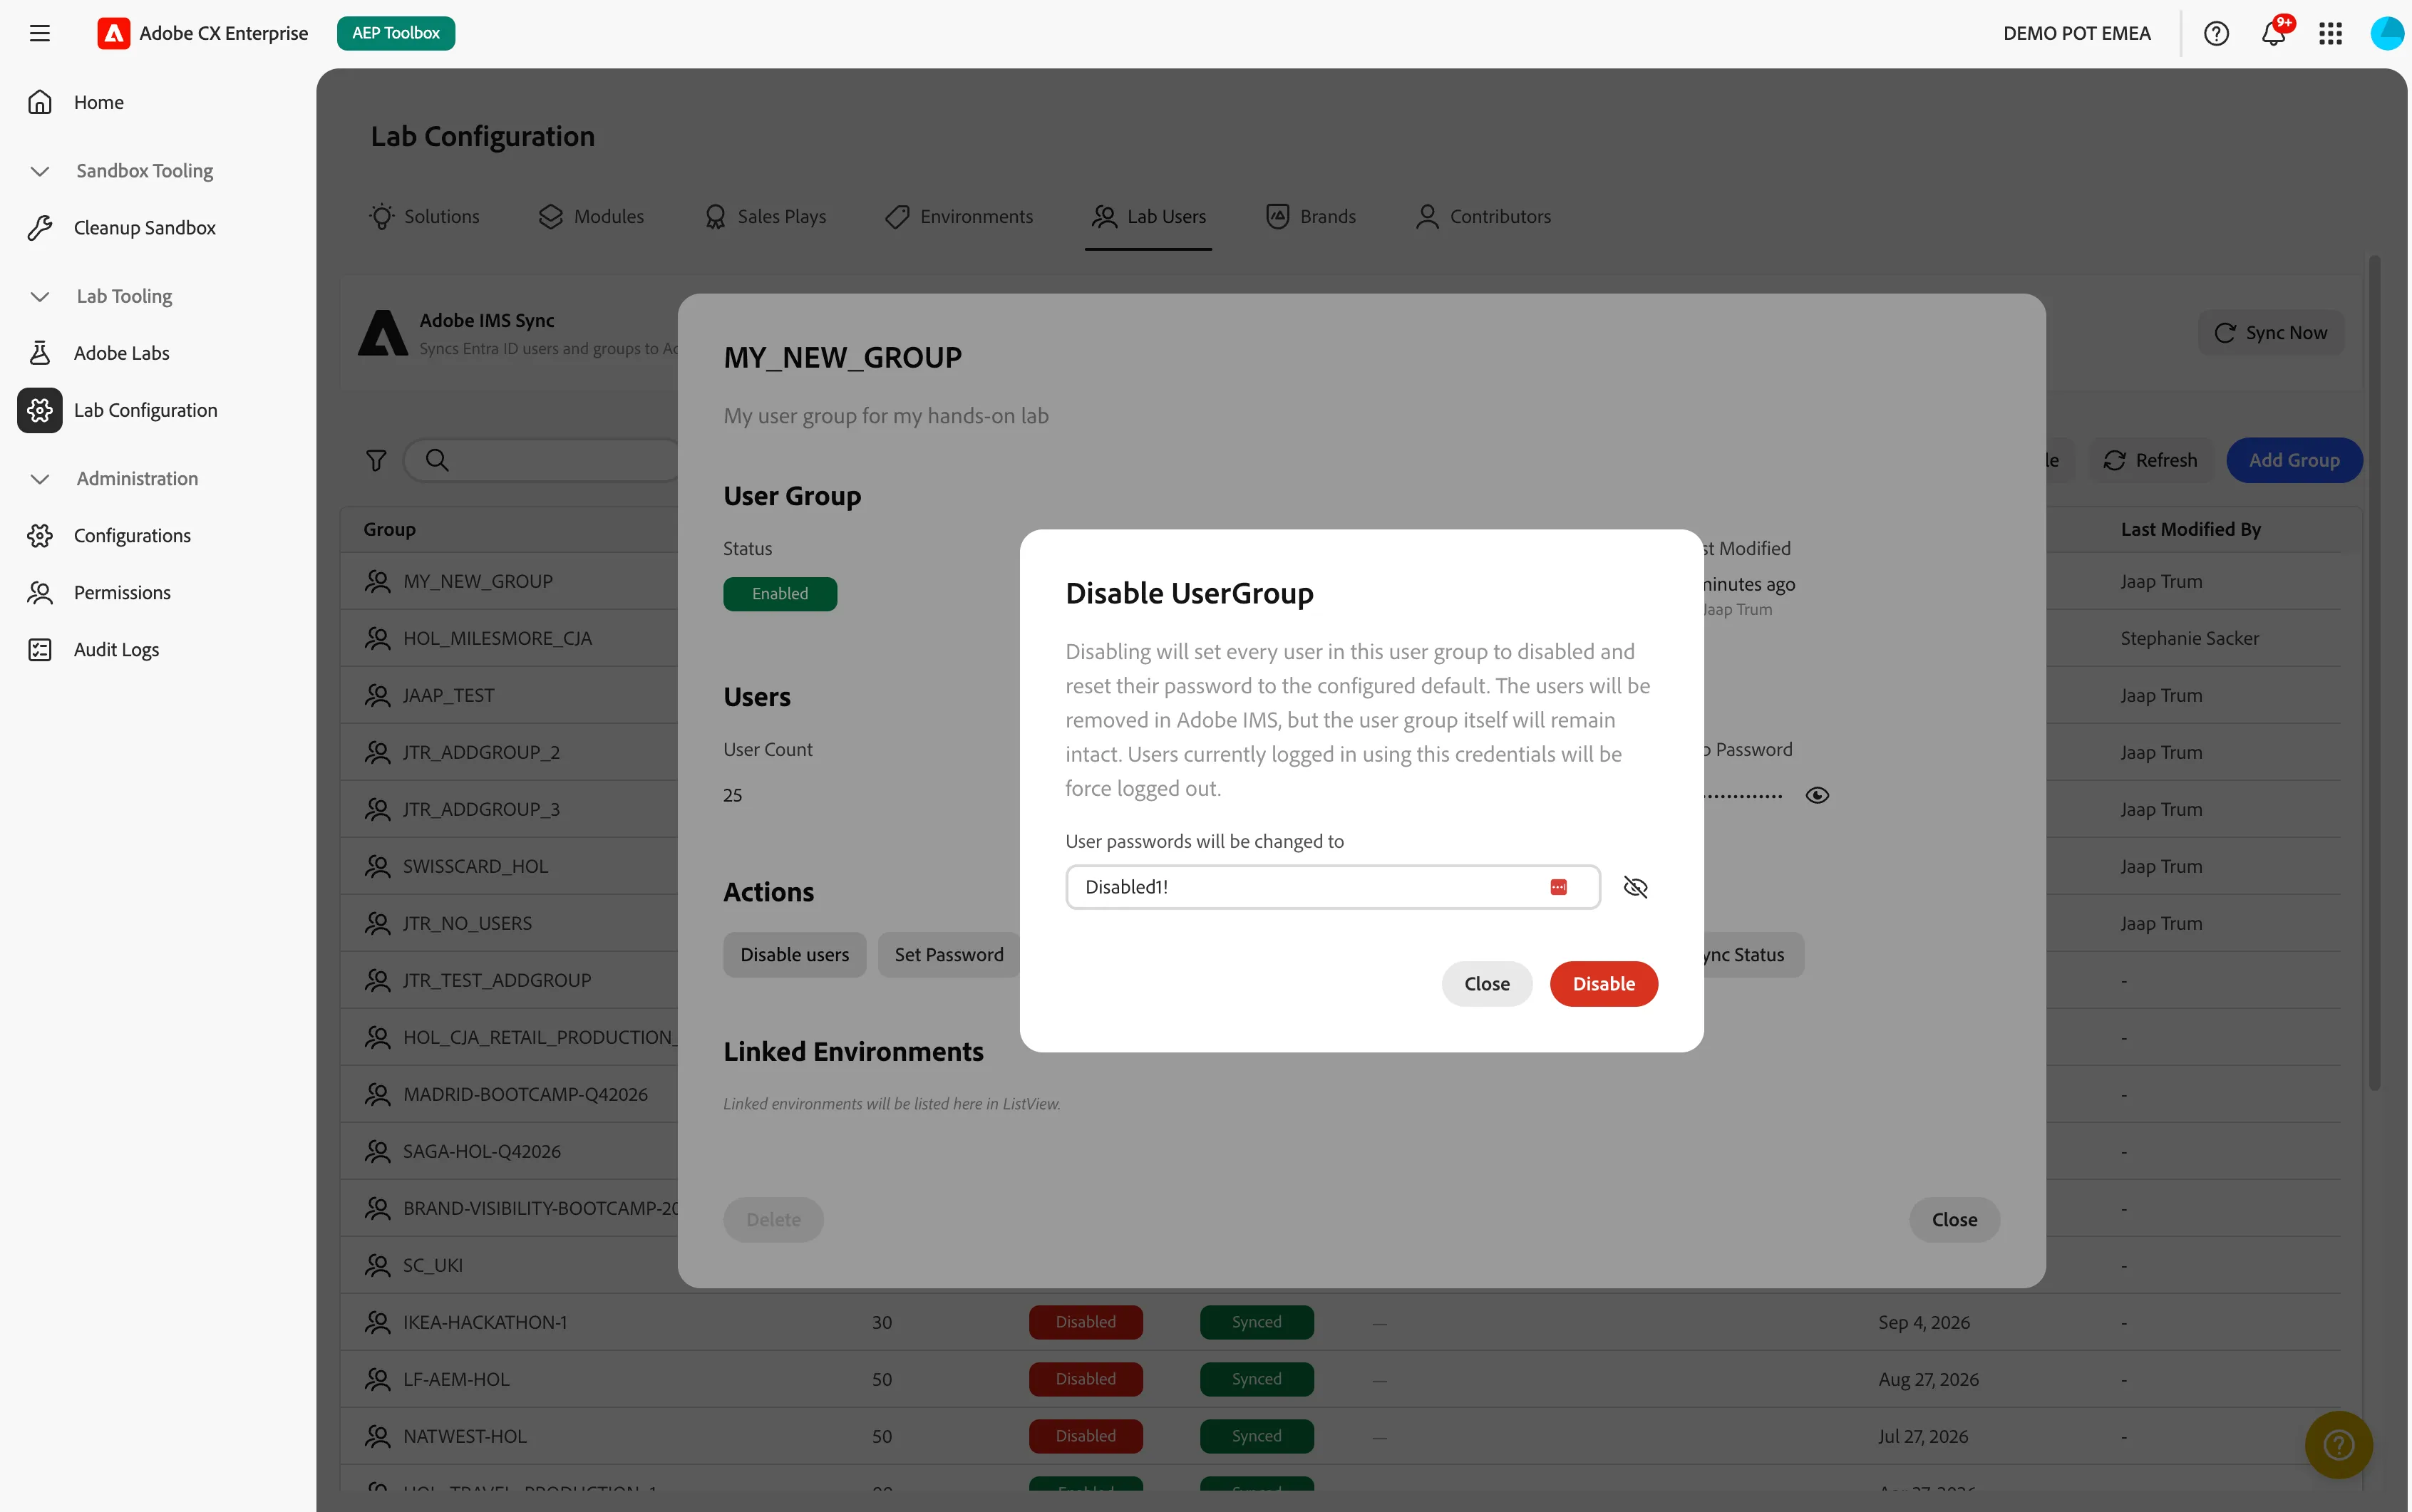
When a group is disabled, the password is reset, logged-in users are signed out, and the users are removed from Adobe on the next sync.
Delete a group
- Make sure the group is disabled or has no users and has been synced to Adobe IMS.
- Open the group.
- In the Actions row, select Delete.
- Confirm.
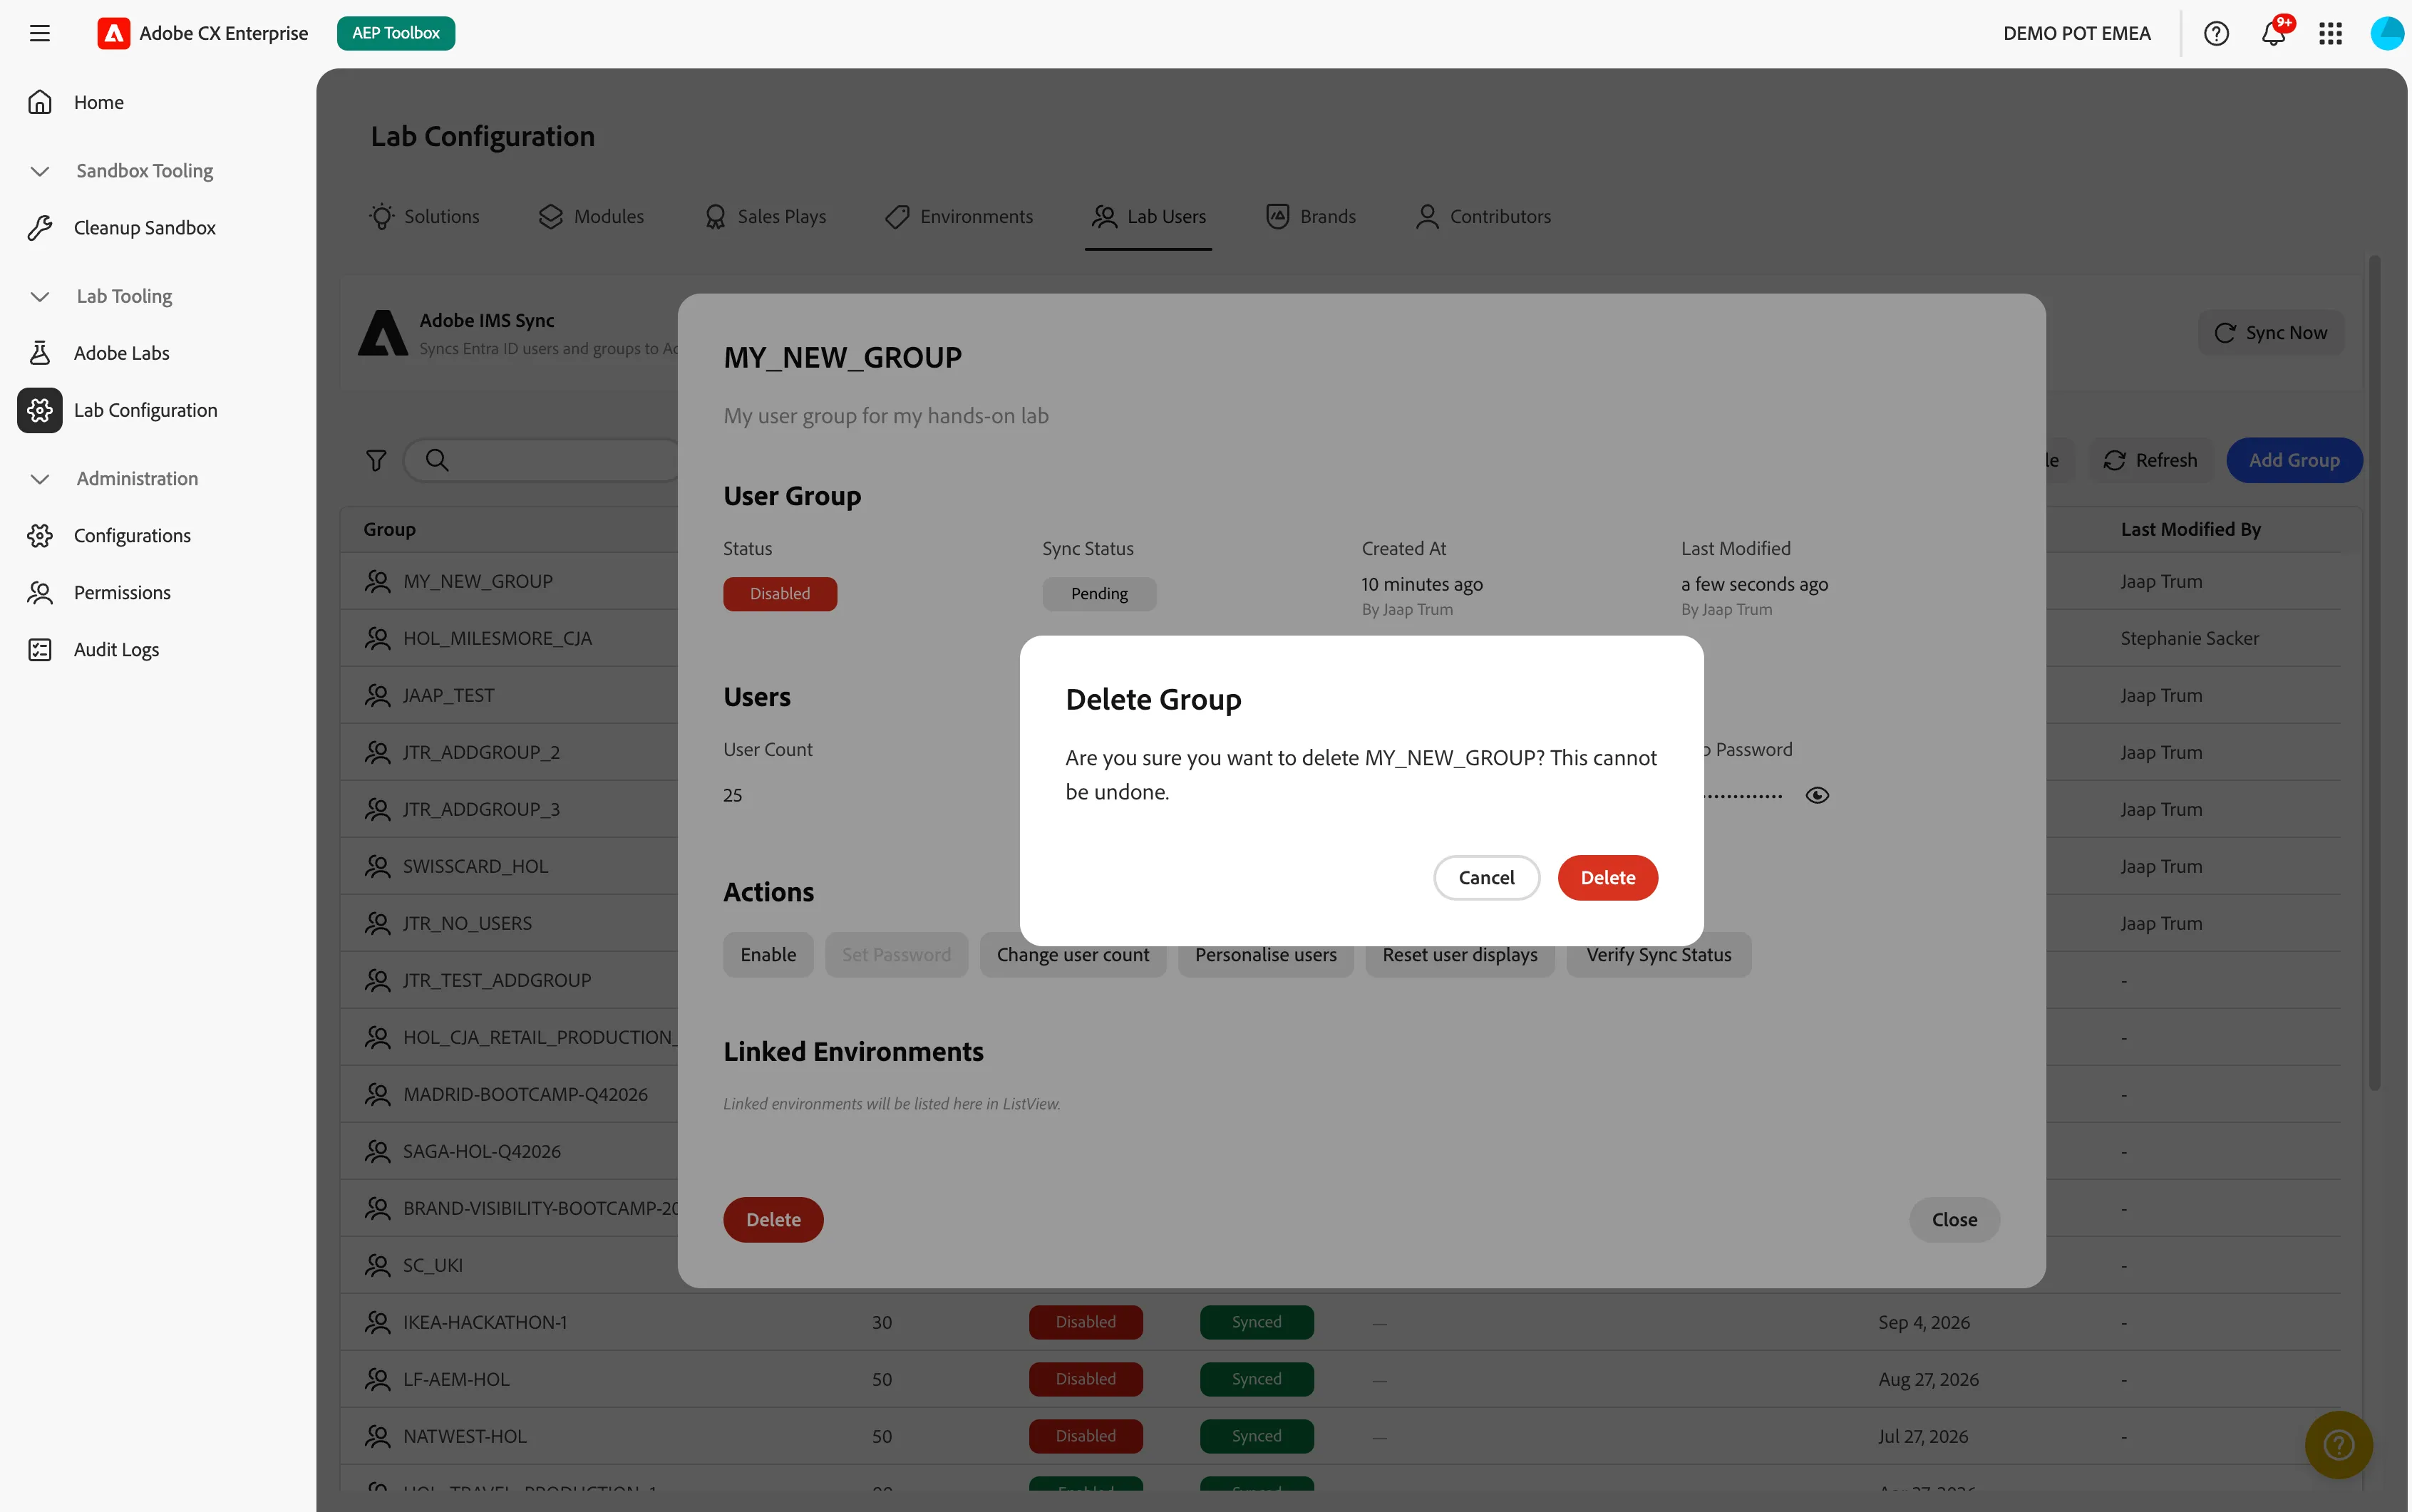
Deleting a group removes all of its accounts. This cannot be undone.
Troubleshooting
Problem | What to do |
|---|---|
Participants cannot sign in | Check that the group is Enabled and the Sync Status is Synced. If not, select Sync Now and check again. |
The group name or email prefix is rejected | Group names allow only uppercase letters, numbers, and underscores. The email prefix must not be used by another group. |
The password is rejected | Check the password policy shown in the dialog and try again. |
The group cannot be deleted | Disable the group first, or remove all its users. |
Buttons are greyed out or missing | You may only have view access. Ask your admin for Configure Lab Users. |
"User Group settings not configured" | An admin needs to finish the Lab Tooling configuration. |