Ex1: Create your GitHub Project
In this section, you will create the code repository that stores your Edge Delivery Services project and connect it to your AEM authoring environment.
In Edge Delivery Services projects, your website code lives in GitHub, not inside AEM. This repository contains the CSS, JavaScript, and project configuration used to render your site.
Step 1 — Create a new repository from the template
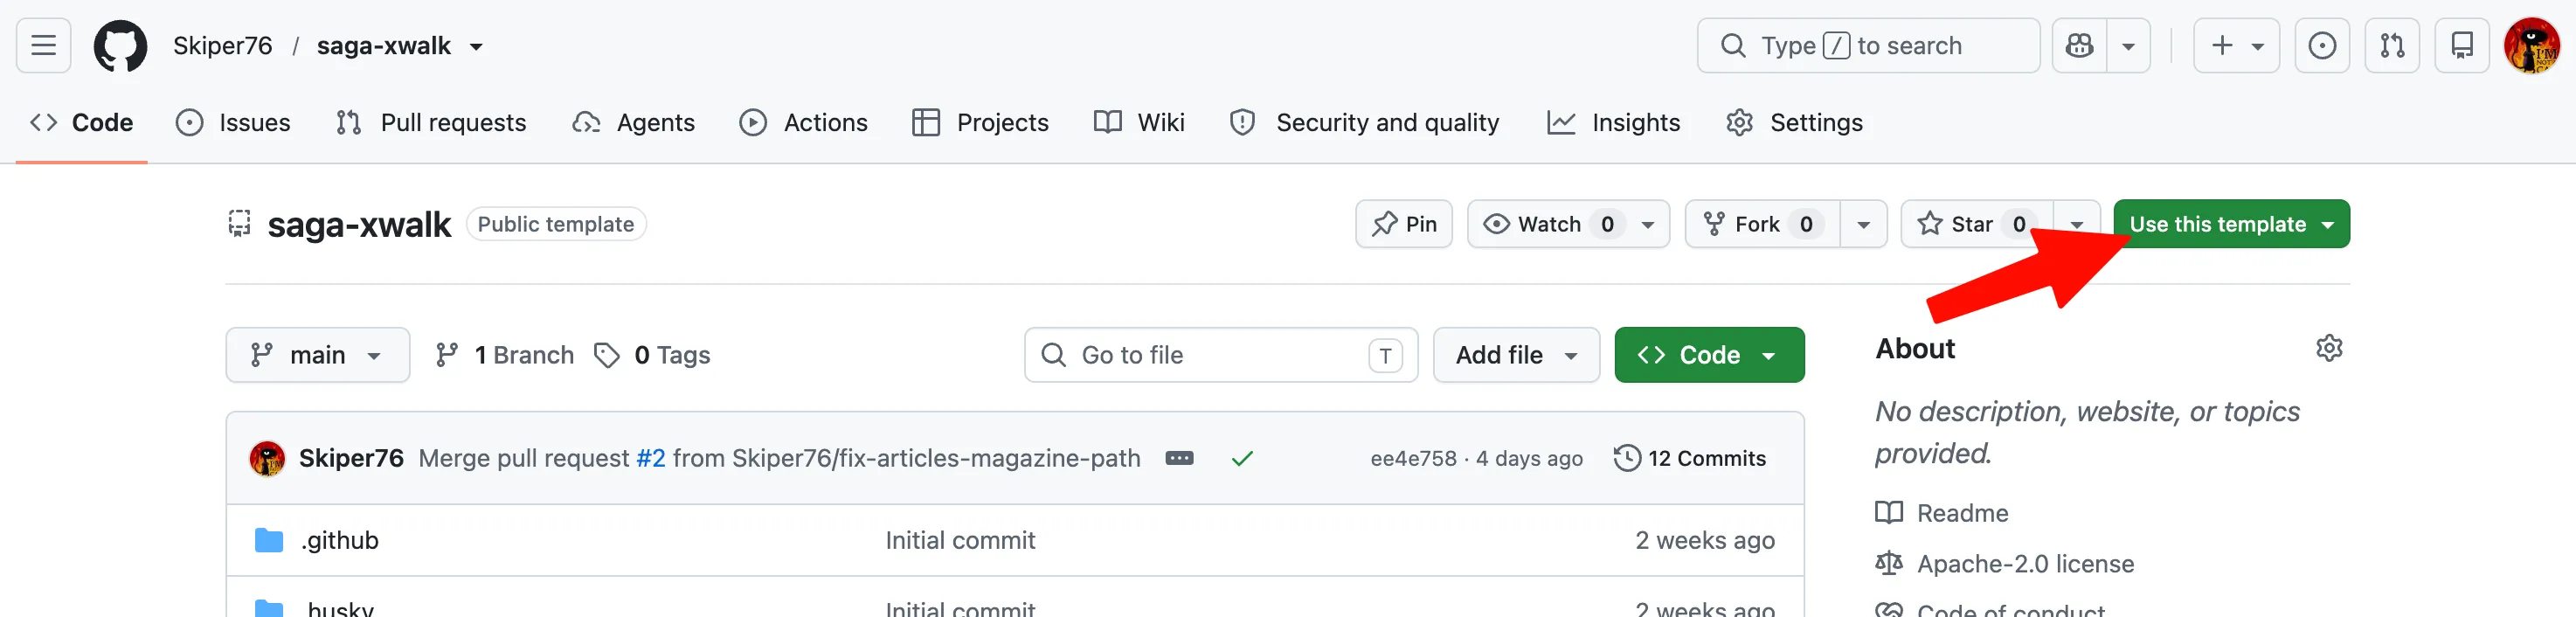
- Navigate to the Saga demo site repository template provided for this lab: https://github.com/Skiper76/saga-xwalk
- Sign in using your GitHub account.
- Click Use this template.
- Select Create a new repository.
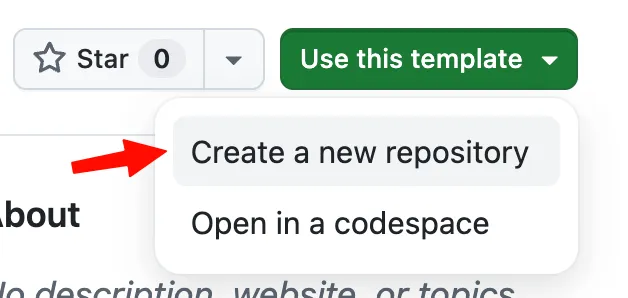
Note: You must be signed in to GitHub to see "Use this template" option.
Step 2 — Configure the new repository
- Choose the GitHub owner:
- your personal account, or
- the GitHub organization used for the lab
- Enter the repository name: sga-site-{CUSTOMER_NAME}}-{{USER_NUMBER}}
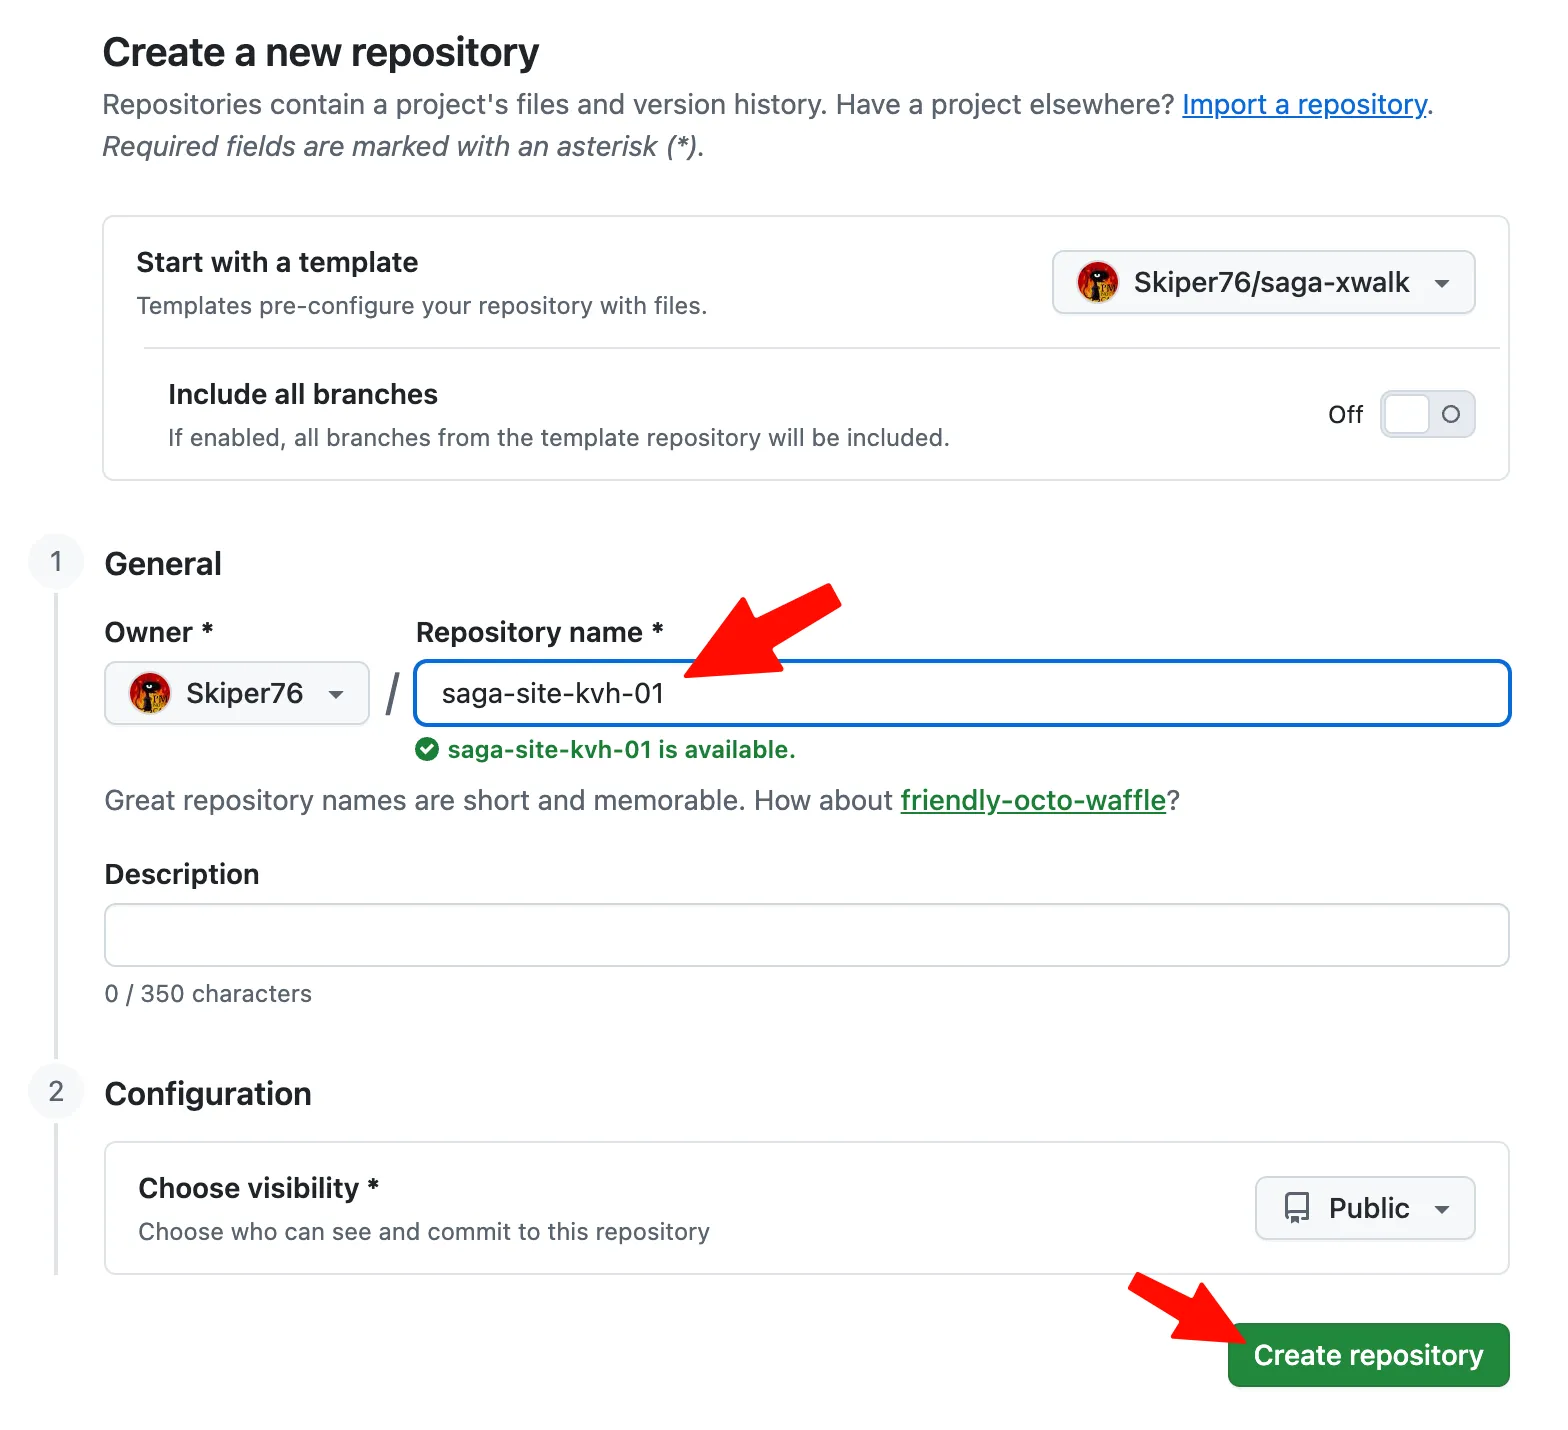
- Optionally add a description.
- Click Create repository.
This creates your own copy of the template so you can safely develop custom code without changing the original starter repository.
Step 3 — Configure the fstab.yaml file
The fstab.yaml file connects your GitHub repository to the AEM authoring environment. It tells Edge Delivery Services which AEM endpoint should be used as the content source for your project.
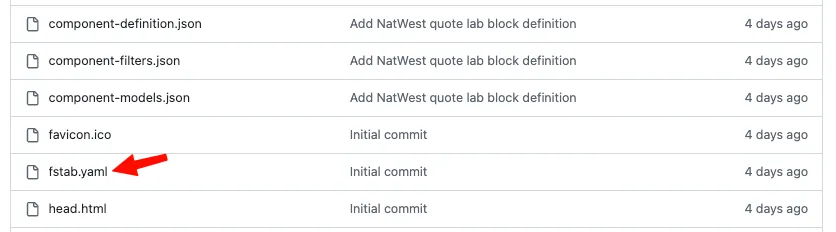
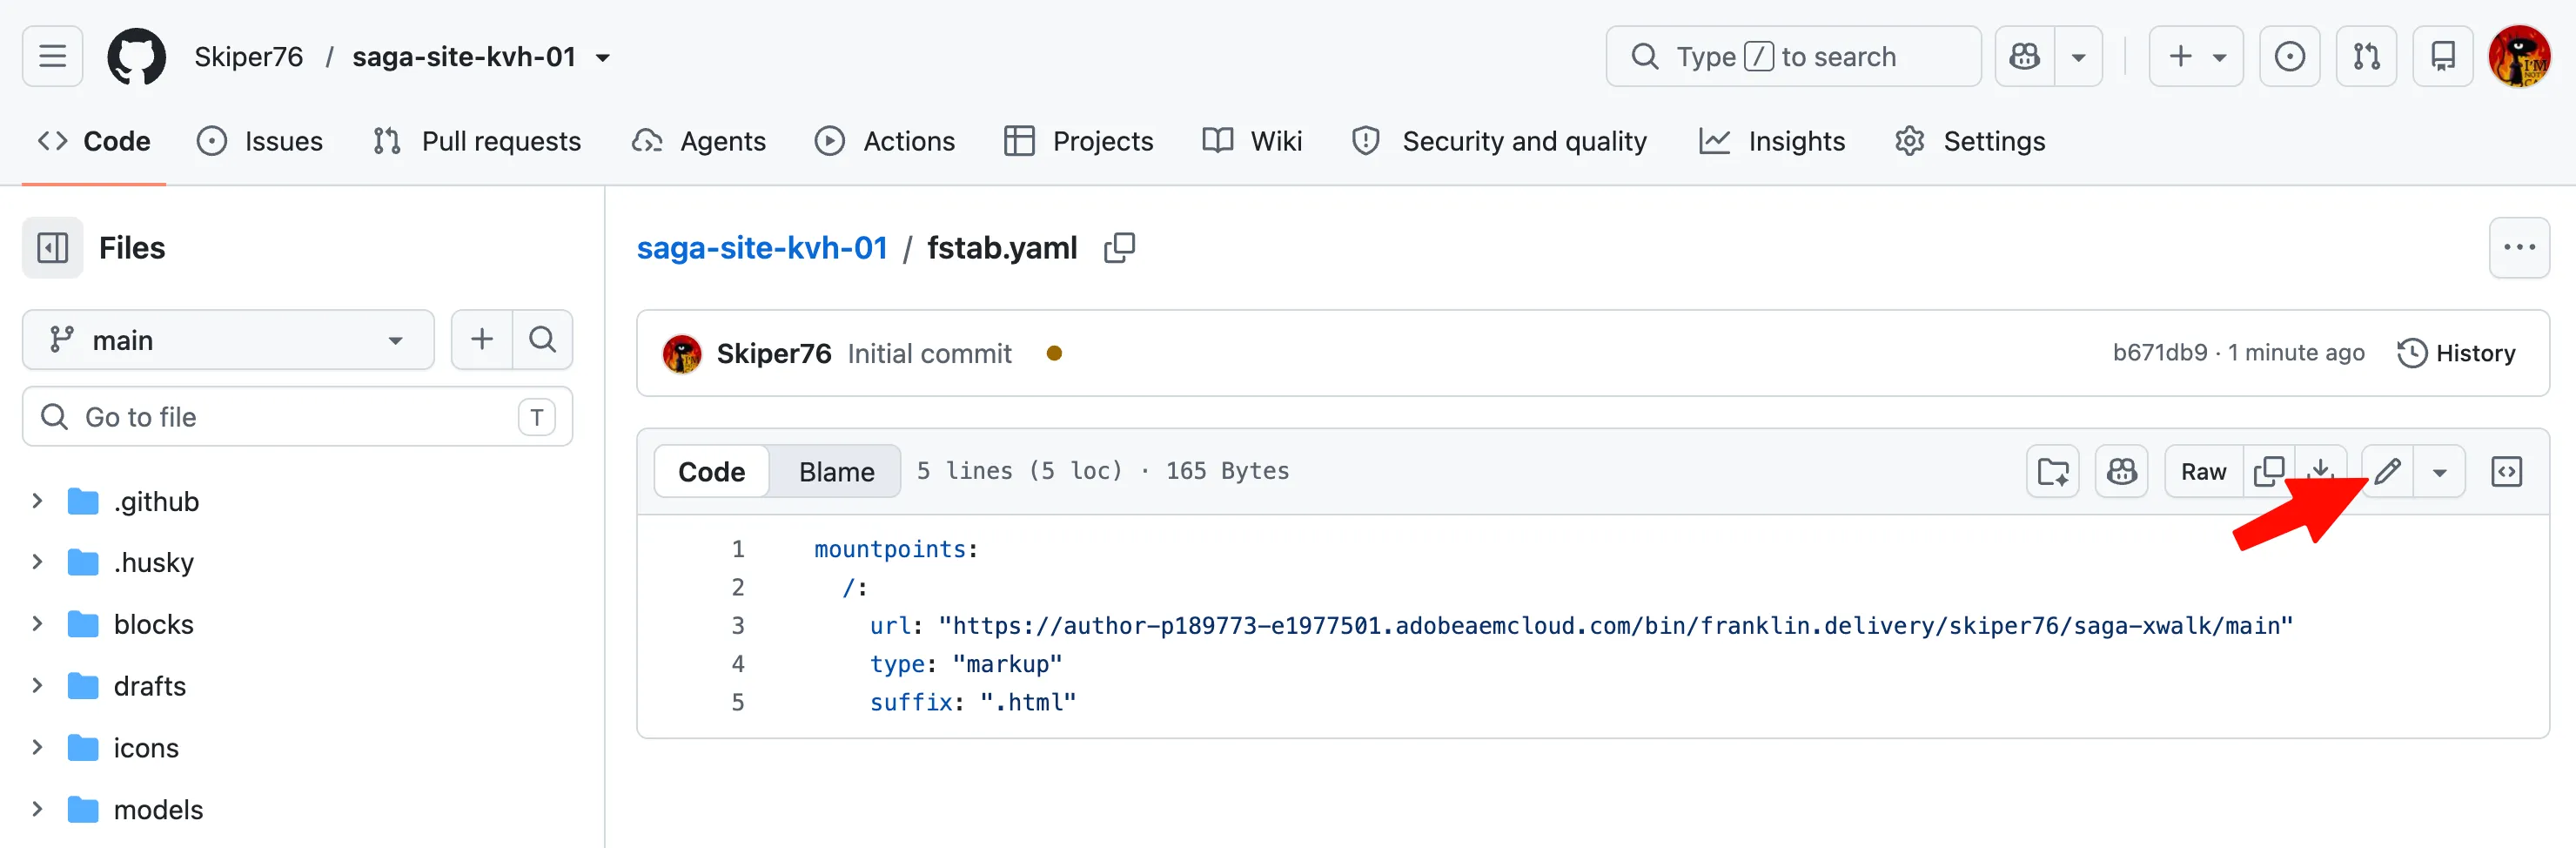
- In your GitHub repository, click the fstab.yaml file to open it:
- Click the Edit this file icon:
- Replace the existing code with the following config:
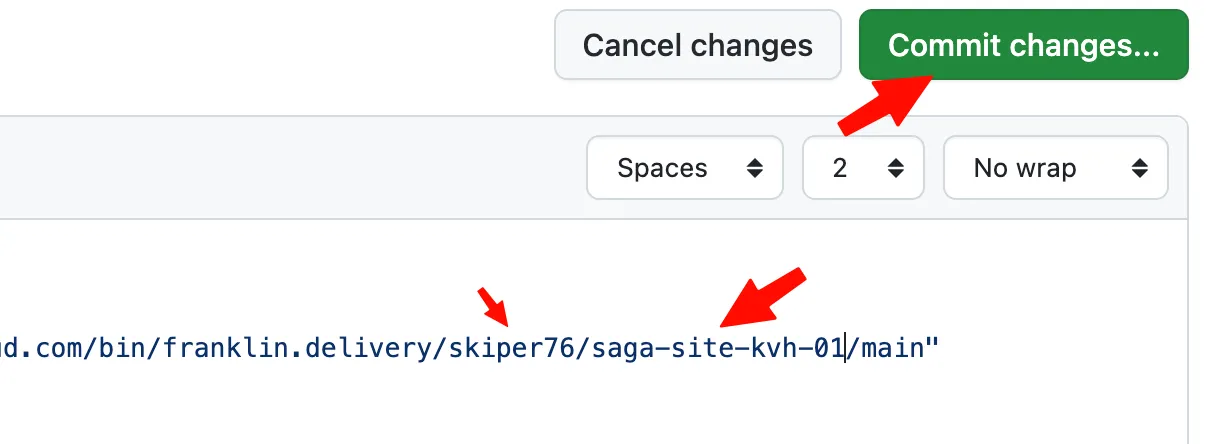
- Replace "Skiper76" → <Your-GitHub-Name>
- Replace "saga-xwalk" → sga-site-{CUSTOMER_NAME}}-{{USER_NUMBER}}
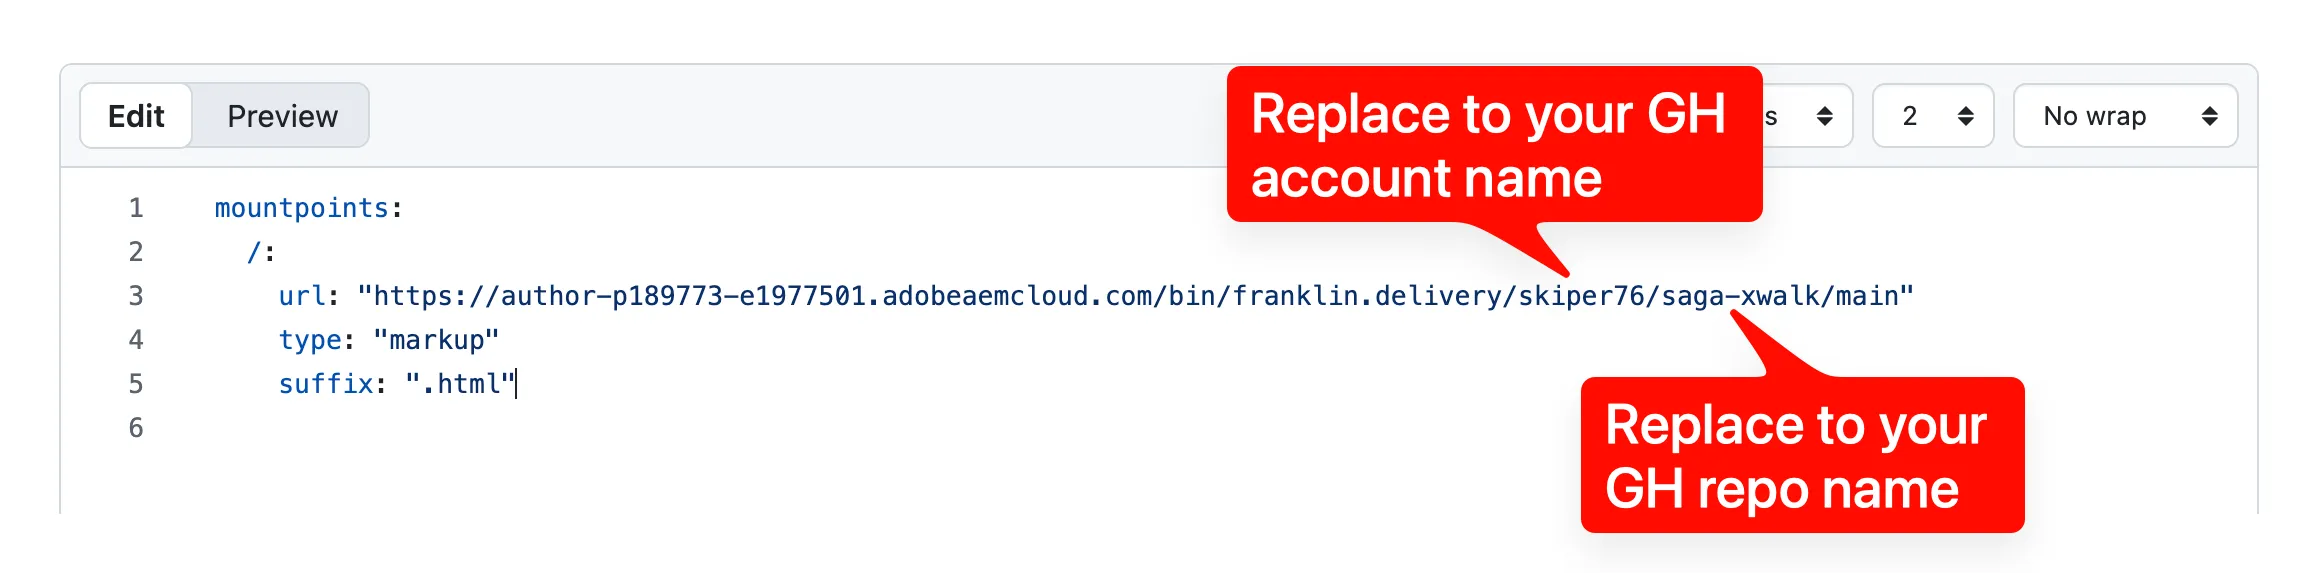
The mount point is set up like this:
mountpoints:
  /:
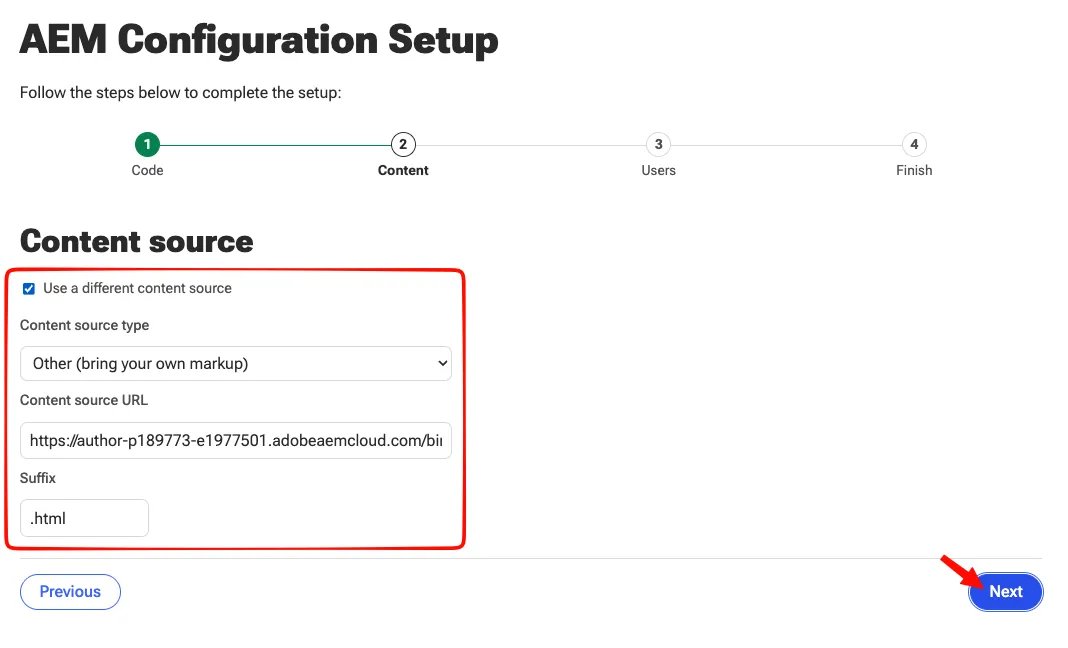
    url: https://<AEM_SERVER_URL>/bin/franklin.delivery/<YOUR_GITHUB_OWNER>/<YOUR_REPOSITORY_NAME>/main
    type: markup
suffix: .html- Do the edit, and click Commit Changes:
- Enter a commit message, select Commit directly to the main branch, and commit:
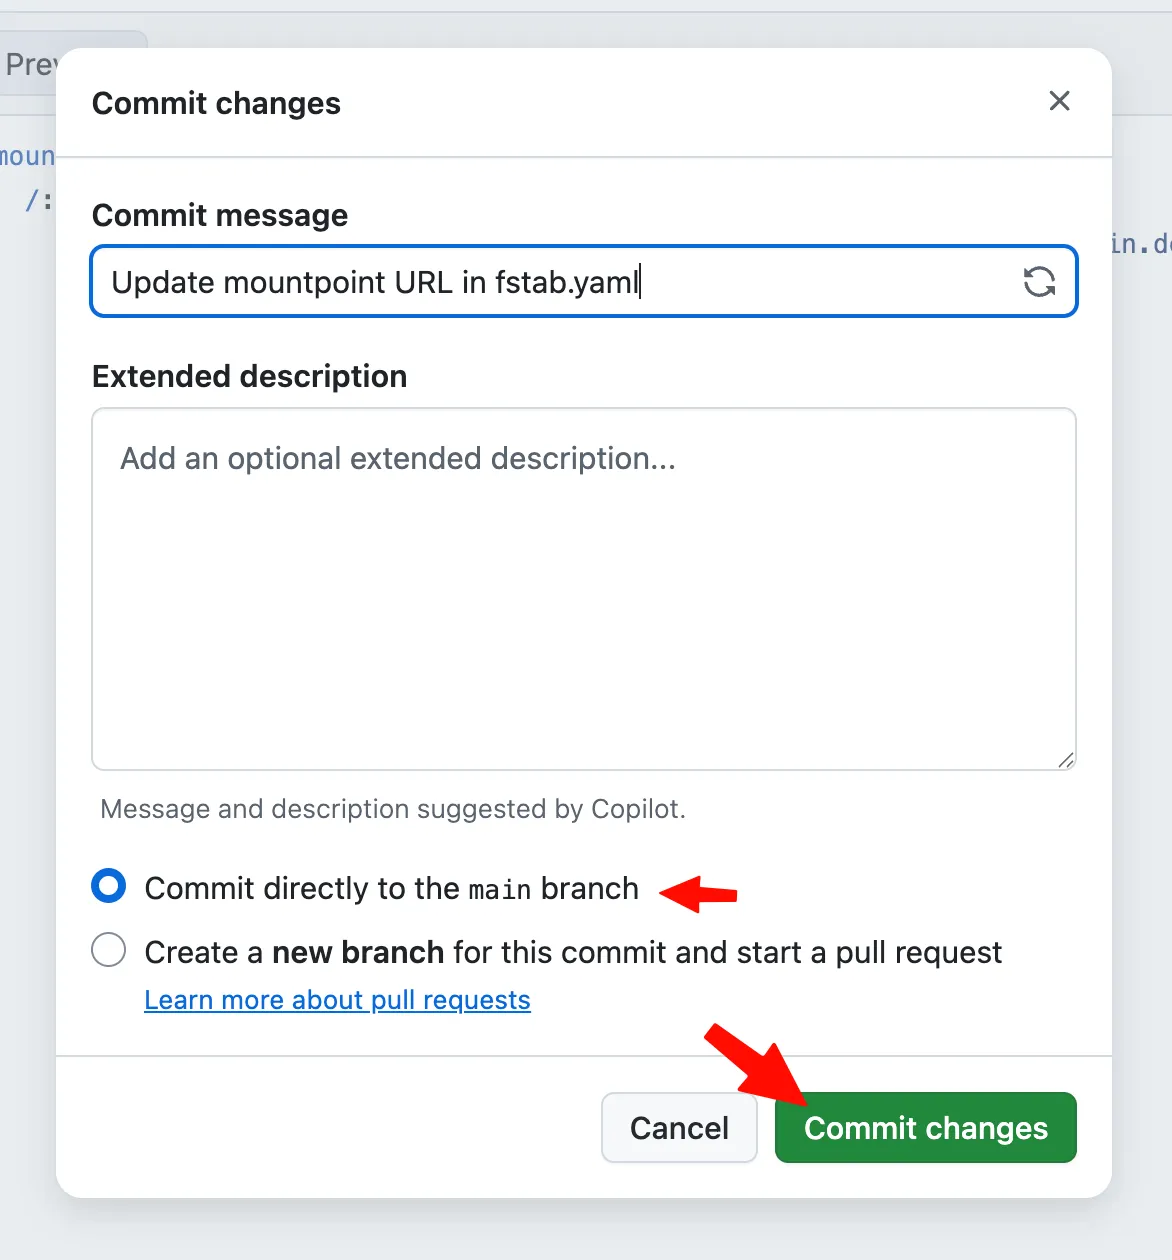
Make sure the GitHub owner and repository name match the repository you created. If the repository belongs to a GitHub organization, use the organization name instead of your personal username.
- The fstab.yaml file is now configured to use your AEM environment as the content source.
Step 4 — Install or configure AEM Code Sync
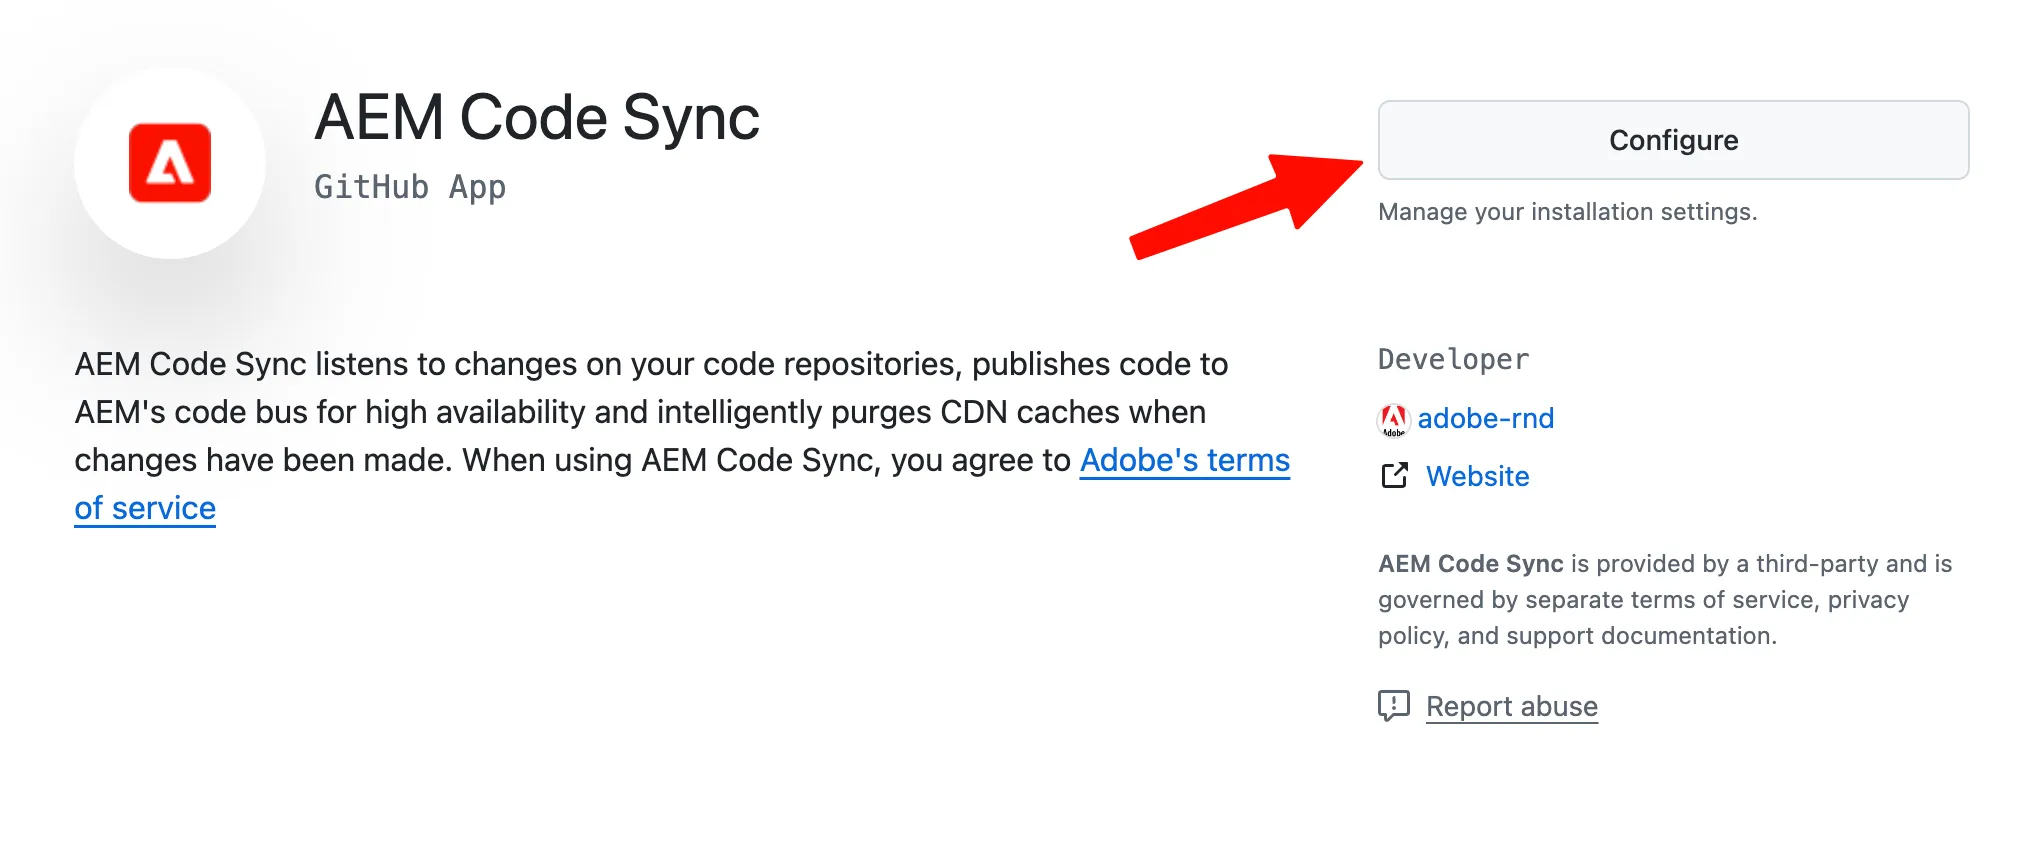
- In a new browser tab, go to: https://github.com/apps/aem-code-sync
- Click Configure.
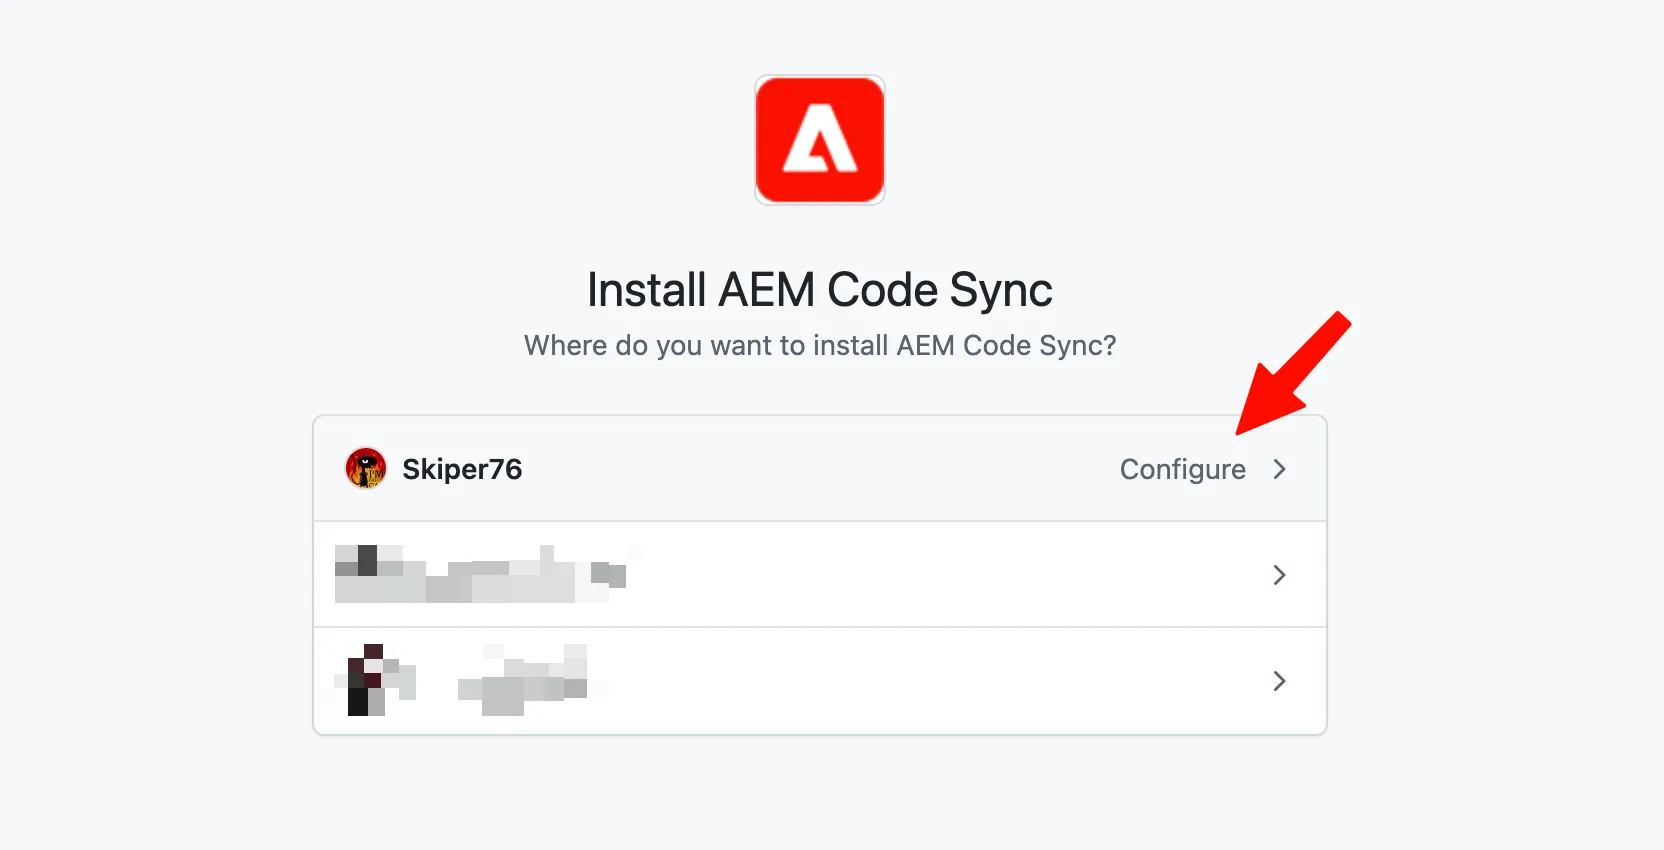
- Choose the GitHub account or organization where you created your new repository.
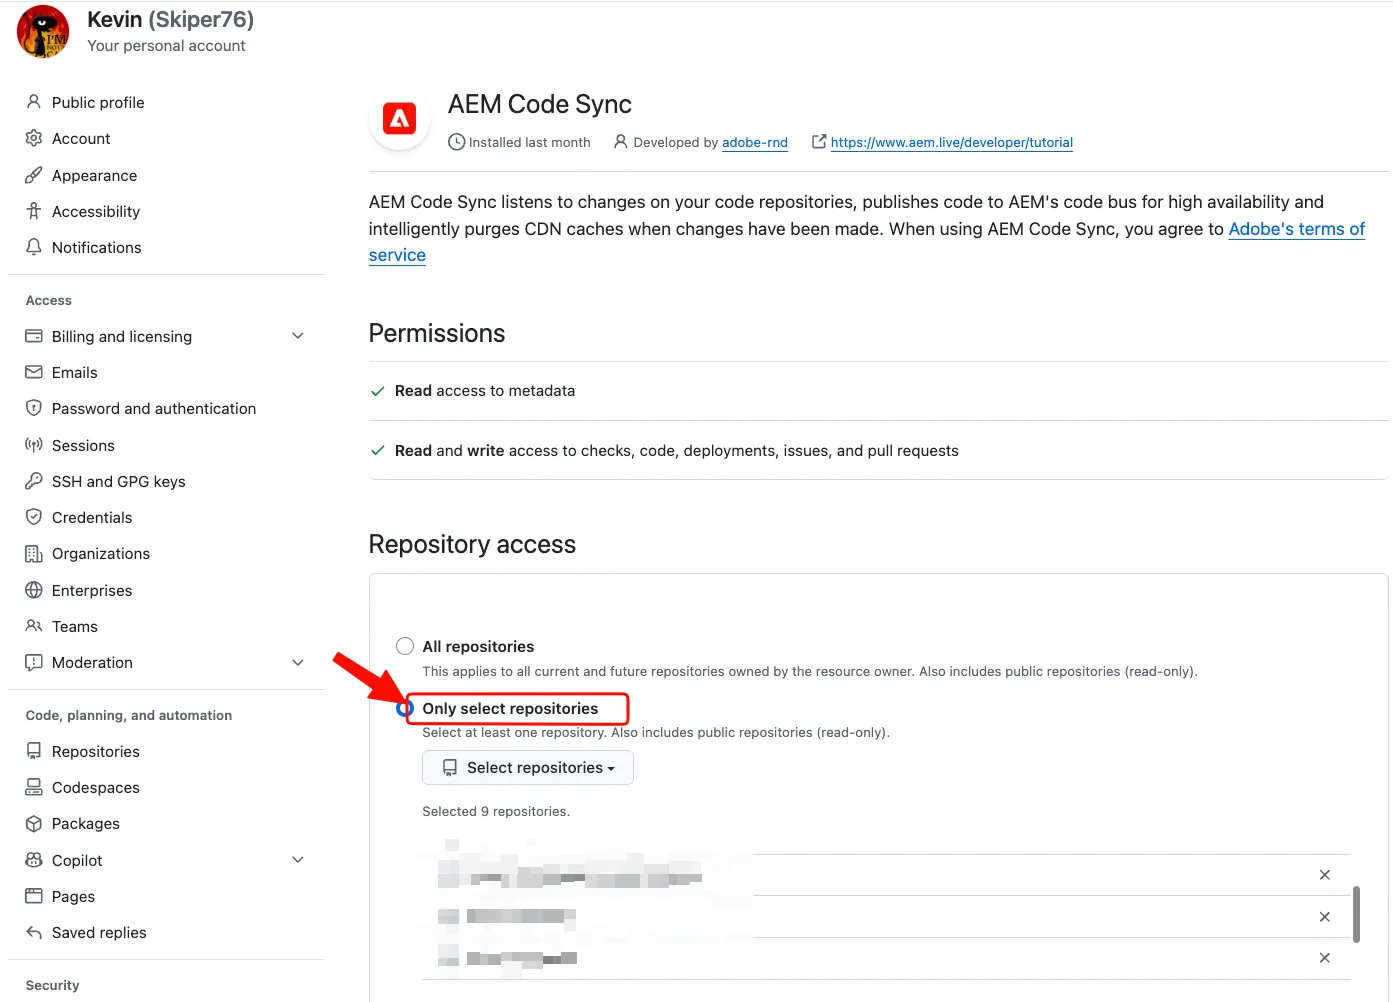
- Under Repository access, select Only select repositories
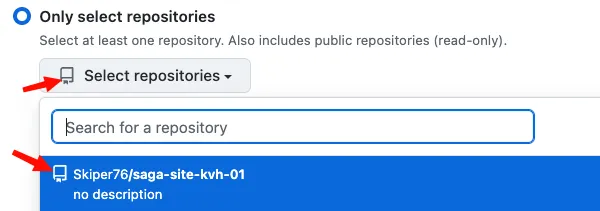
- Choose the repository you created in the previous step.
- Click Save.
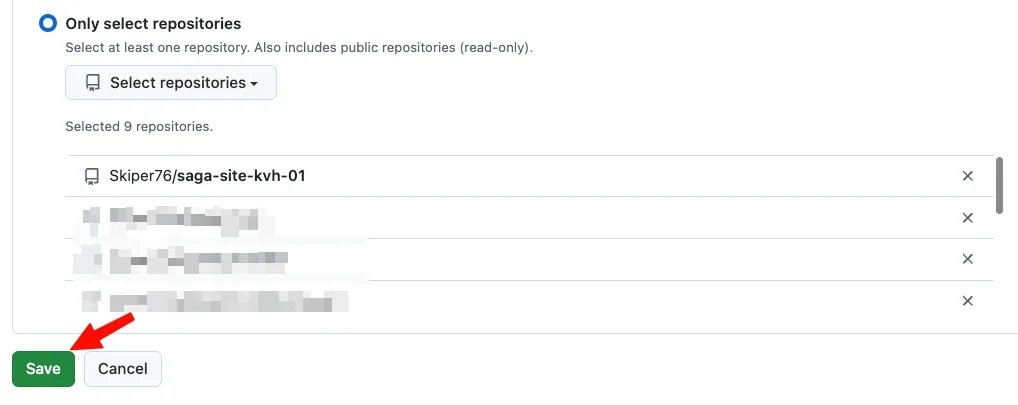
Why This Is Needed AEM Code Sync connects your GitHub repository to the Edge Delivery Services delivery pipeline so that the code in your repository can be used by your site.
Step 5 — AEM Configuration Setup
We now need to connect our project with AEM, with previous step, clicking on save will take us to this AEM Configuration Setup page:
- Confirm you are now on this page, and click on next:
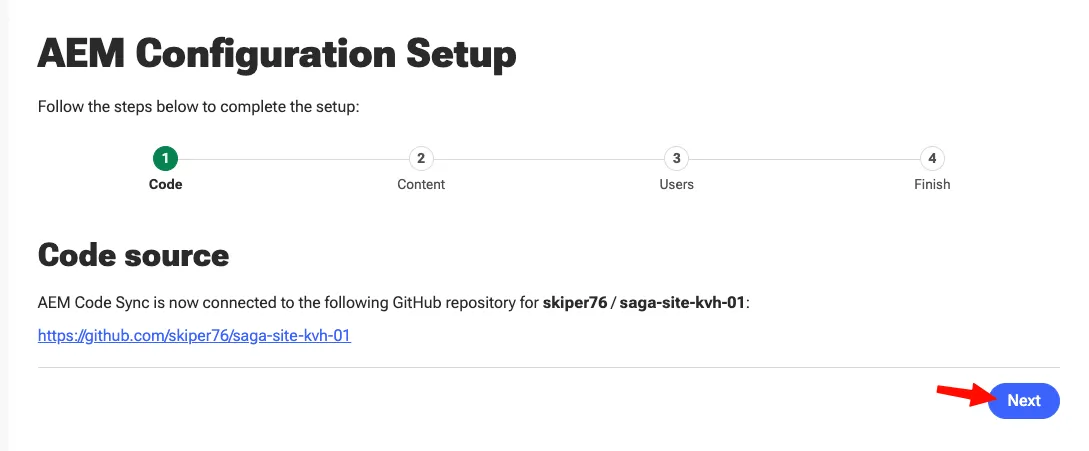
- In Content Source, it is already preselected to "Other" and has the content source URL configured from our fstab. Click Next.
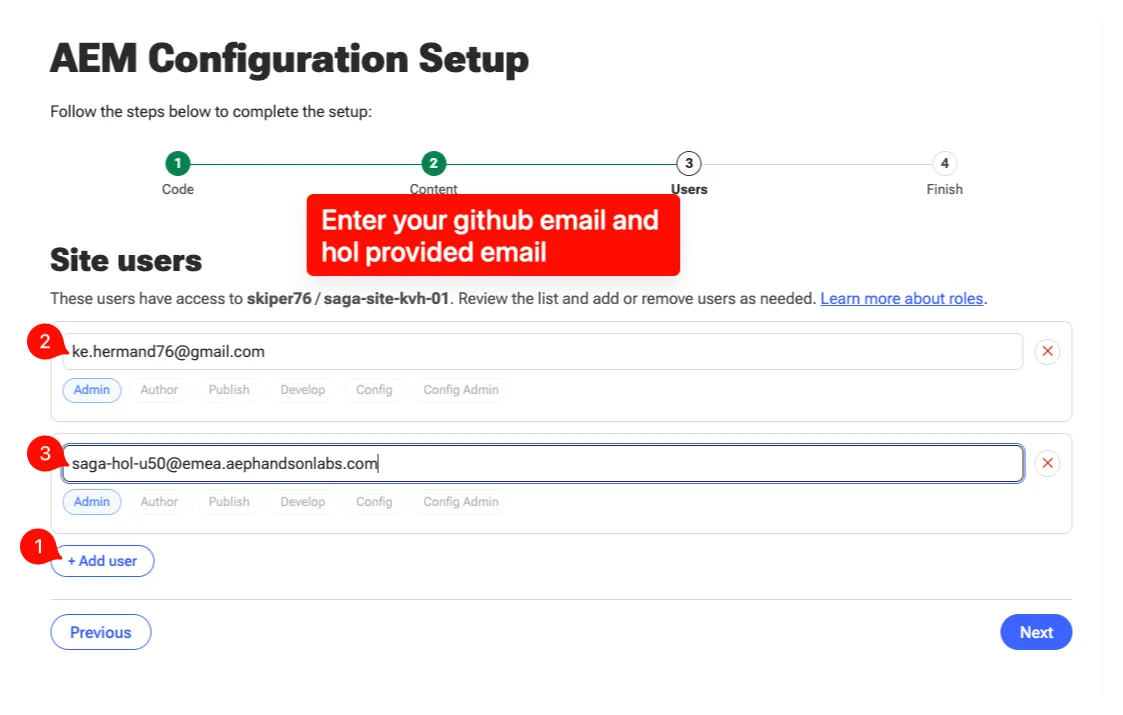
- Add Users, especially yourself as admin (add your github email AND your provided HOL email):
- In summary, you can click Save.
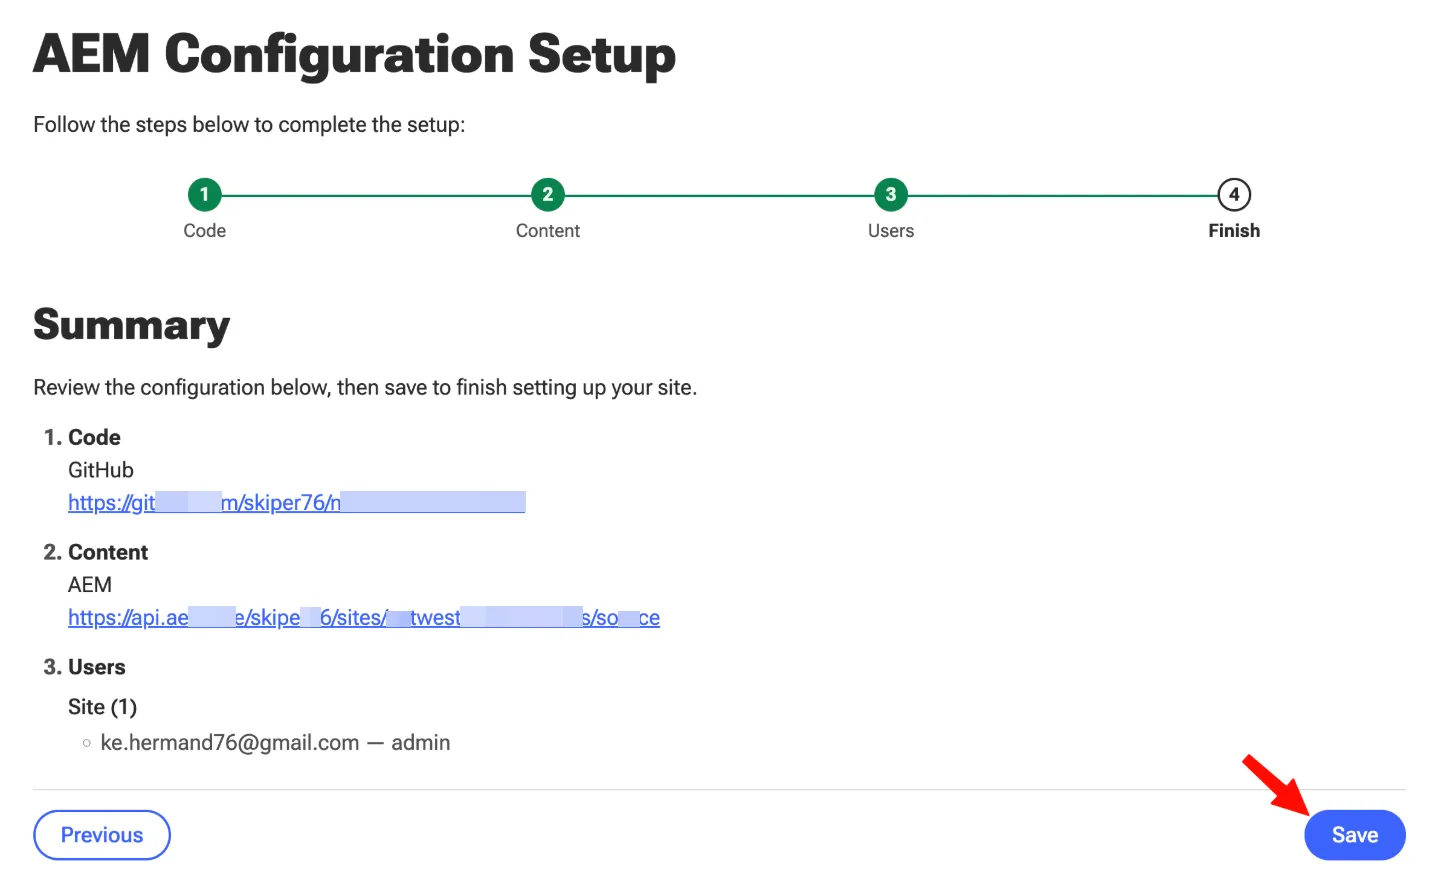
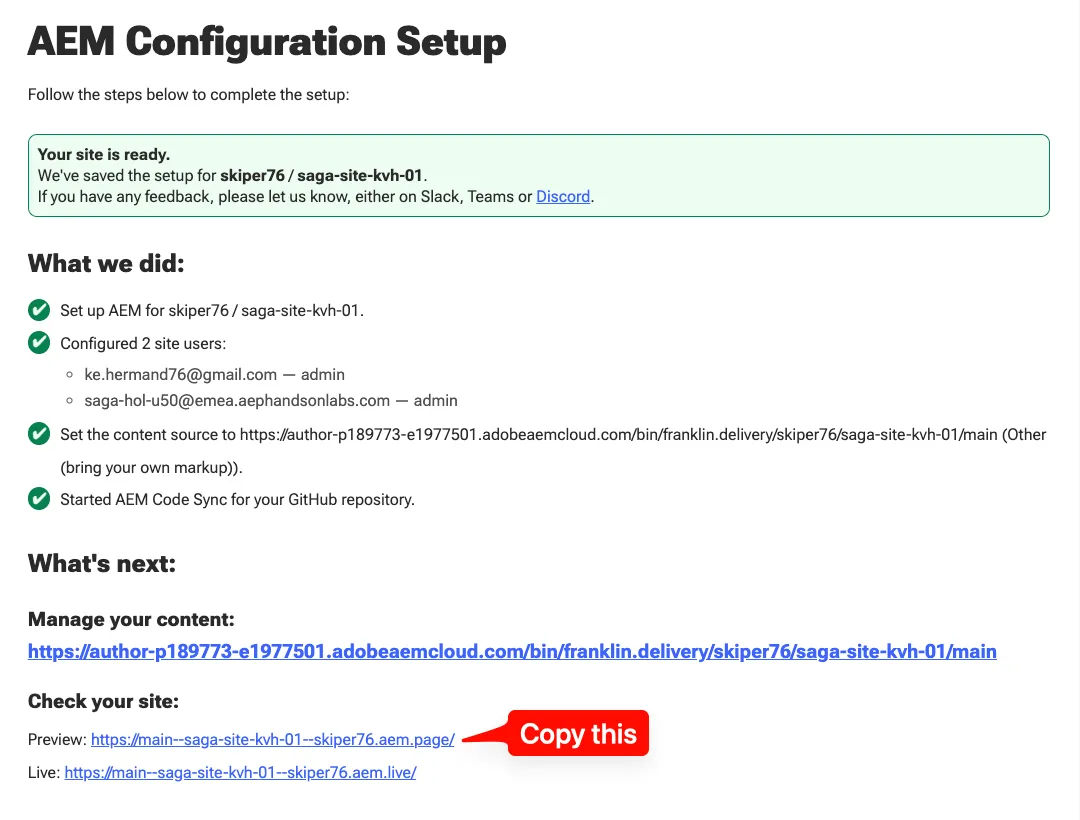
- You will have a confirmation screen that your Site is ready, with all its info. Copy the preview page link:
Congratulations!
You now have:
- A GitHub repository containing your Edge Delivery Services project code.
- AEM Code Sync configured for the repository.
- An fstab.yaml file connecting the repository to your AEM environment.
- An AEM site configuration with the appropriate users and content source.
Your project is ready for the next step: creating a new AEM site, using our EDS configuration.