Create an Analysis Project
Access
To log into the Adobe Experience Platform, check the Environment & AccessEnvironment & Access page.
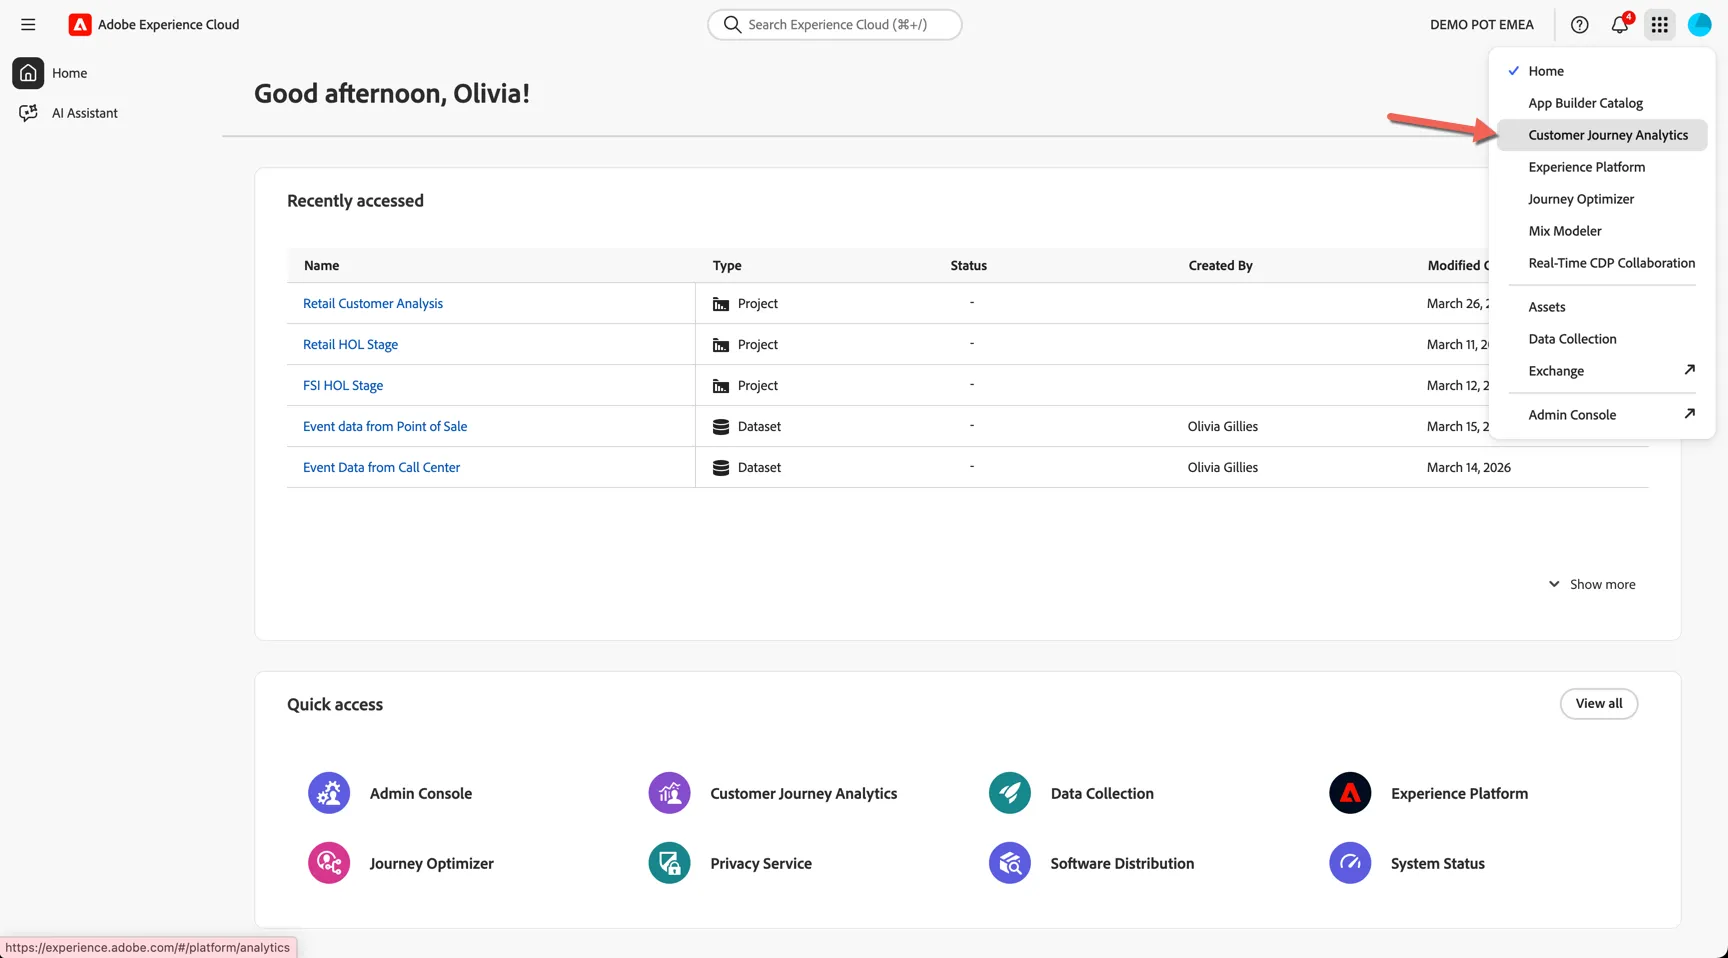
To navigate to Customer Journey Analytics:
- Click on the product selector (nine-dot icon) at the top right of the screen.
- Select Customer Journey Analytics.
Setting up Your Project
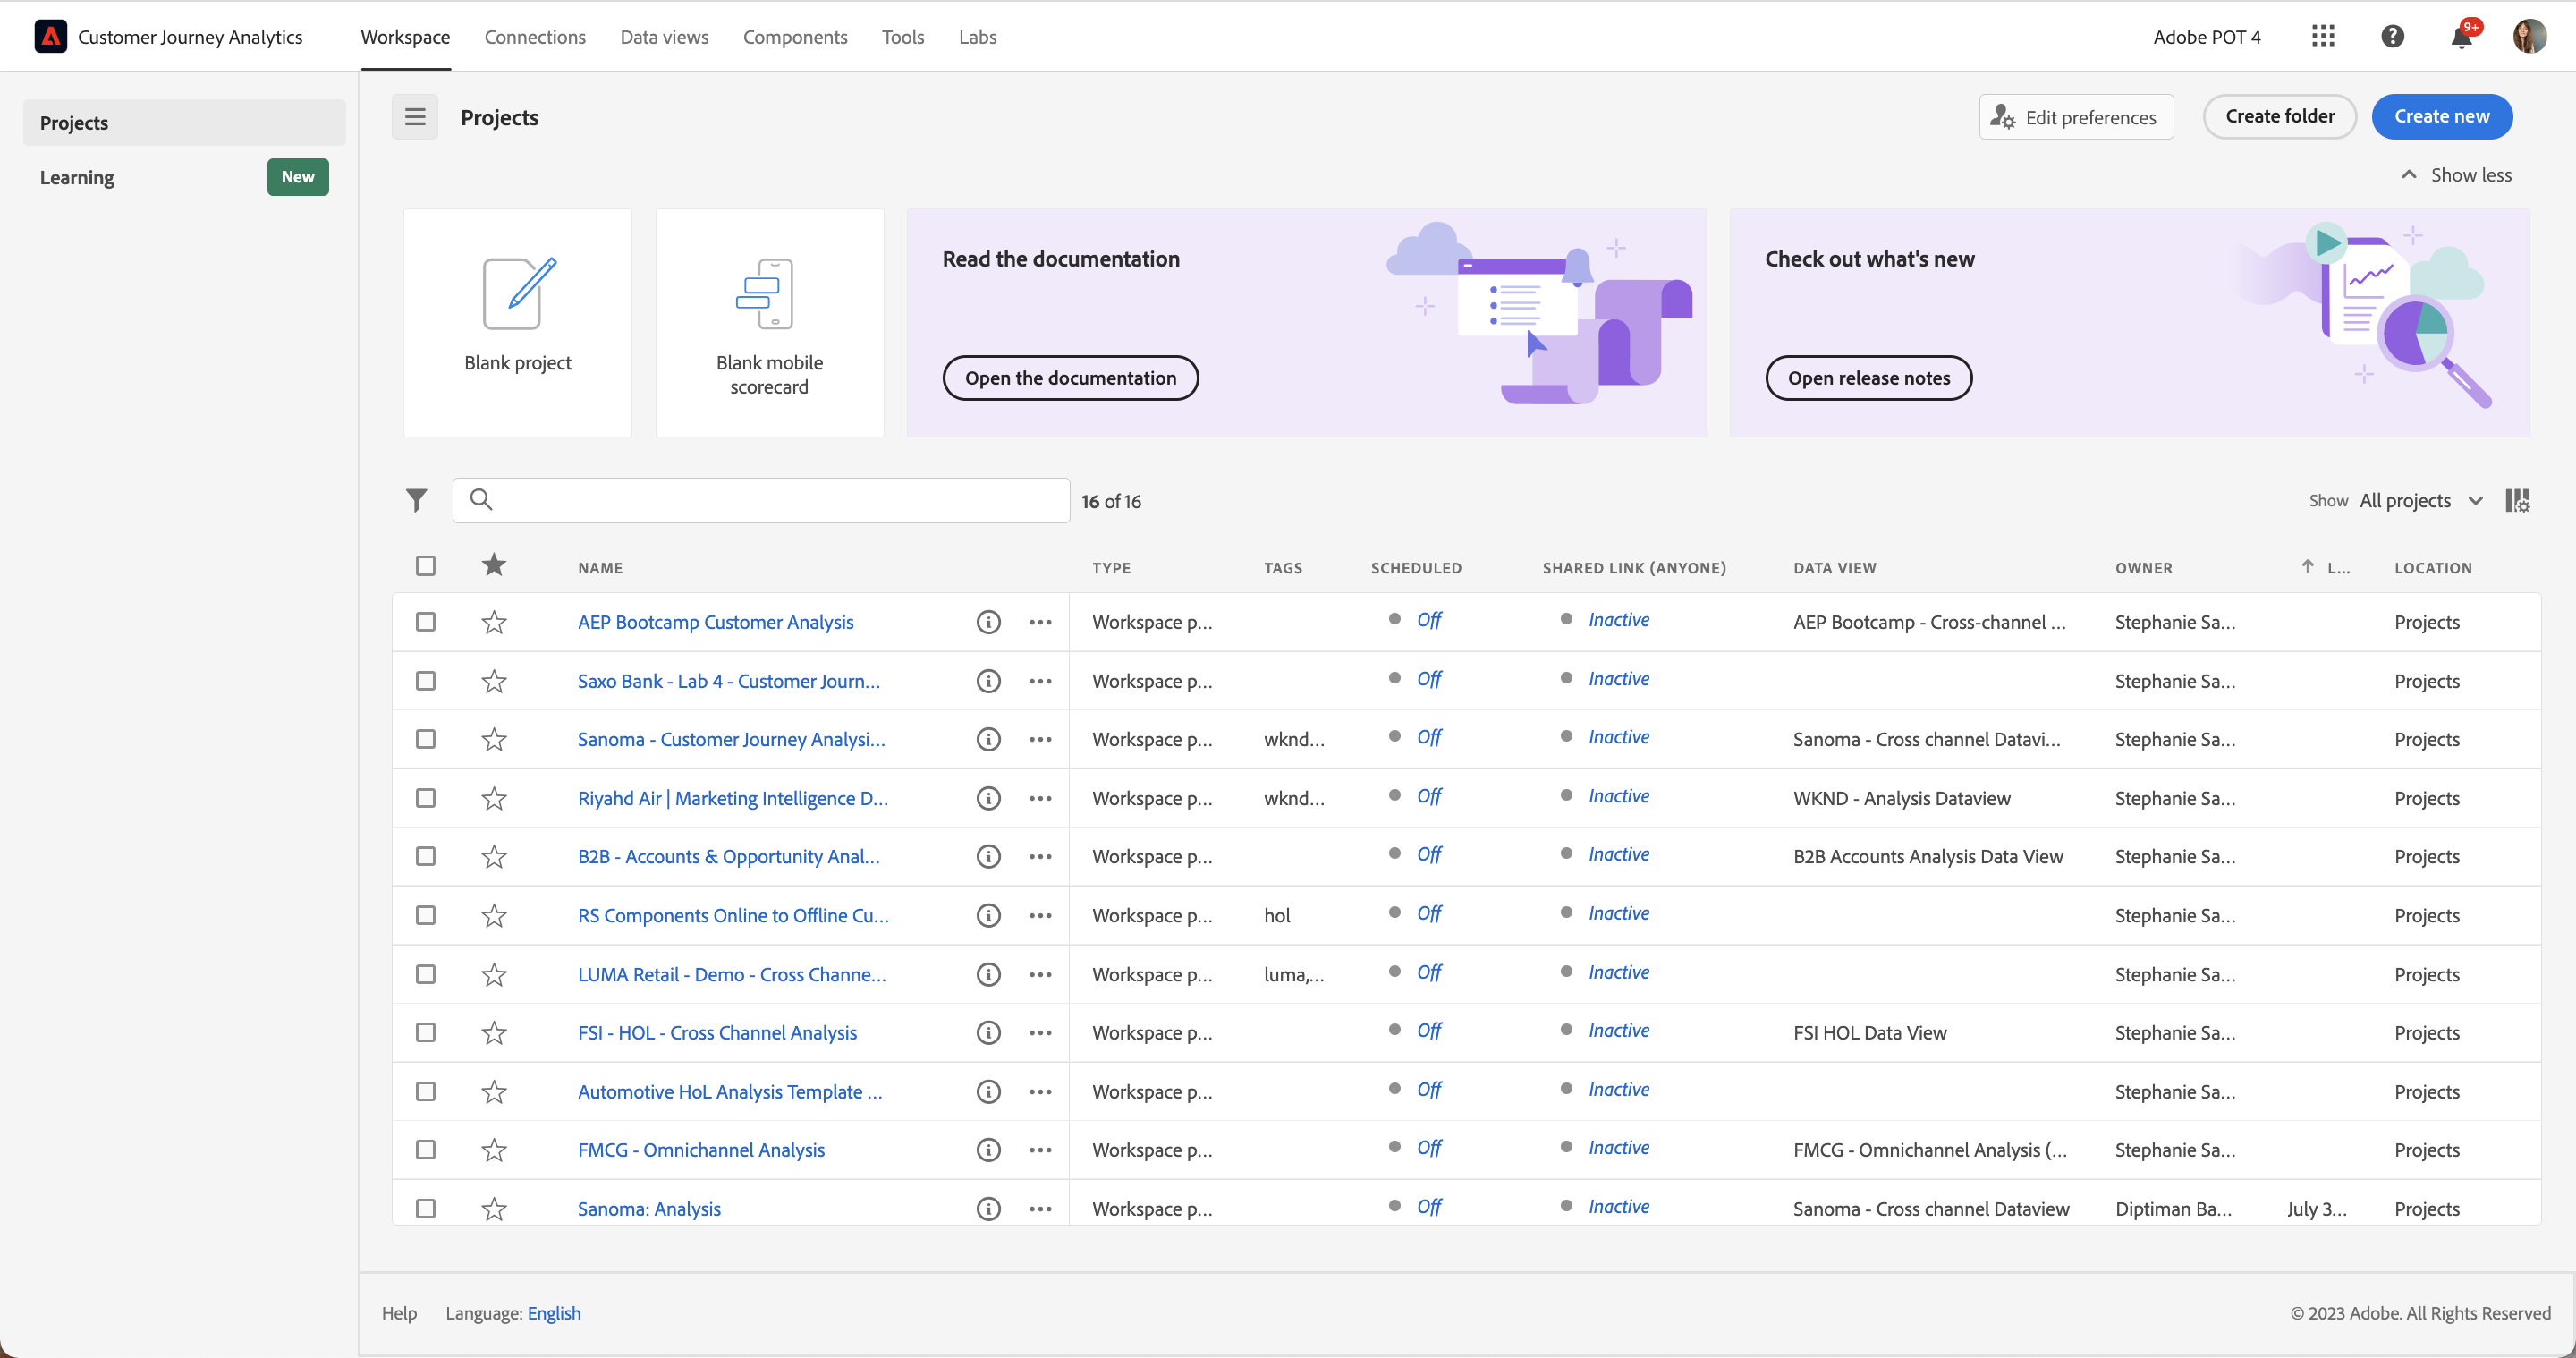
To get an overview of the available projects to you, click on Workspace -> Projects.
- Click on Create Project for a new Workspace project.
- From the pop-up, select Blank Workspace project, and click Create.
There is also a pre-built reference project, Travel Customer Analysis, if you want to preview the finished state at any point.
Creating your First Panel
IMPORTANT: numbers shown in this guide may differ slightly from your reports. All figures reflect the WKND Travel demo dataset.
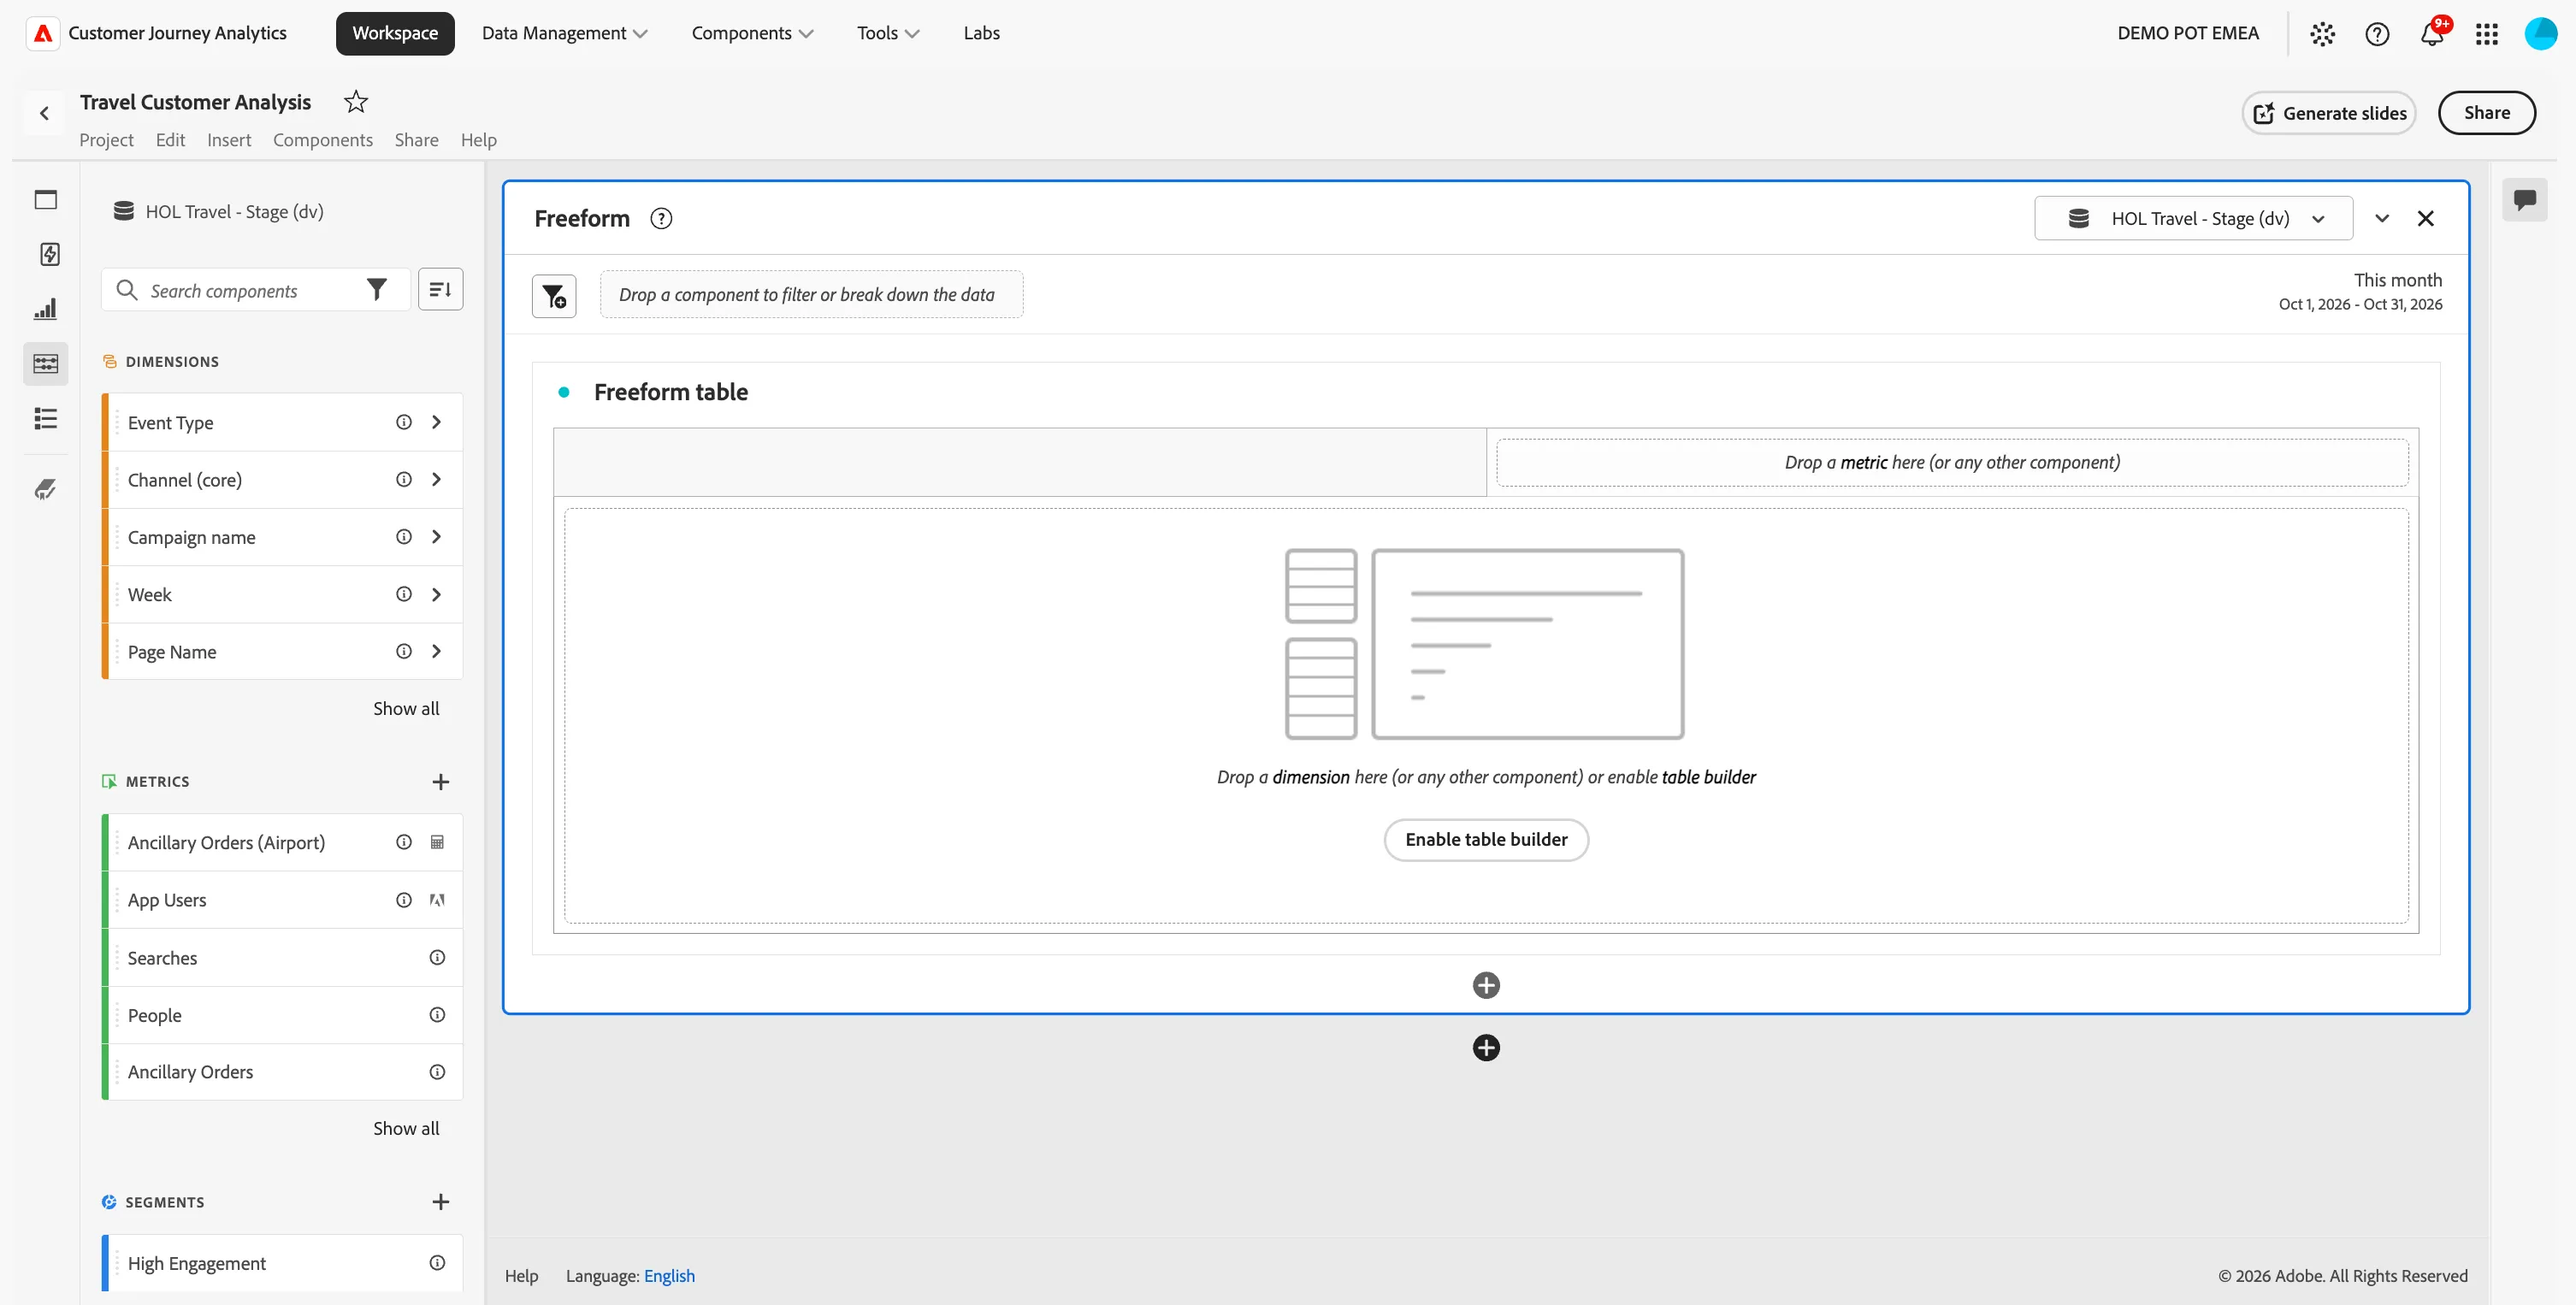
- Rename the project: click the title New project at the top and rename it {{LASTNAME}} - Travel Customer Analysis.
- There will be one panel in the Workspace already, click on the name to rename this as Key KPIs.
- Click the Data View dropdown at the top right of the panel and select {{ENV:CJA_DATA_VIEW}}.
Save often: Use Project > Save (or Cmd+S / Ctrl+S) after completing each section.
WKND's customer interactions arrive from distinct channels: web, mobile app, airport, and call centre. All interactions flow into AEP and are available in a single CJA data view.
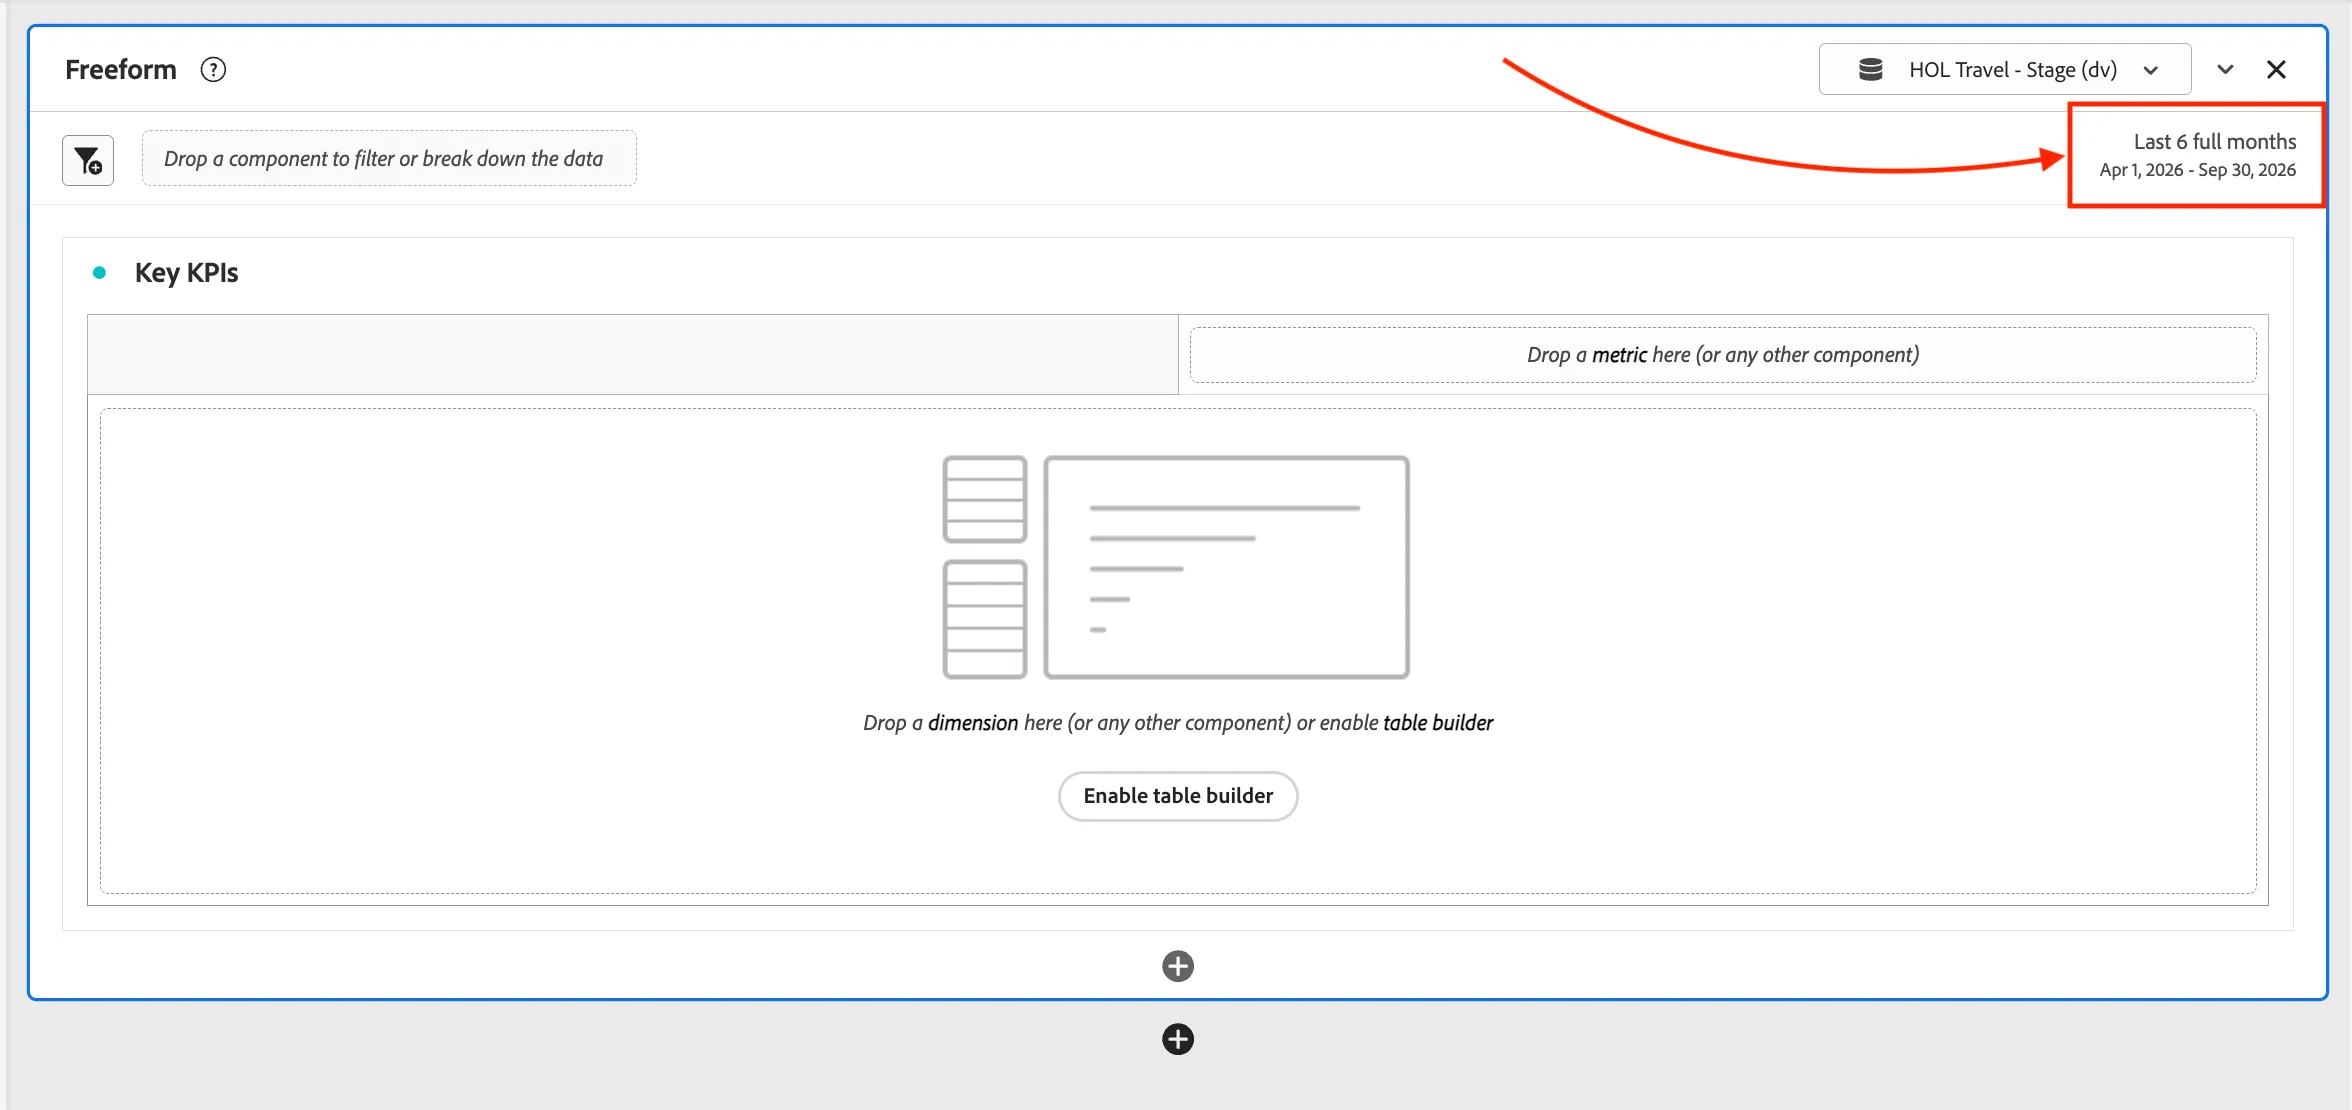
- Set the date range to Last 6 full months and click Apply to all panels.
- Click on Search Components in the left hand side panel.
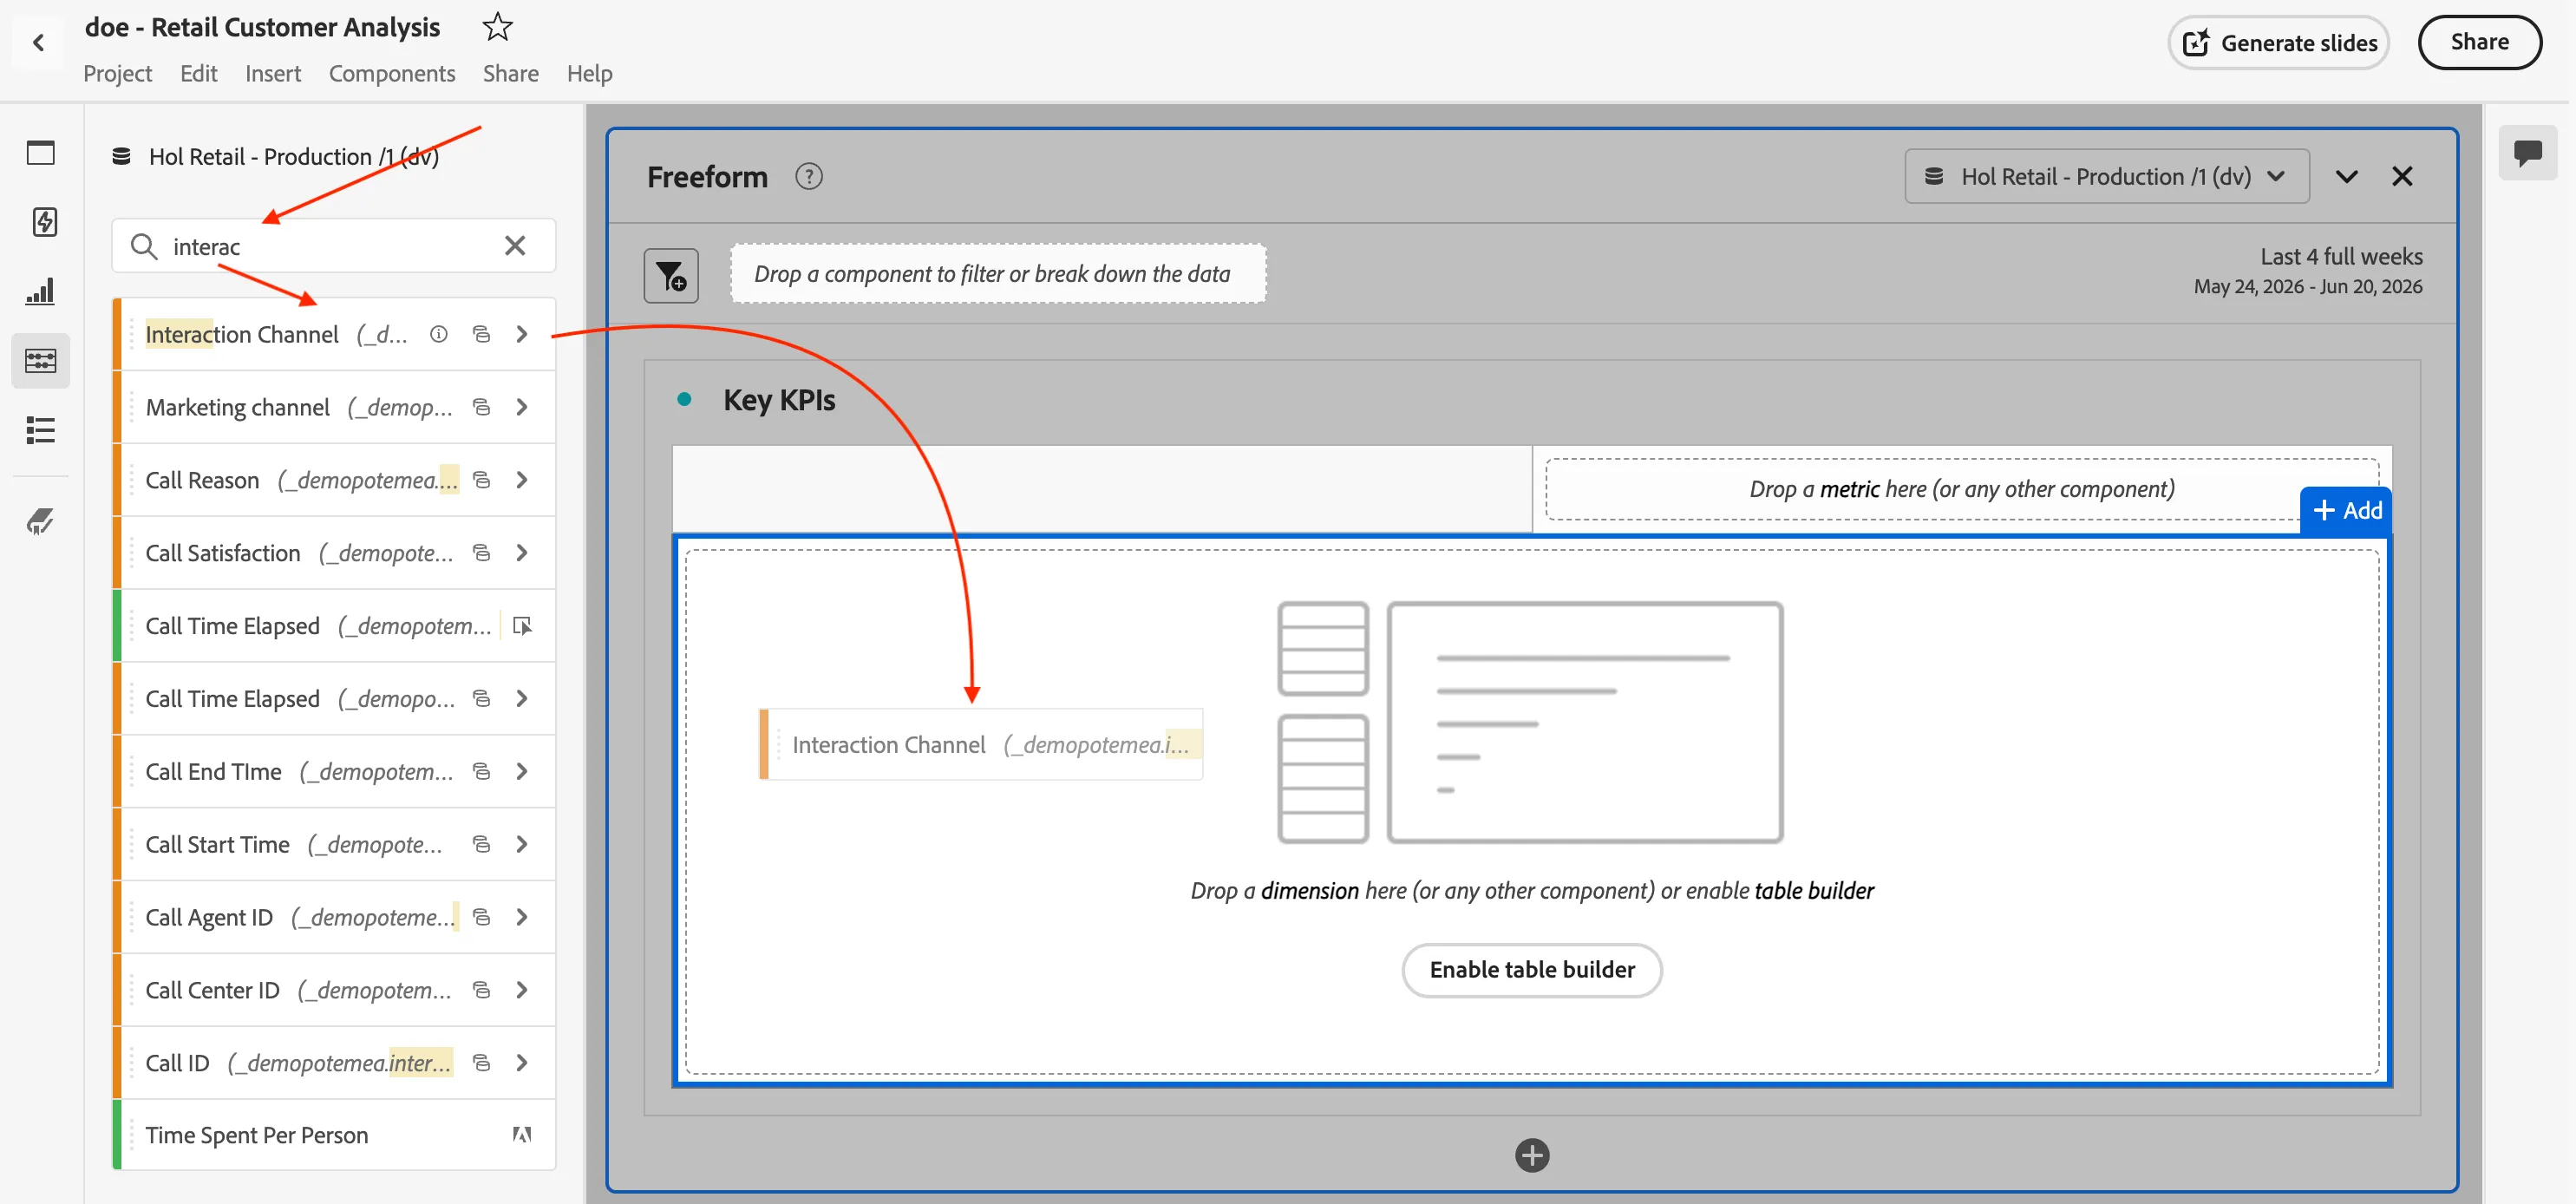
- Search for Interaction Channel, and drag this dimension (orange component) onto the main part of the freeform table. This will display the values in the Channel dimension with Events as the metric.
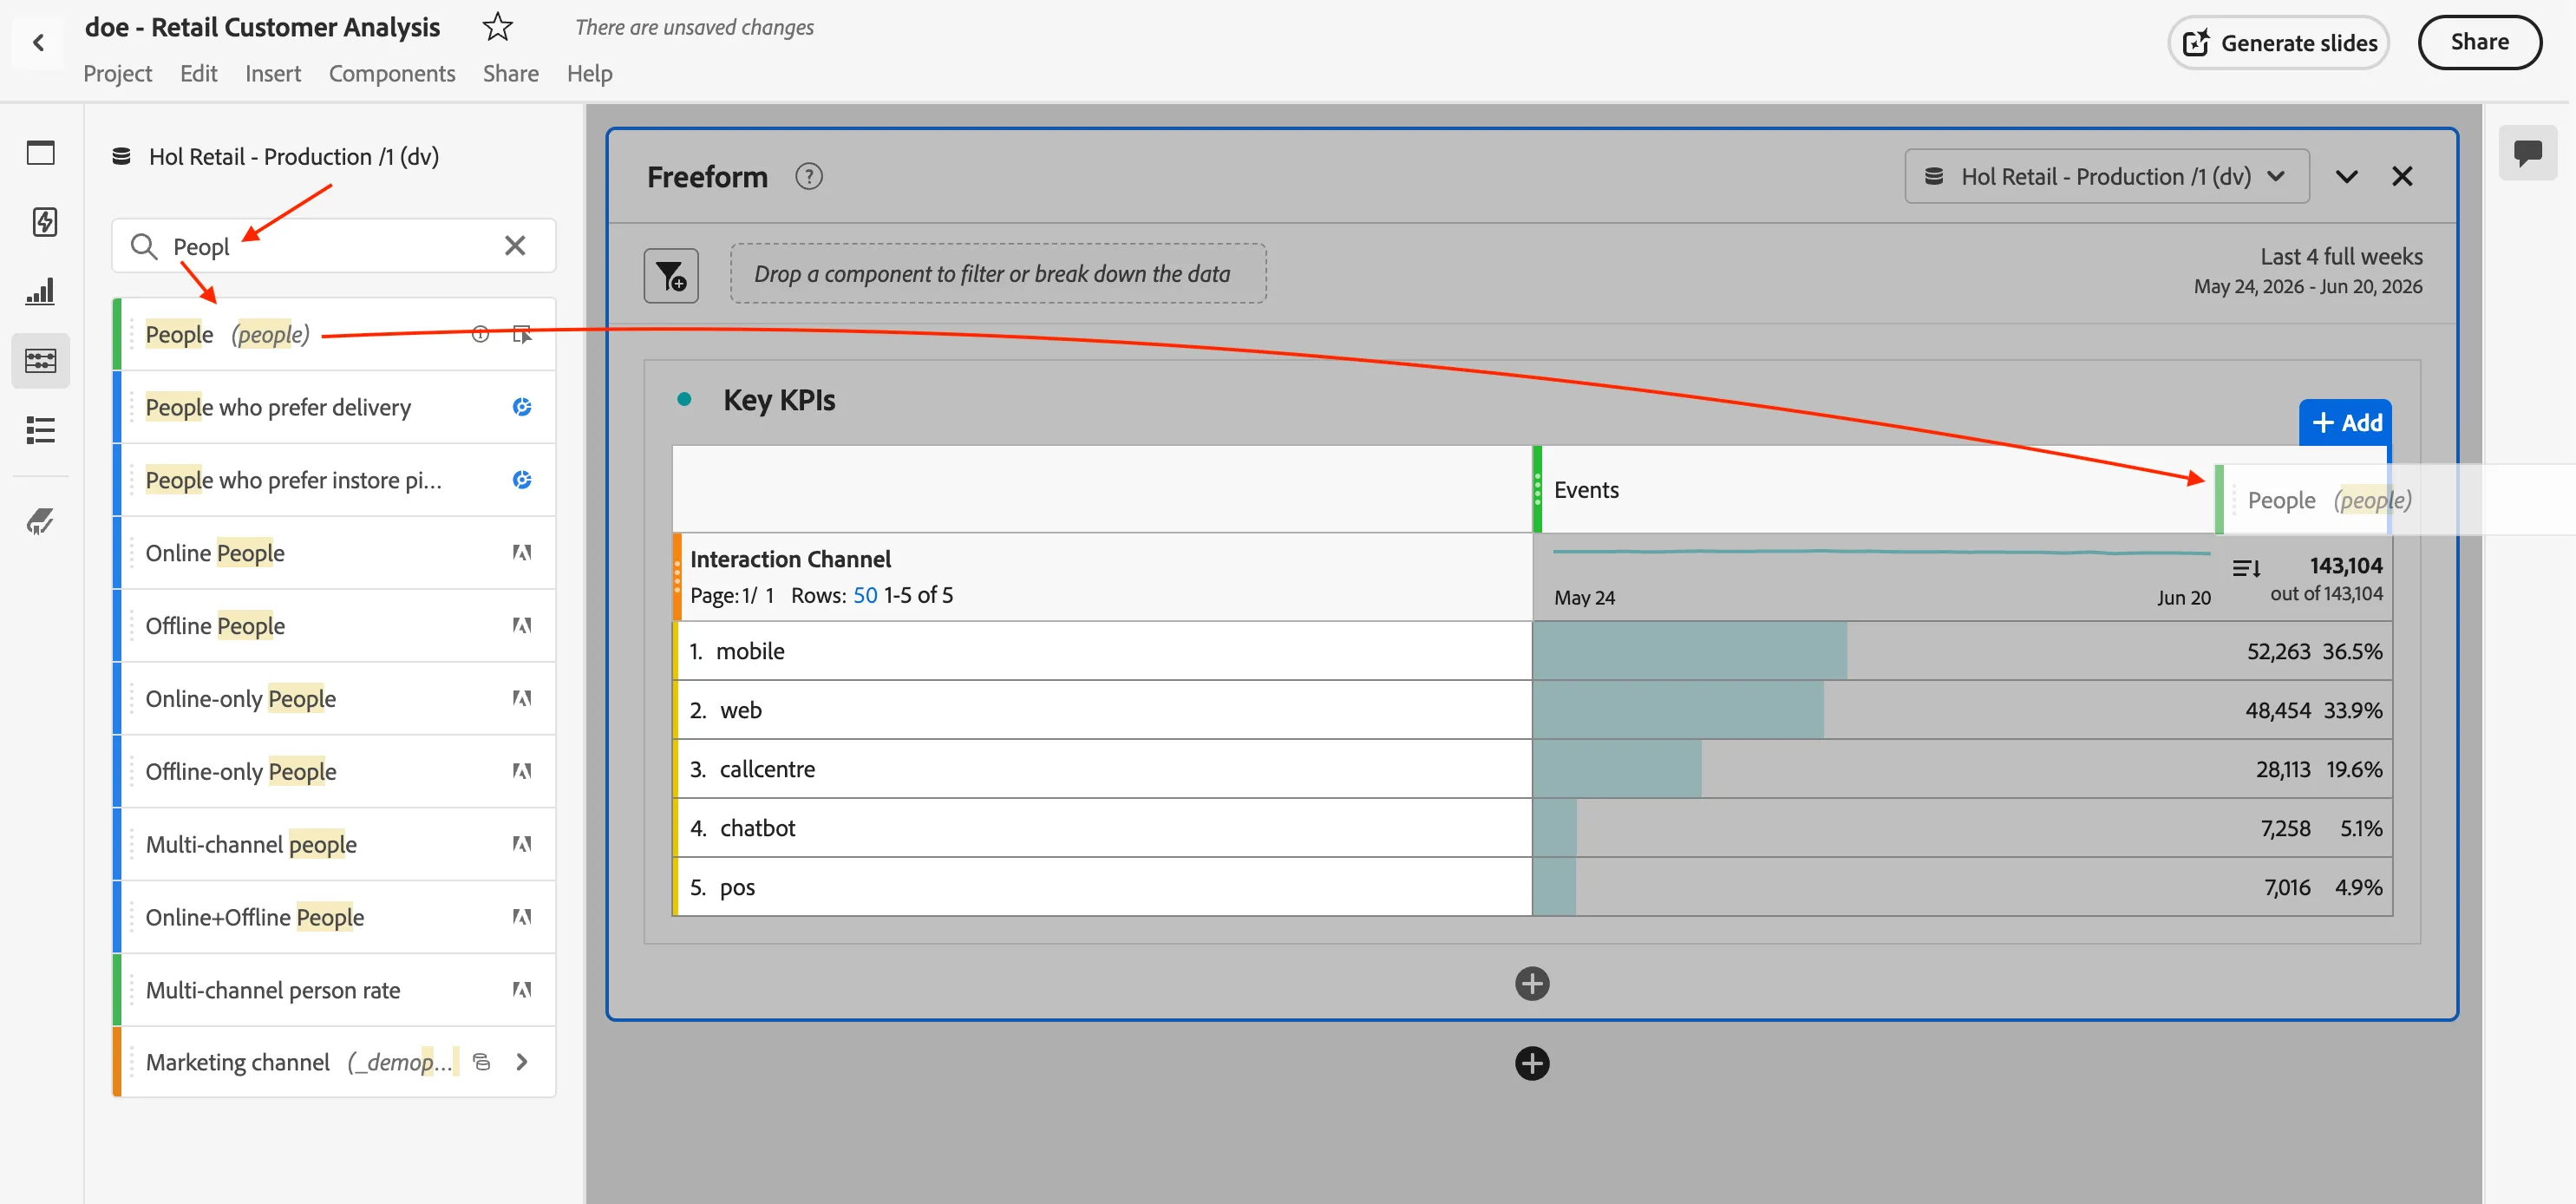
- Search now for People and drag it into the panel next to Events.
- Repeat the same for Sessions.
Your table will show five rows: Web, Mobile, Airport, Call Centre, and Email.
- In the freeform table, select multiple rows by clicking each one while holding the Shift key. Right-click on the selected rows, click on Visualize, then Donut. This will build out 3 donuts for you.
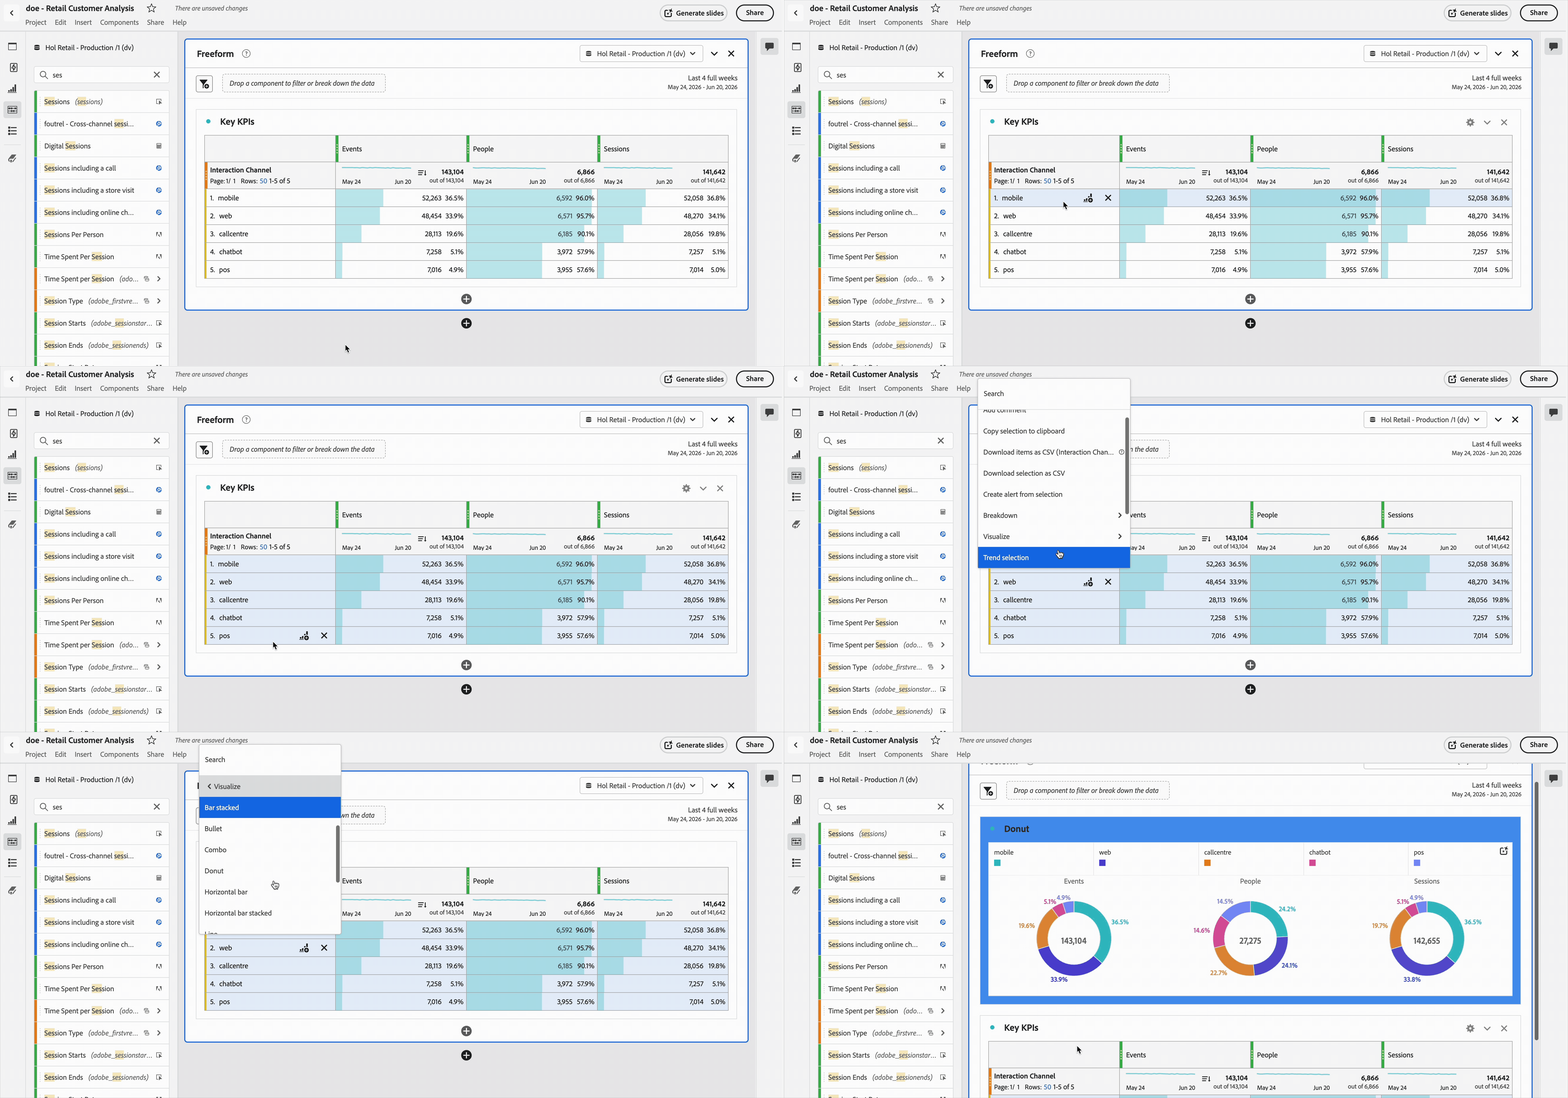
Save your changes: Use Project > Save (or Cmd+S / Ctrl+S).
You have now completed your first panel! Create some visualisations to see how customers interact across channels...