Journey Visualisation
IMPORTANT: numbers shown in this guide, including screenshots, may differ from your reports due to different underlying datasets.
Goals
- Understand where customers are falling out across the ancillary offer redemption journey after booking.
- Map the customer journey from offer presentation through to digital and airport ancillary purchases.
Offer Impact on Purchase Funnel
Scenario: Marketing wants to understand the full picture, from the moment a customer completes their booking to purchasing ancillary add-ons. Where are customers dropping out of the process? Are they shown an offer, if so, what impact does the offer have on ancillary purchases?
Task: Build a Fallout to visualise the complete journey from flight booking to ancillary offer redemption.
The Fallout visualisation is great for understanding customer paths when there are specific points or events you want to account for.
- Create a new panel by clicking the
 icon at the bottom of the page, outside the panel.
- Label it Journey Visualisation.
- Add a Fallout visualisation into the panel by clicking the
 icon
- Label it Booking Funnel.
- Set the date range to Last 6 full months.
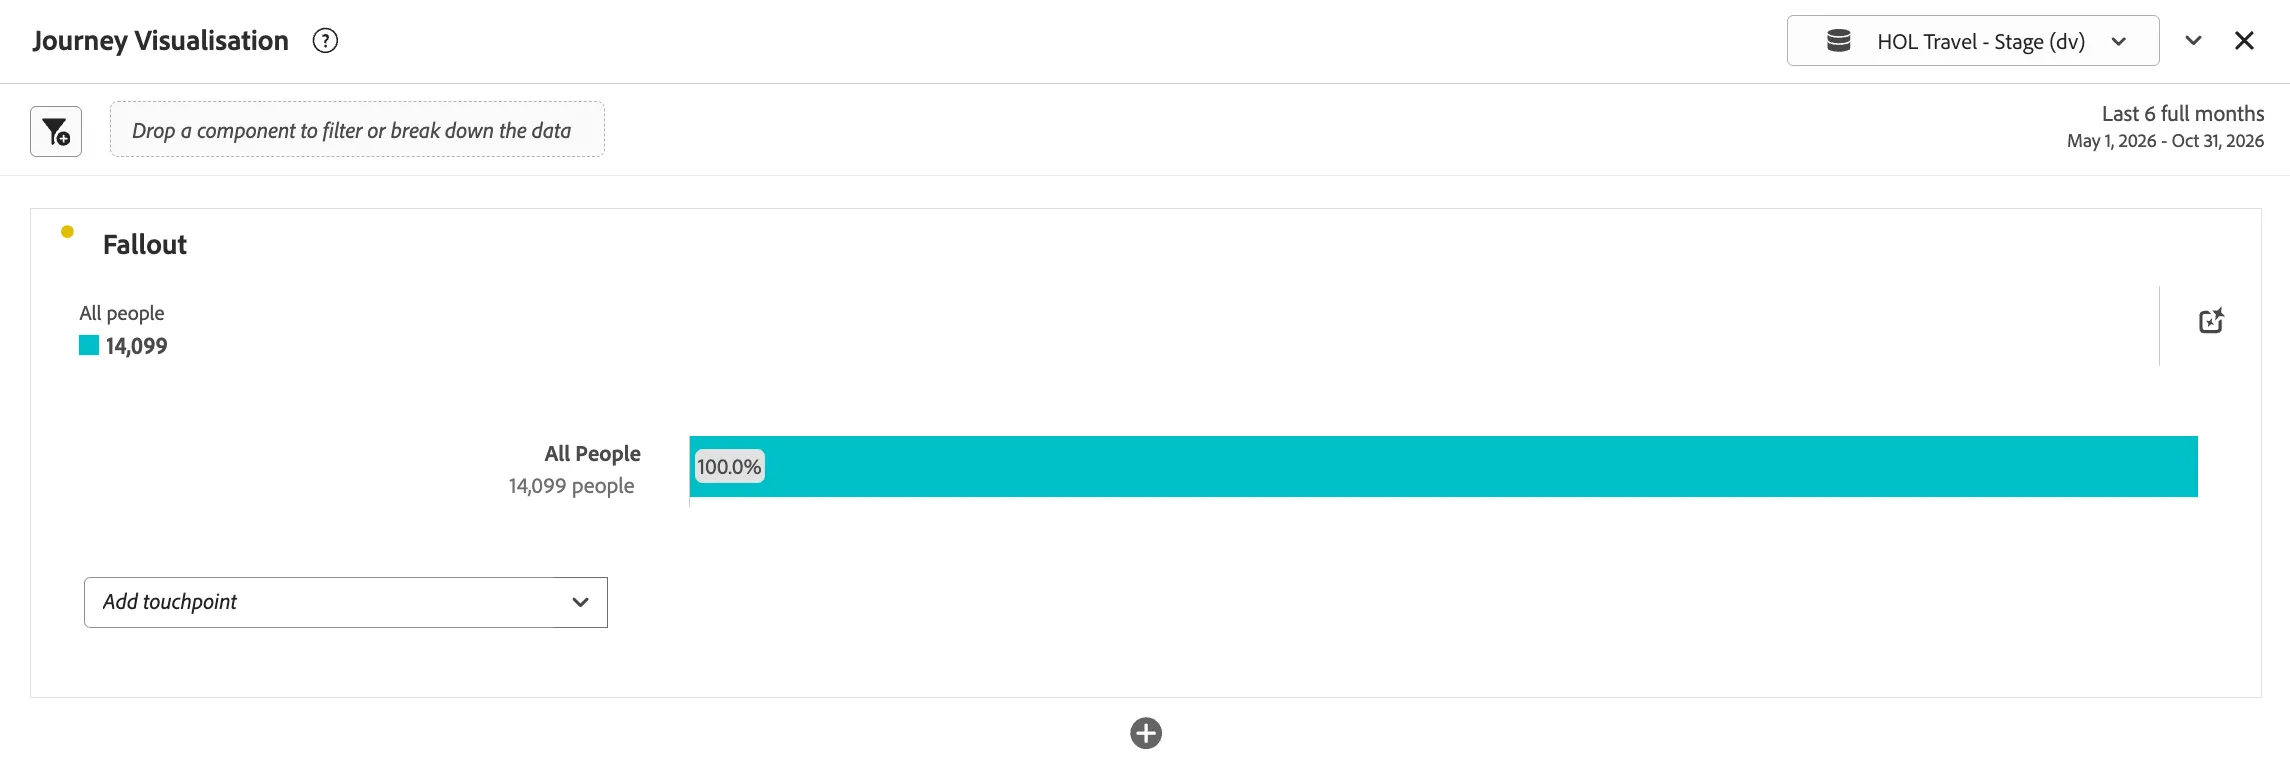
The Fallout visualisation requires touch points in the process you want to measure fall-through as well as fall-out for.
- From the Components menu, search for Event Type
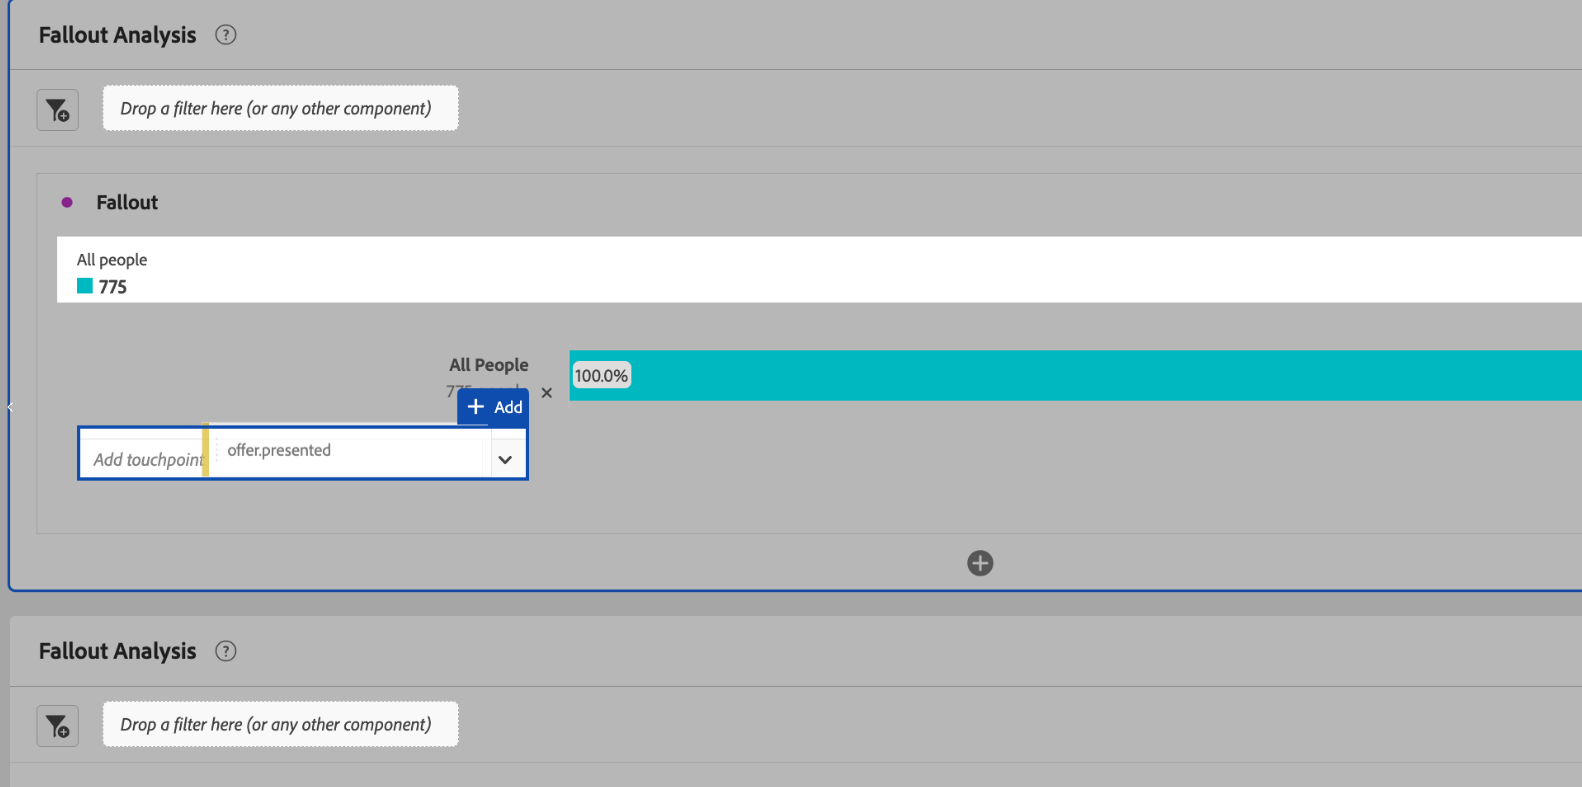
- Click the arrow to the right to expand the list of values, and drag the following touchpoints onto the funnel in order:
- booking.completed → rename Completed booking
- offer.proposed → rename Has been presented an offer
- offer.viewed → rename Has viewed the offer
- offer.redeemed → rename Has redeemed the offer
Your Fallout should look like this:
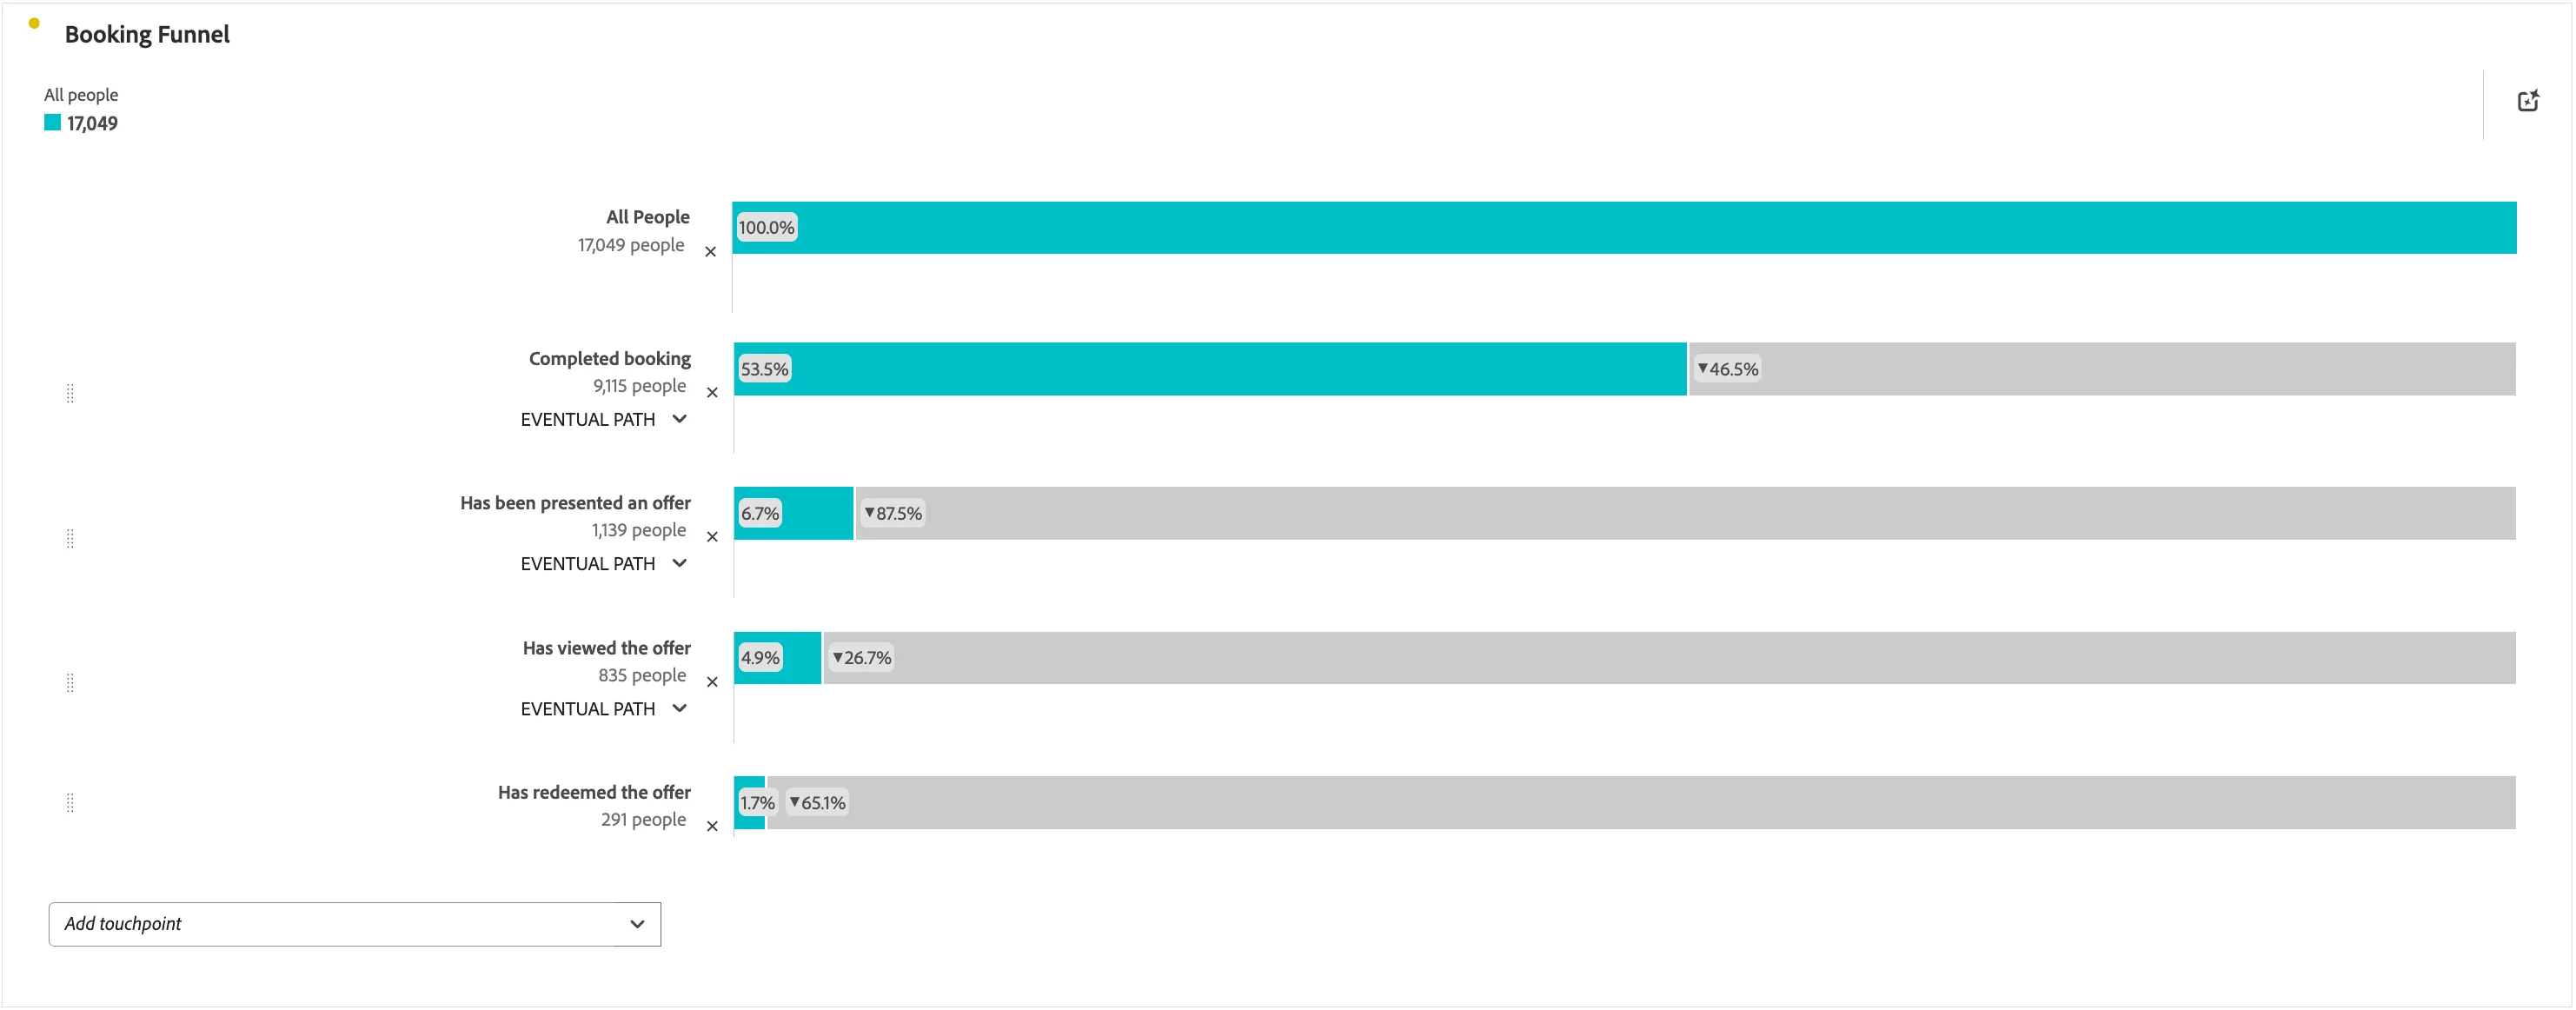
From the completed bookings, a subset of customers have been presented with an ancillary offer, and a subset of these customers redeem the ancillary offer. Which offers are being presented to customers before they drop-off?
To investigate which offers are being shown to the customers who have viewed but did not redeem the offer.
- Right-click the Has Viewed the offer touchpoint and select Breakdown by Fallout at this touchpoint. A freeform table is generated showing customers who viewed an offer but did not redeem it.
- Replace Event Type with Offer Name.
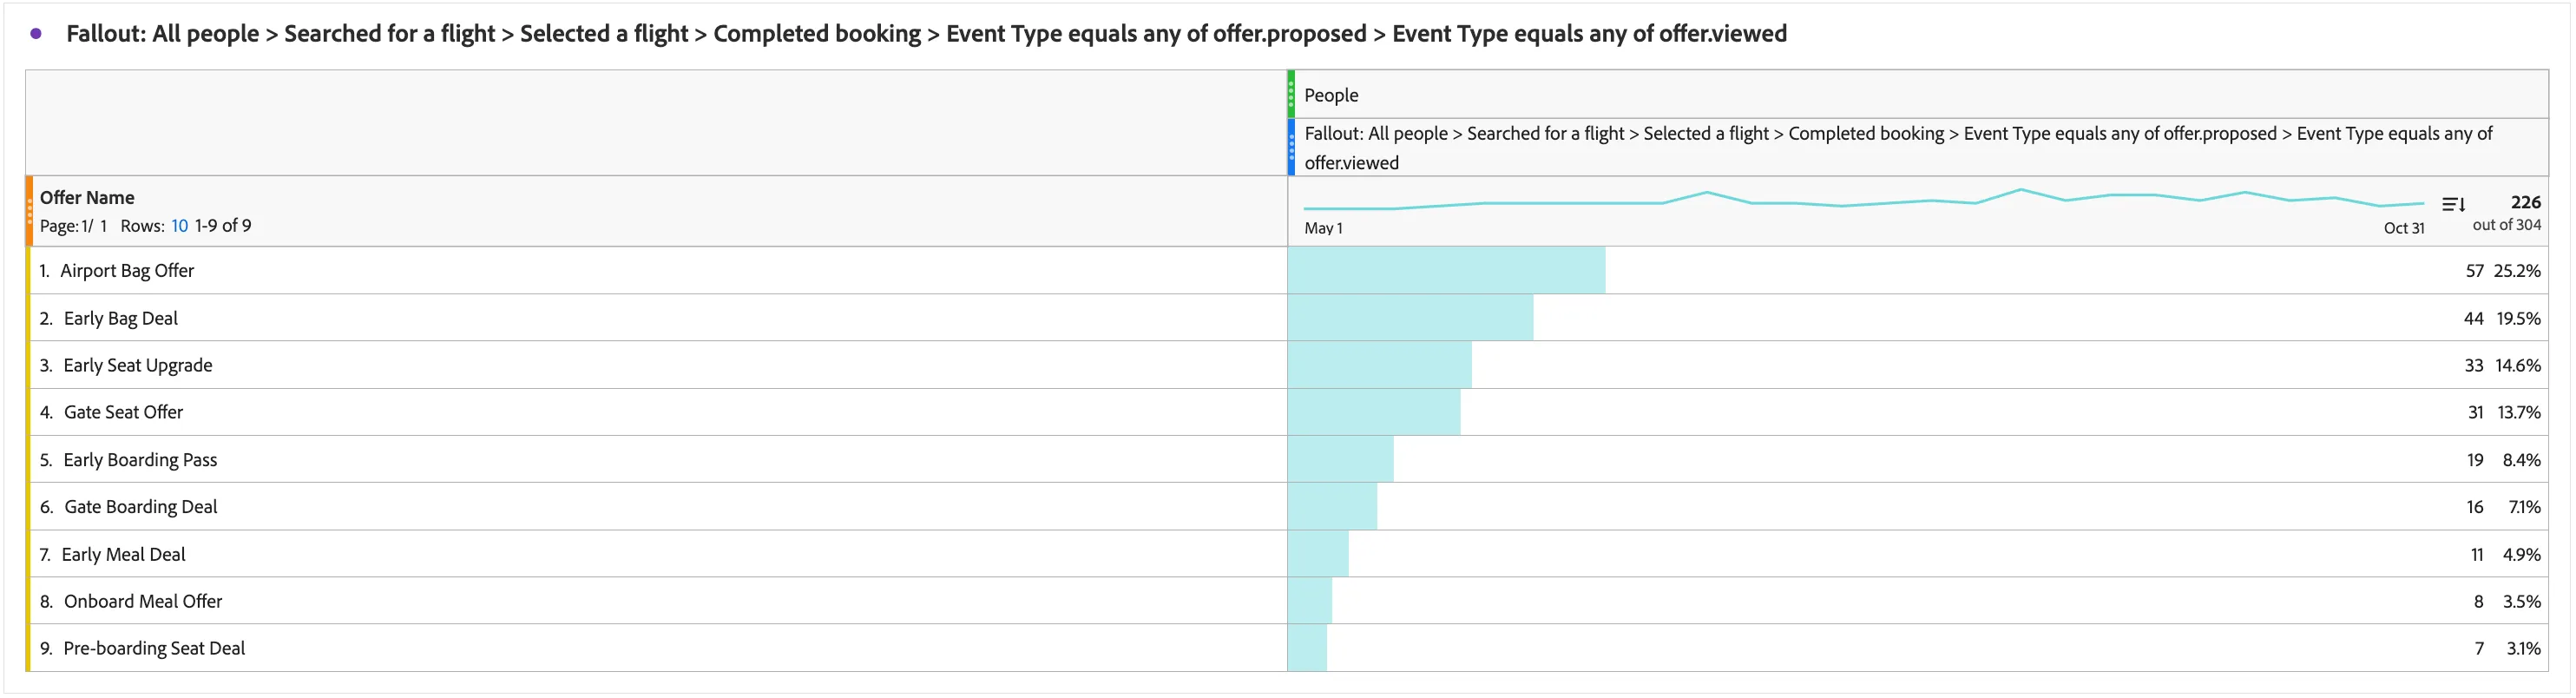
The ancillary offers presented to customers that were not redeemed follow a pattern. They are the "Early" offers presented at the time of booking, and the "Airport" offers available at the check-in desk.
WKND wants to increase the ancillary offer redemptions. Is there a better time in the customer journey to present the offer?
The Fallout has told us the scale of the opportunity. The Journey Canvas will now show us the path these customer took following their booking.
Save your Changes: Use Project > Save (or Cmd+S / Ctrl+S) after completing each section.
Digital to Airport Journey Mapping
Scenario: The e-commerce team want to understand how many customers engaged with an ancillary offer digitally but still ended up at the airport desk. They want to identify which ancillary types are most affected and target these customers with offers exclusive to digital purchase to bring the sale forward.
Task: Create a Journey Canvas to visualise the paths customers take after receiving an ancillary offer.
The Journey Canvas is a great way to get a complete picture of the journey your customers are taking regardless of its complexity.
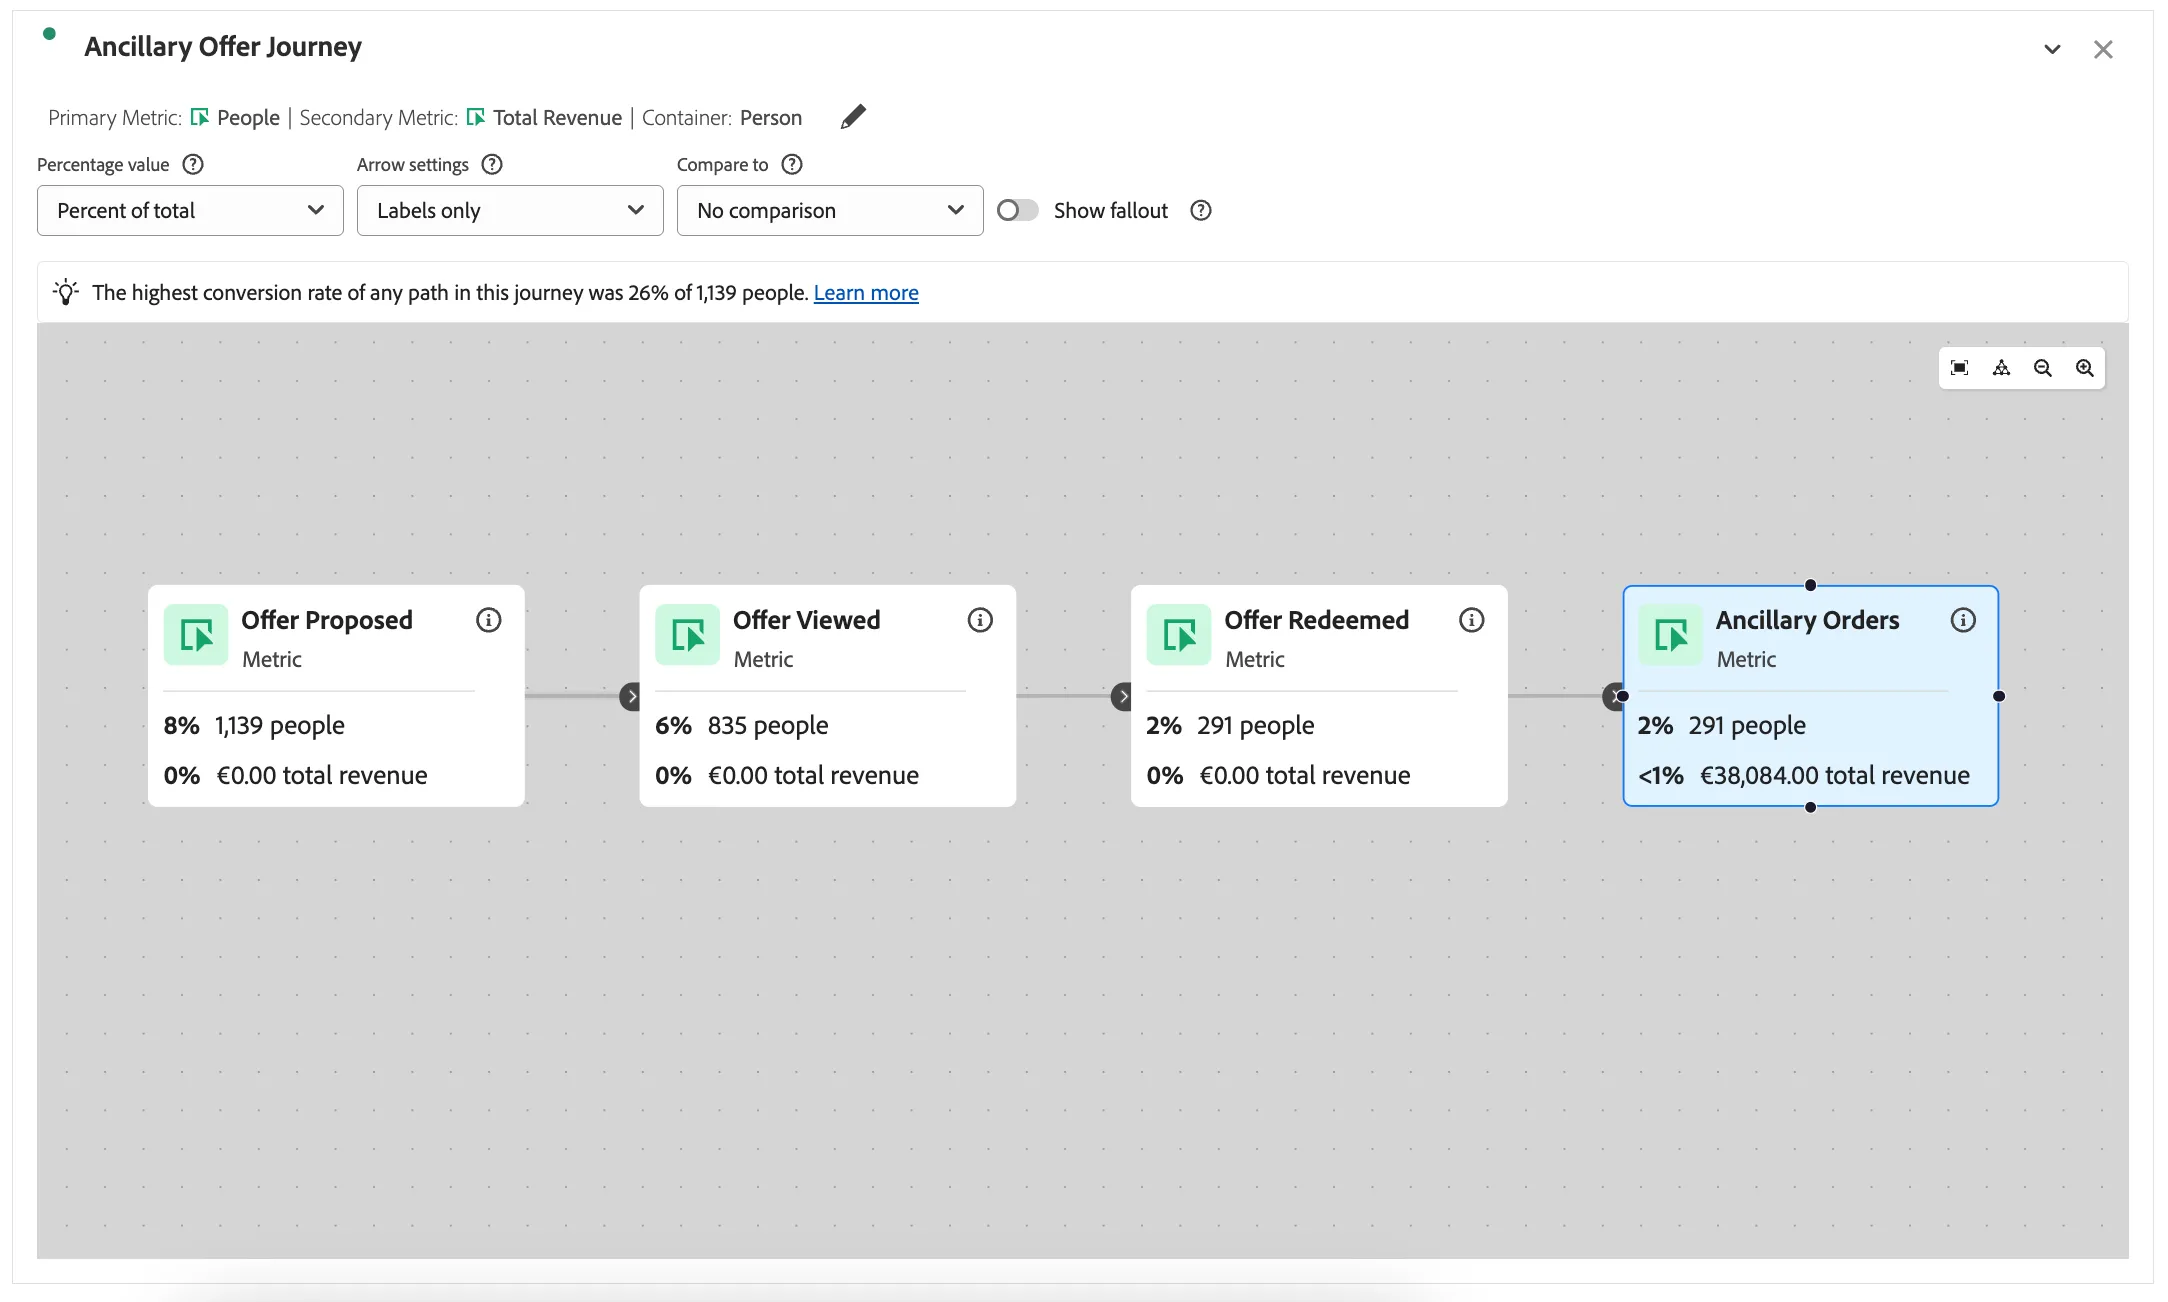
- Add a Journey Canvas visualisation and label it Ancillary Offer Journey.
- Select Total Revenue as the secondary metric and click Build.
- Drag Offer Proposed into the canvas as the entry node (customers who received an offer).
- Drag Offer Viewed into the canvas and connect it to the entry node (customers who engaged with the offer).
- Drag Offer Redeemed into the canvas and connect it to Offer Viewed.
- Drag Ancillary Orders into the canvas and connect it to Offer Redeemed - this is the successful path where the offer was accepted and an ancillary was purchased digitally.
- Drag a second Ancillary Orders metric node and connect it to Offer Viewed as a separate branch.
- Breakdown this second Ancillary Orders node by the segment Sessions including airport (drag and drop the segment from the left components over the Ancillary orders node) - to filter it to airport purchases only.
- Breakdown this airport node by Offer Name - drag the Offer Name dimension over the node.
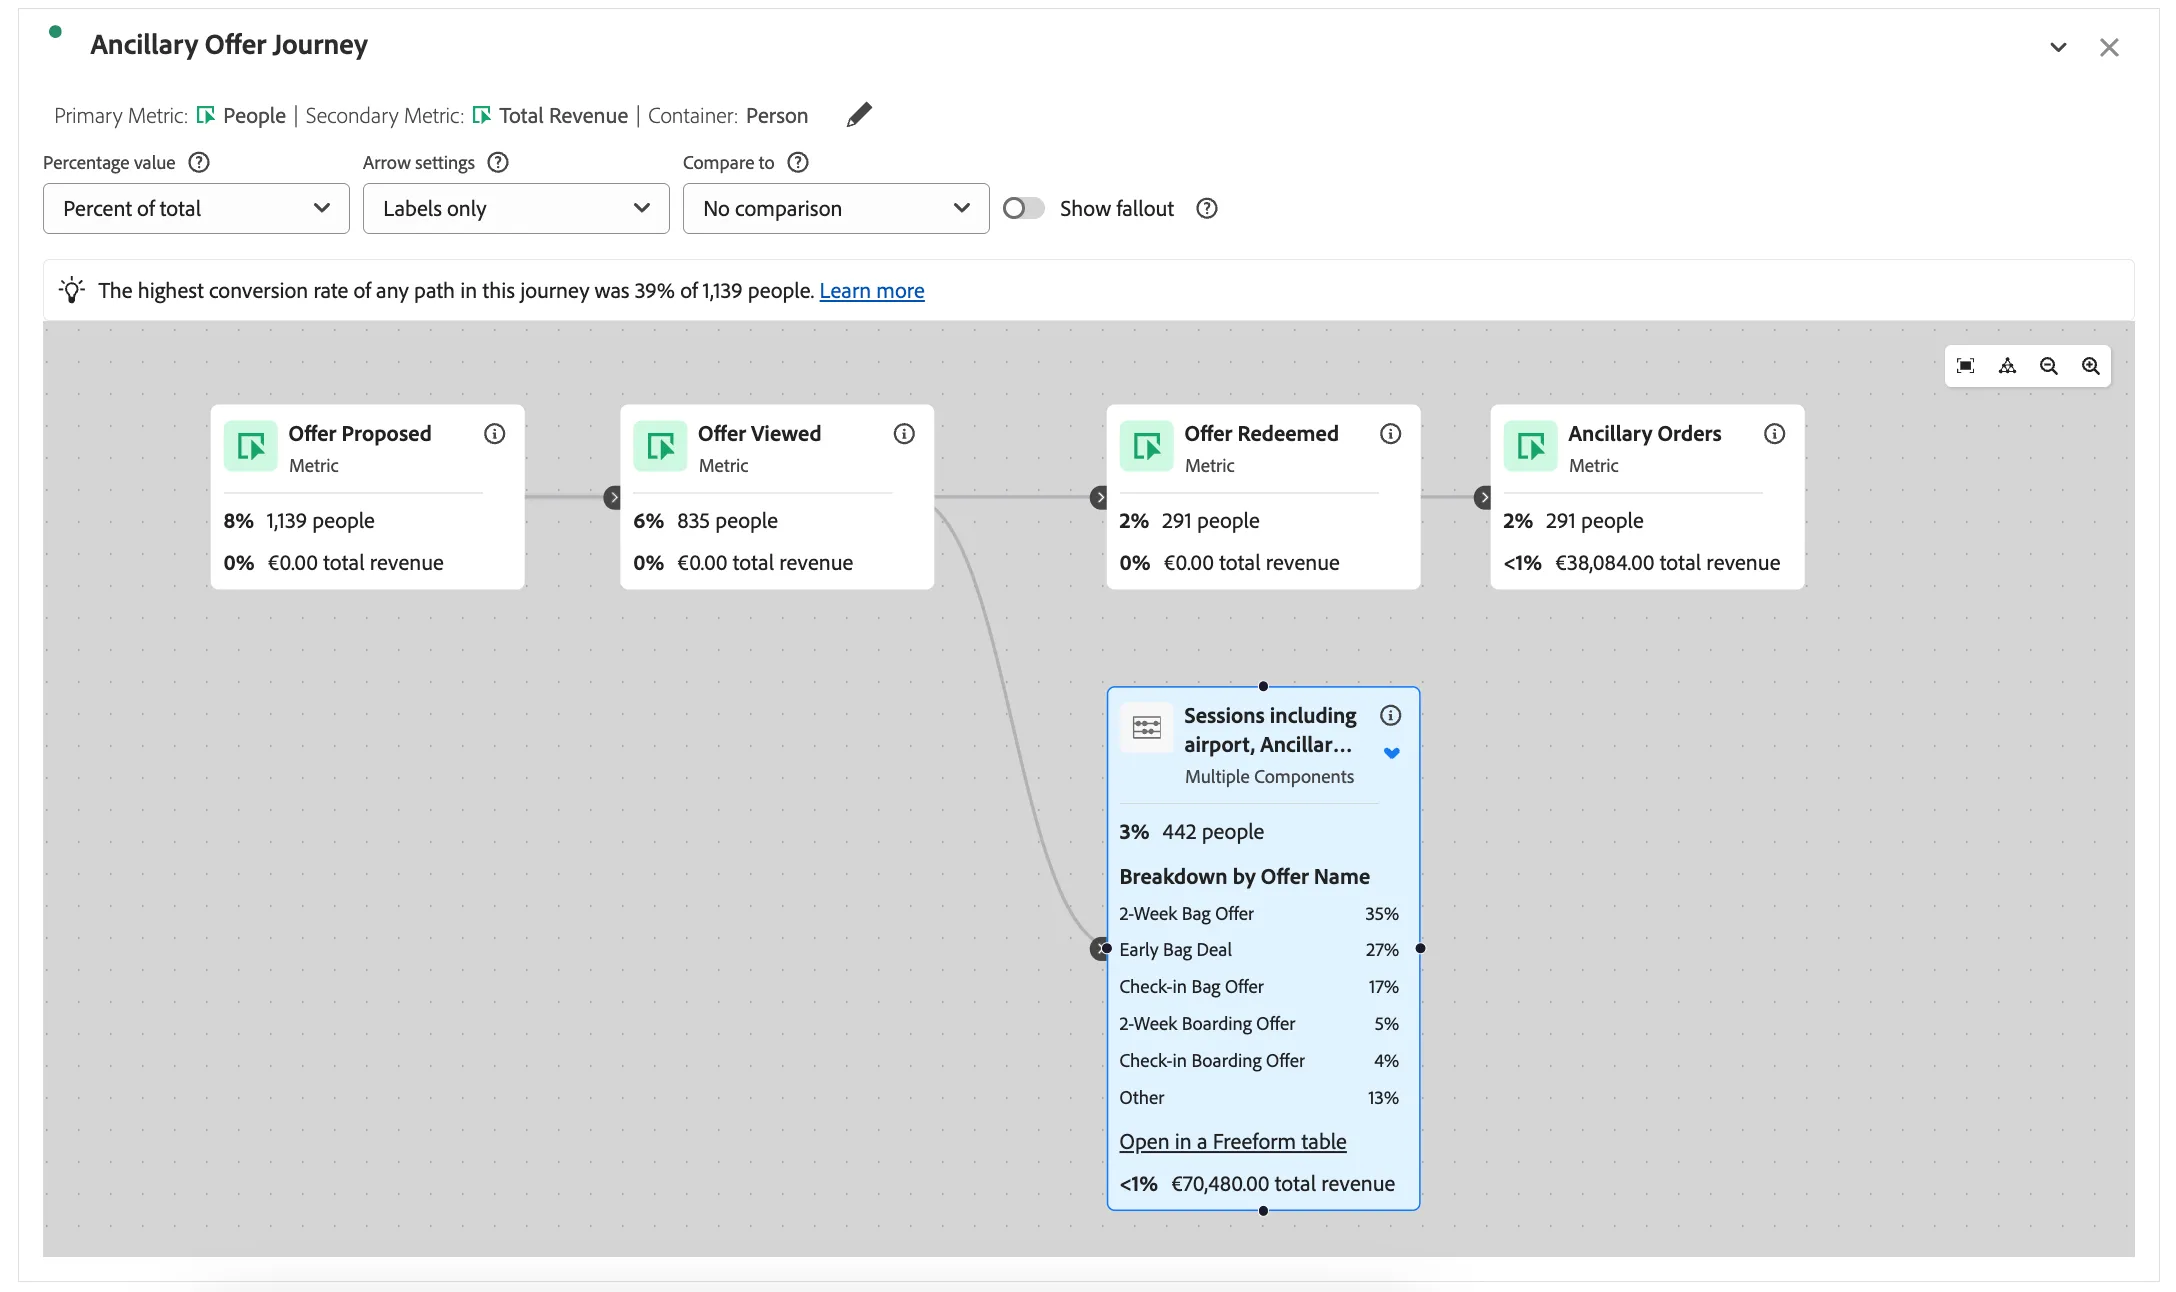
The breakdown of the airport purchase node is interesting. Customers who viewed an offer on the digital channel sometimes bought the same product at the airport desk weeks later. Offers such as "Early Bag Deal" were offered at booking time, but forgotten by the time they travelled
Conclusion: A check-in window offer could close the gap between viewing an offer and acting on it.
Save your changes: Use Project > Save (or Cmd+S / Ctrl+S).
Congratulations, this completes the Journey Visualisation exercise!