Improving the journey
Coworker drafted the journey structure now to add the details in Journey Optimizer.
After research we concluded that there is an opportunity to improve this journey. We're now going to update the journey so we can:
- Optimise the email send time based on the customer's prior behaviour.
- Upgrade the email text to be more engaging.
- Add personalised offers to upsell ancillaries.
- Add an exit criteria for customers that cancel their booking.
Open your journey
- In the menu, under Journey Management, click on Journeys and open the Browse tab.
- Find and open the Journey you created [{{LASTNAME}}] - Engage - Upcoming flight
If you didn't complete your Journey structure in the Create the journey exercise, you can start from an example journey.
Duplicate the [Example] [Before] Engage - Upcoming flight Journey and replace the entire name with [{{LASTNAME}}] - Engage - Upcoming flight.
Email - Upcoming flight
We want to improve the current email by making it more engaging and adding personalised ancillary offers.
- Click on the Email activity to open the detailed view.
- Click on Configure action.
- Enable Send time optimization
 and choose to Optimize send time for Opens and set it to send within next 6 hours
Adobe Journey Optimizer’s Send-Time Optimization feature, powered by Adobe’s Journey AI services, chooses the optimal send time for email and push messages to maximise customer engagement, based on your customers’ historical open and click behavior.
- Click on Edit content to finish designing your email.
- Toggle Enable decisioning
We'll be importing the email content from a Content template.
- Click on Edit email body.
- Under Select design template open the Saved templates tab.
- Select the template [Example] Upcoming flight.
- Finalise by clicking on Use this template. The email designer will now open.
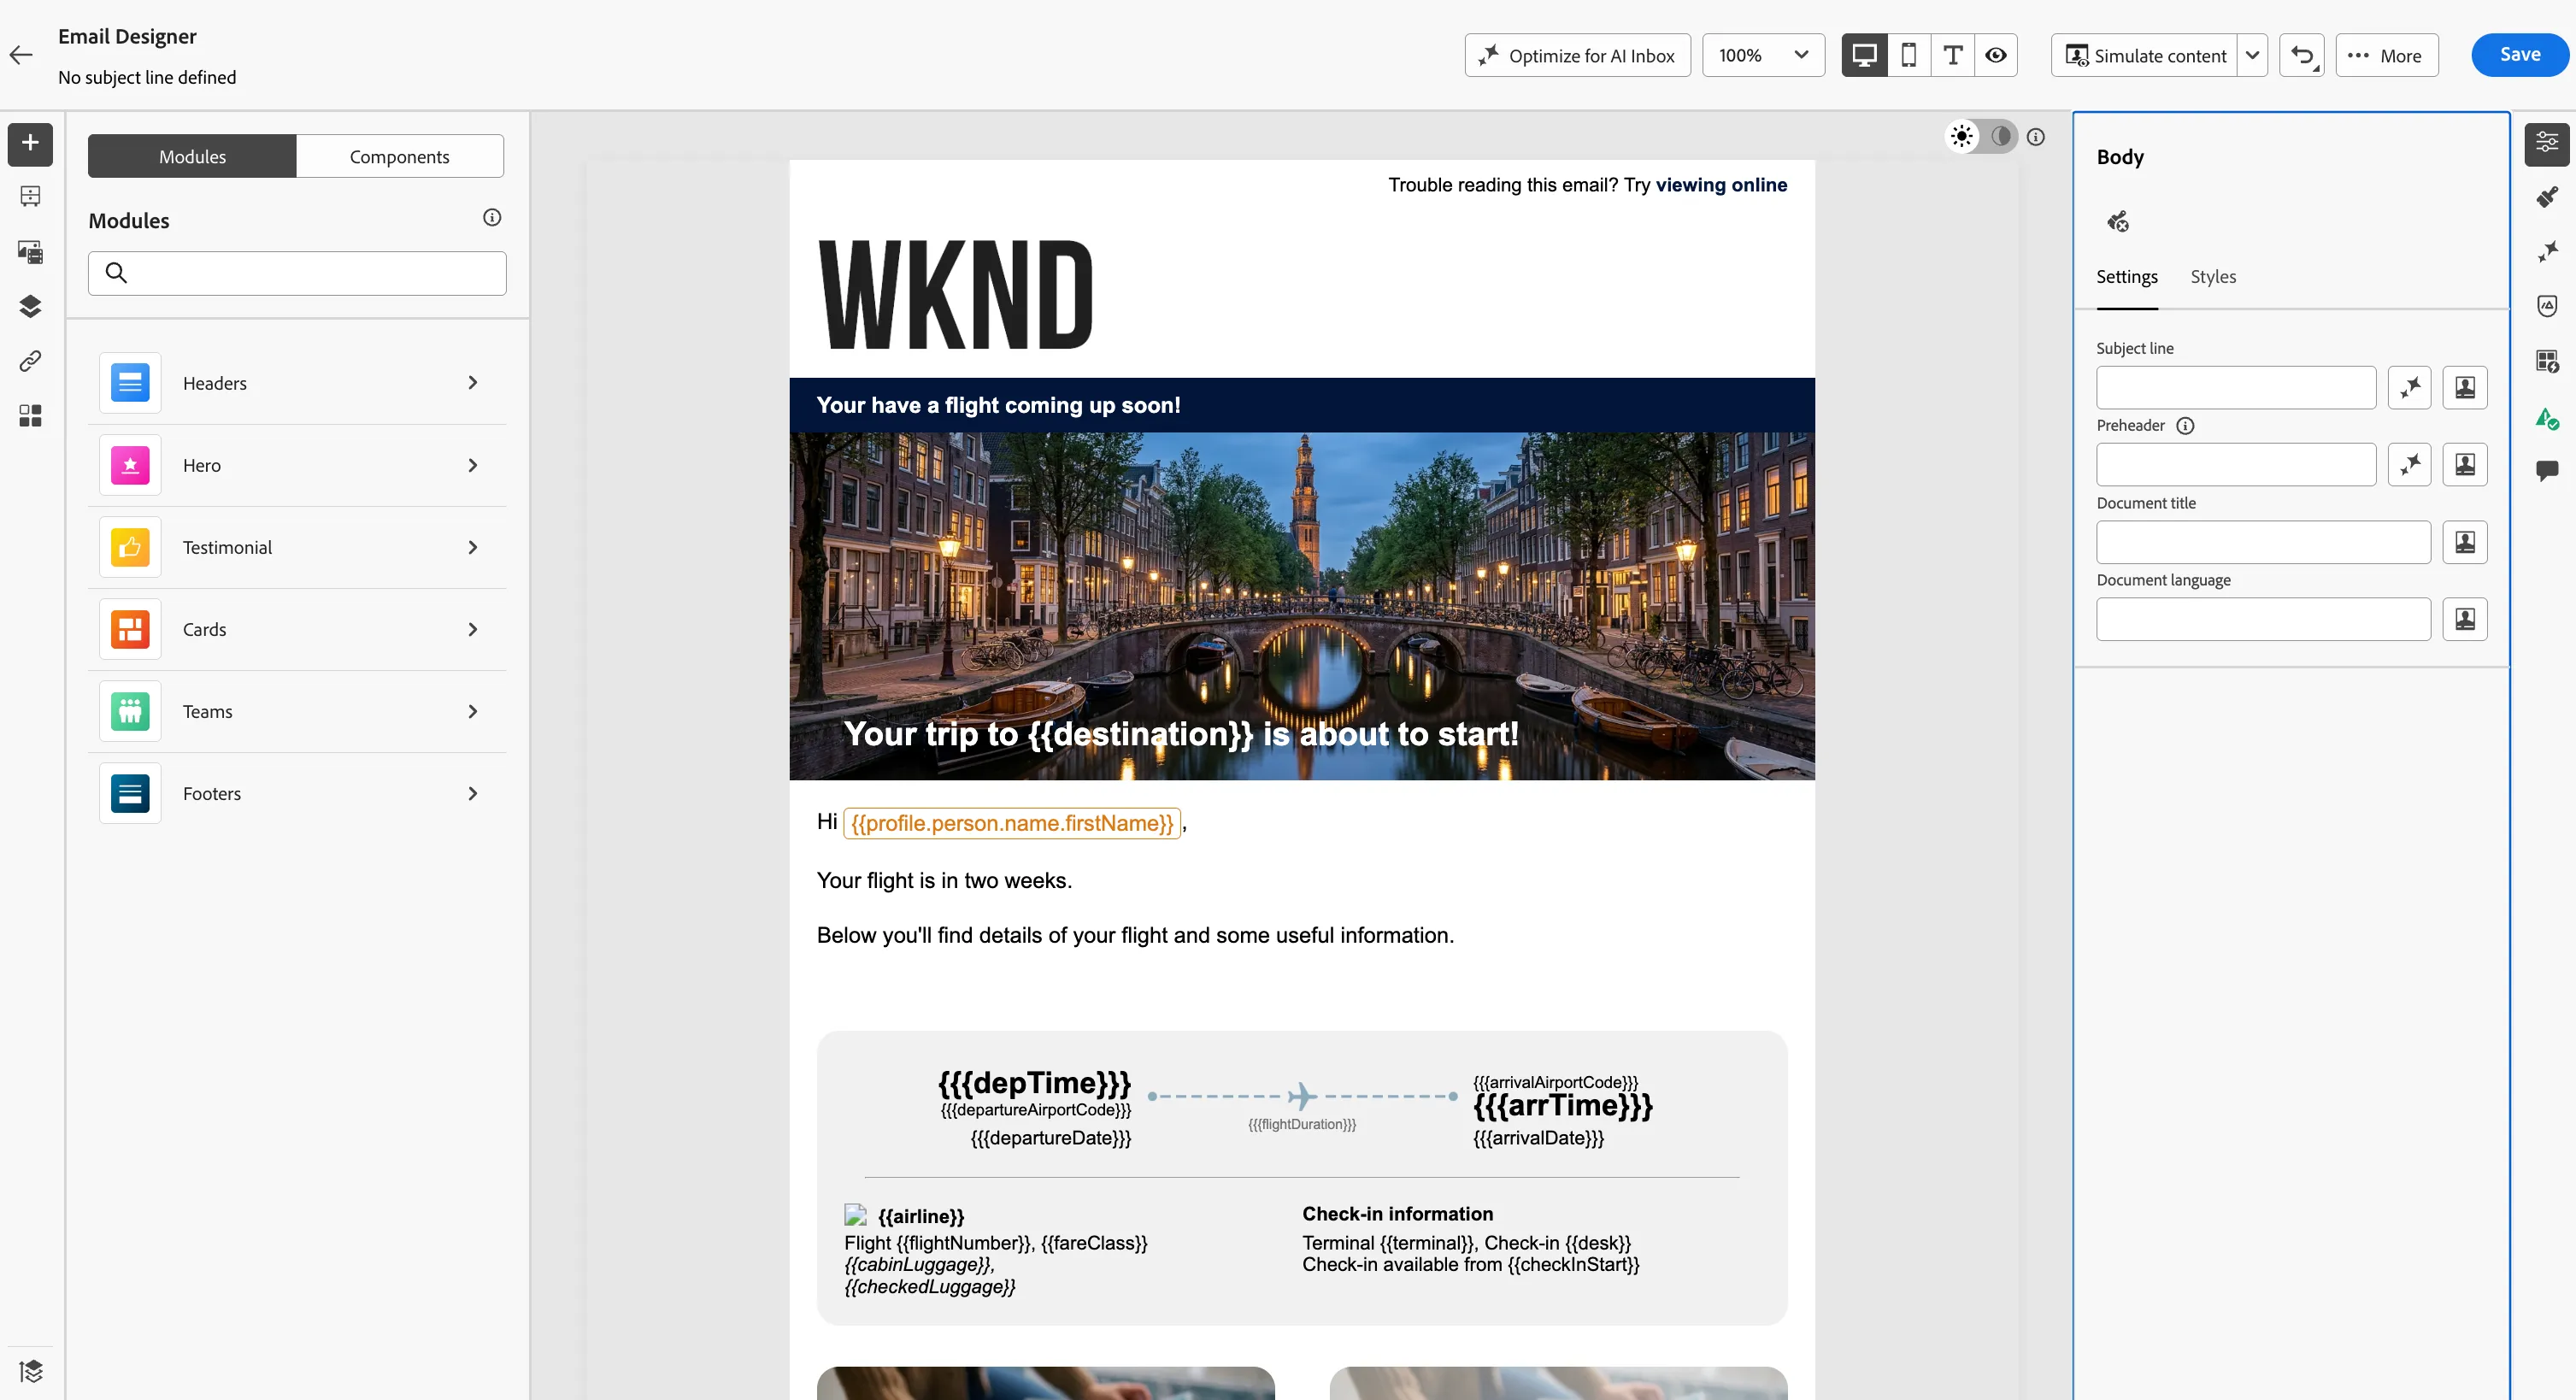
- Click Save in the top right.
We're now going to improve the upcoming flight email content beyond this initial content template, starting by improving the text content.
Improve the content with Gen AI variations
Ask the AI Assistant for improvements:
- Select the block that contains the salutation
- In the right panel, click on the AI Assistant icon

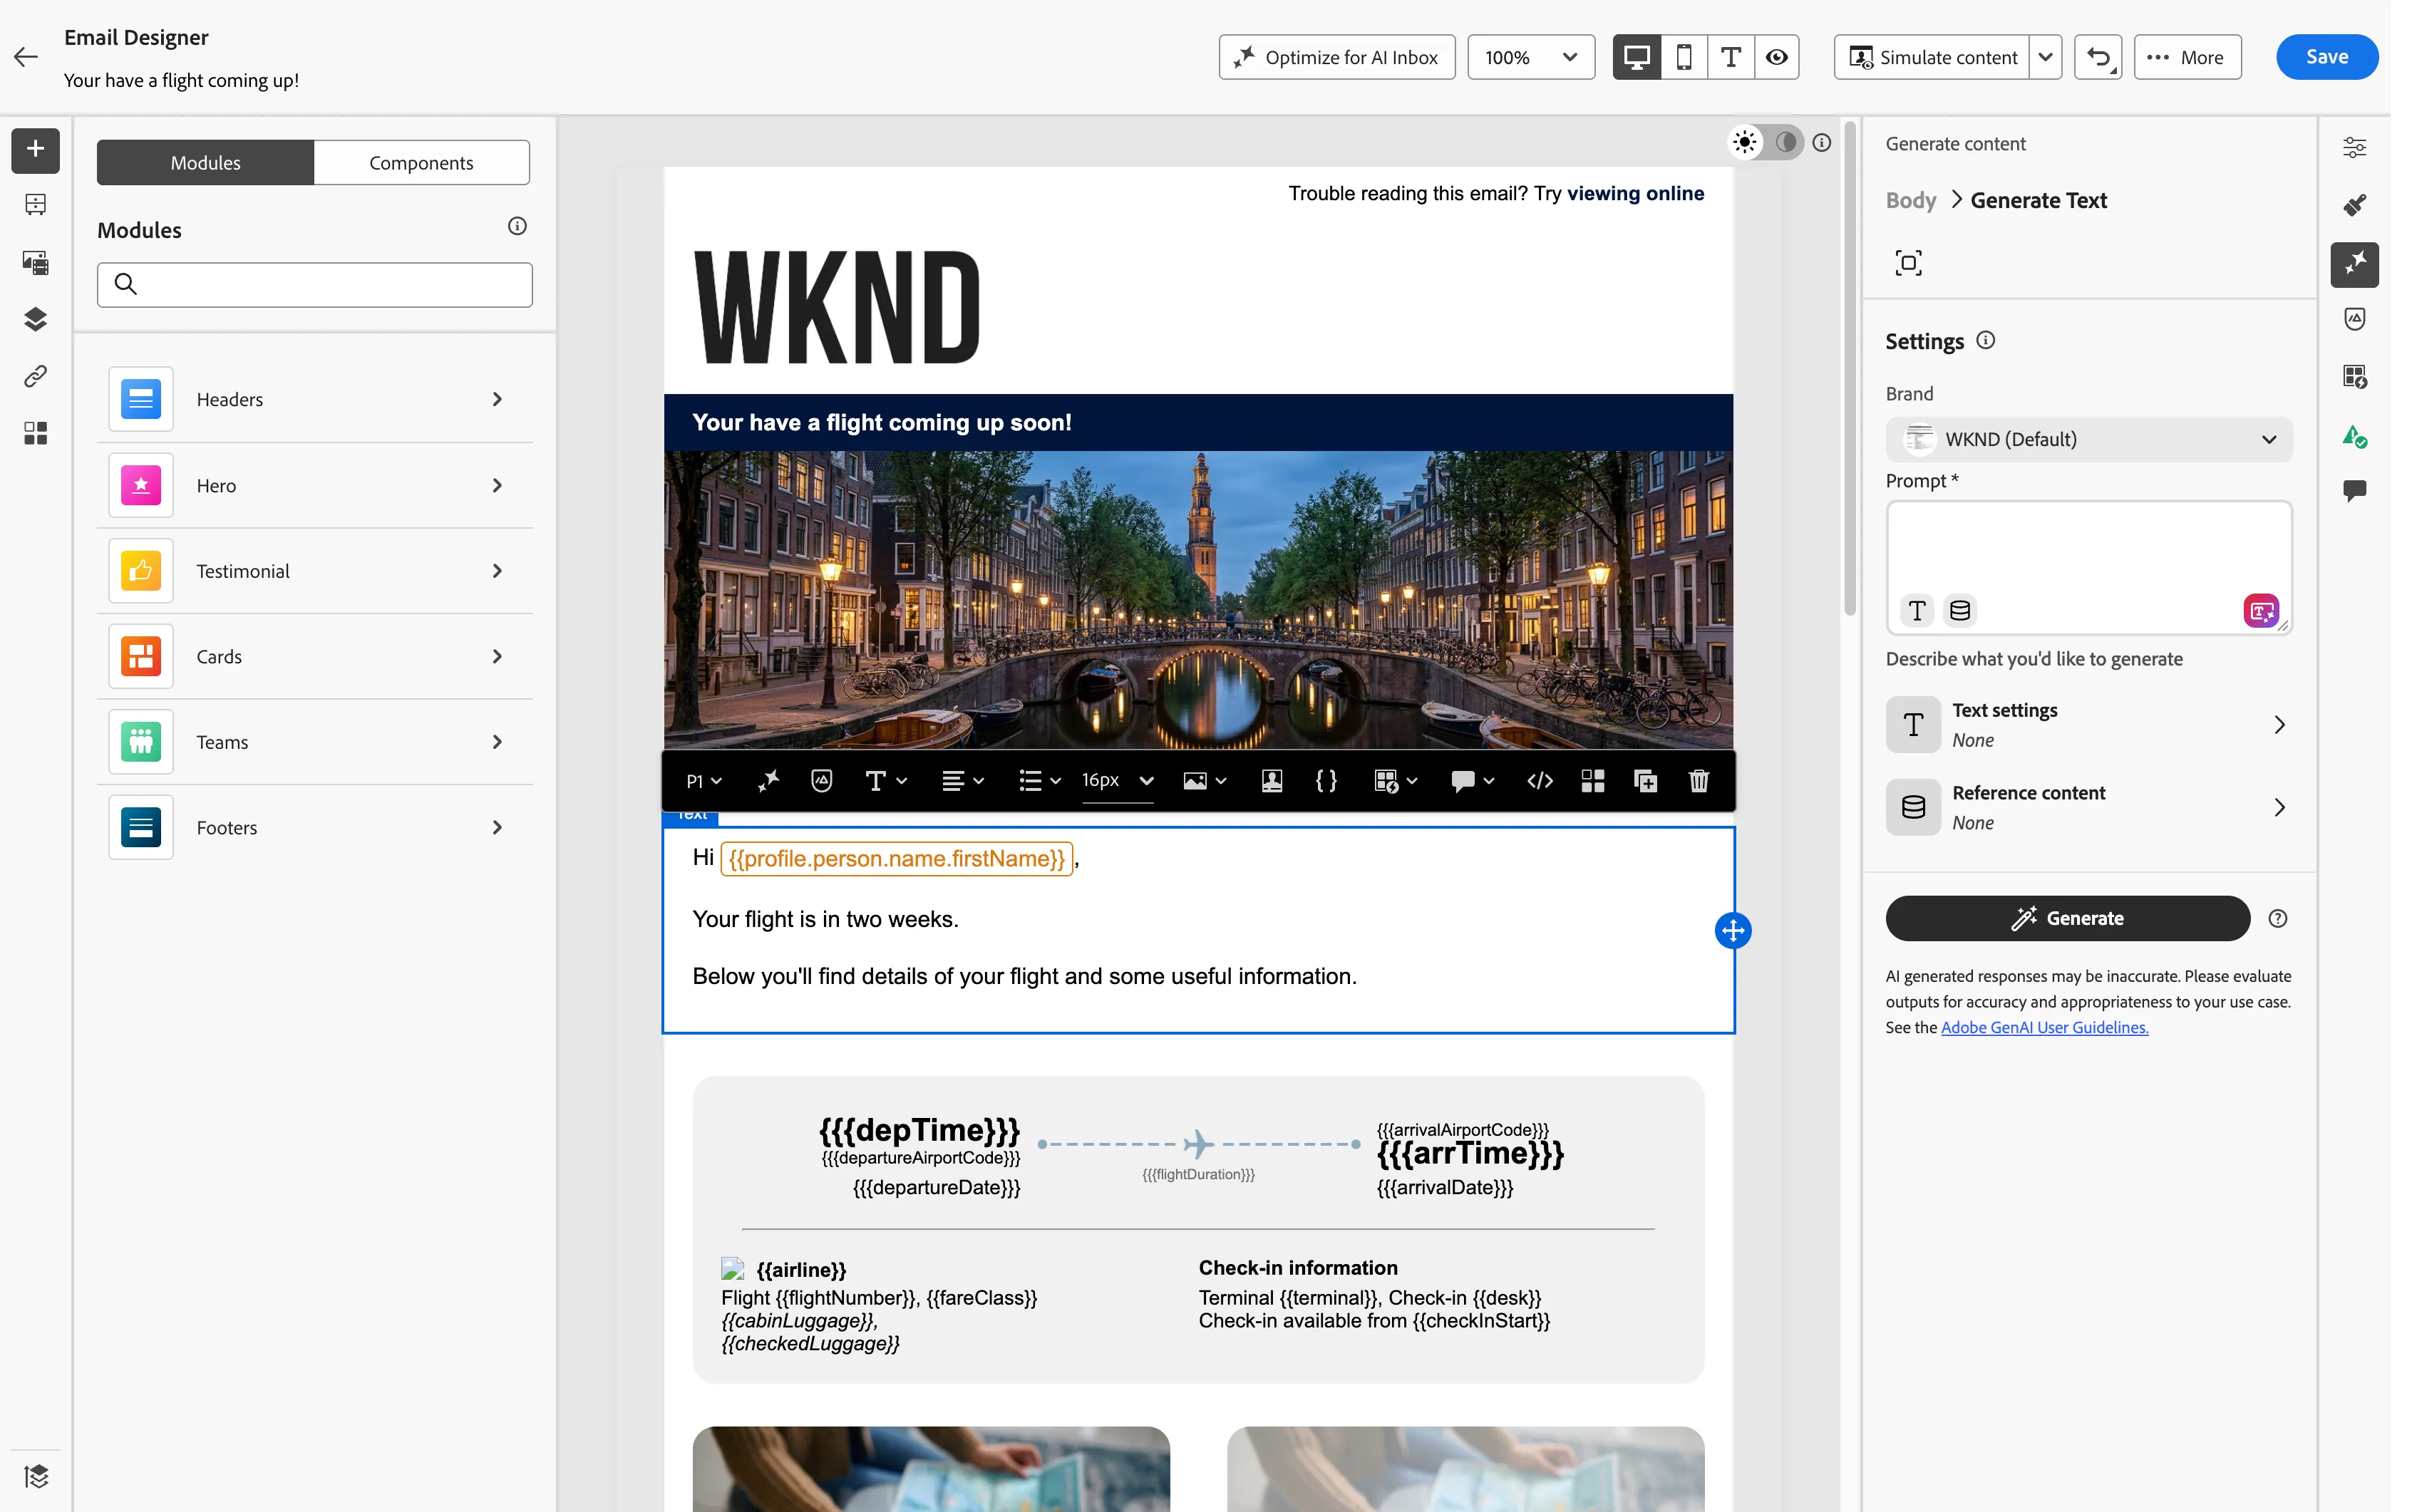
- Click on the Fullscreen icon
 to maximise the window
- Click on the Brand alignment tab
- Click on the Evaluate score button to get the Brand alignment score and scroll down to see what could be improved. Click on Writing style (low) to see the brand violations. Then go back with the
 button.
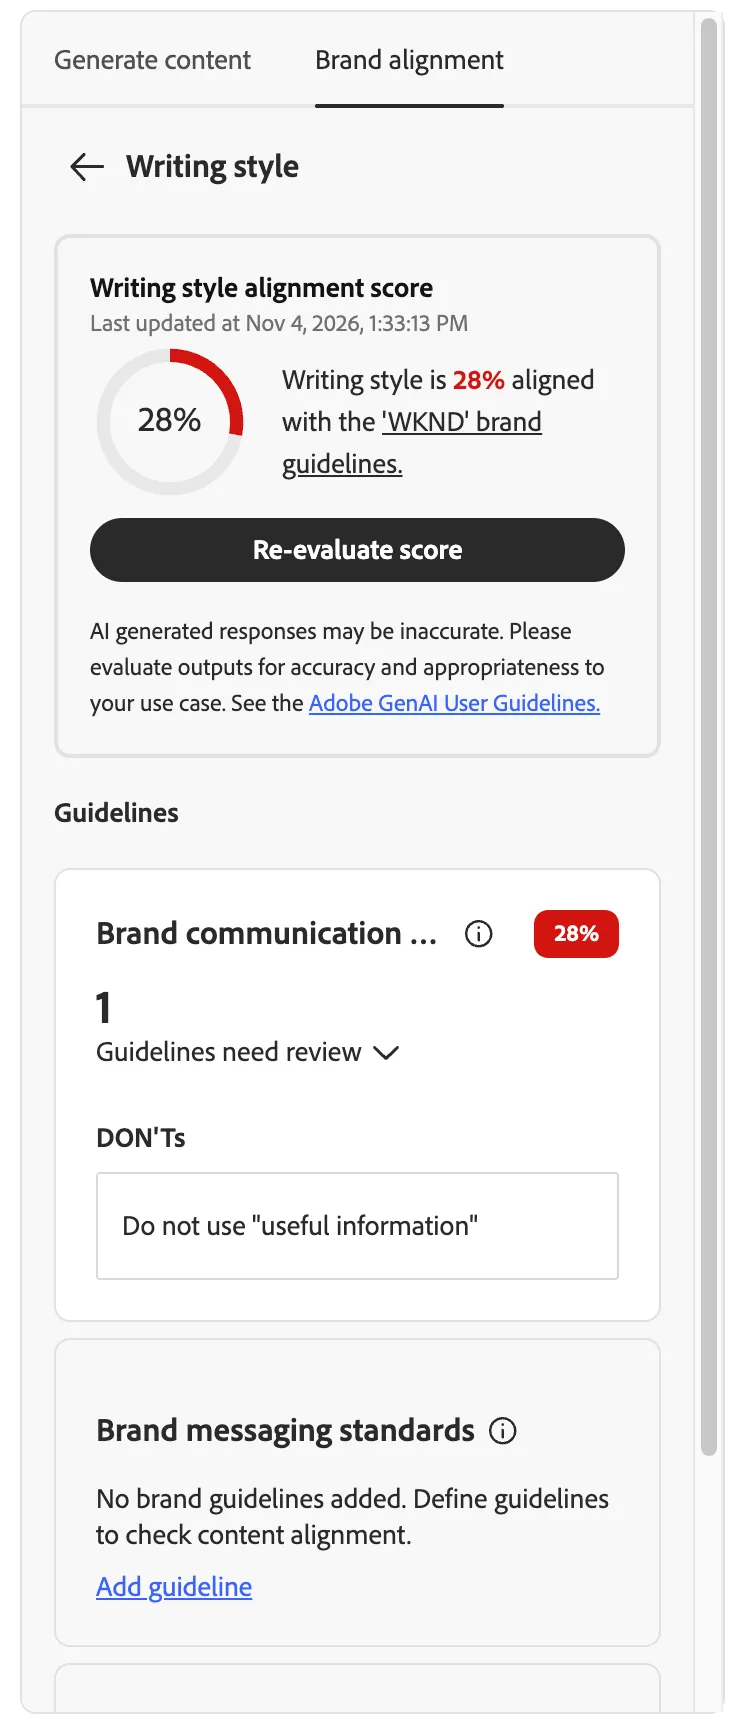
The email content is in need of improvement in order to meet the standards set by WKND's brand guidelines. Let's use AI to generate some recommendations.
- Click on the Generate content tab
- The WKND brand should already be selected
- Try this prompt
- Set Text settings to
- Communication strategy: Informative
- Language: English
- Tone: Exciting
- Click on Generate button and you should see a couple of recommendations.
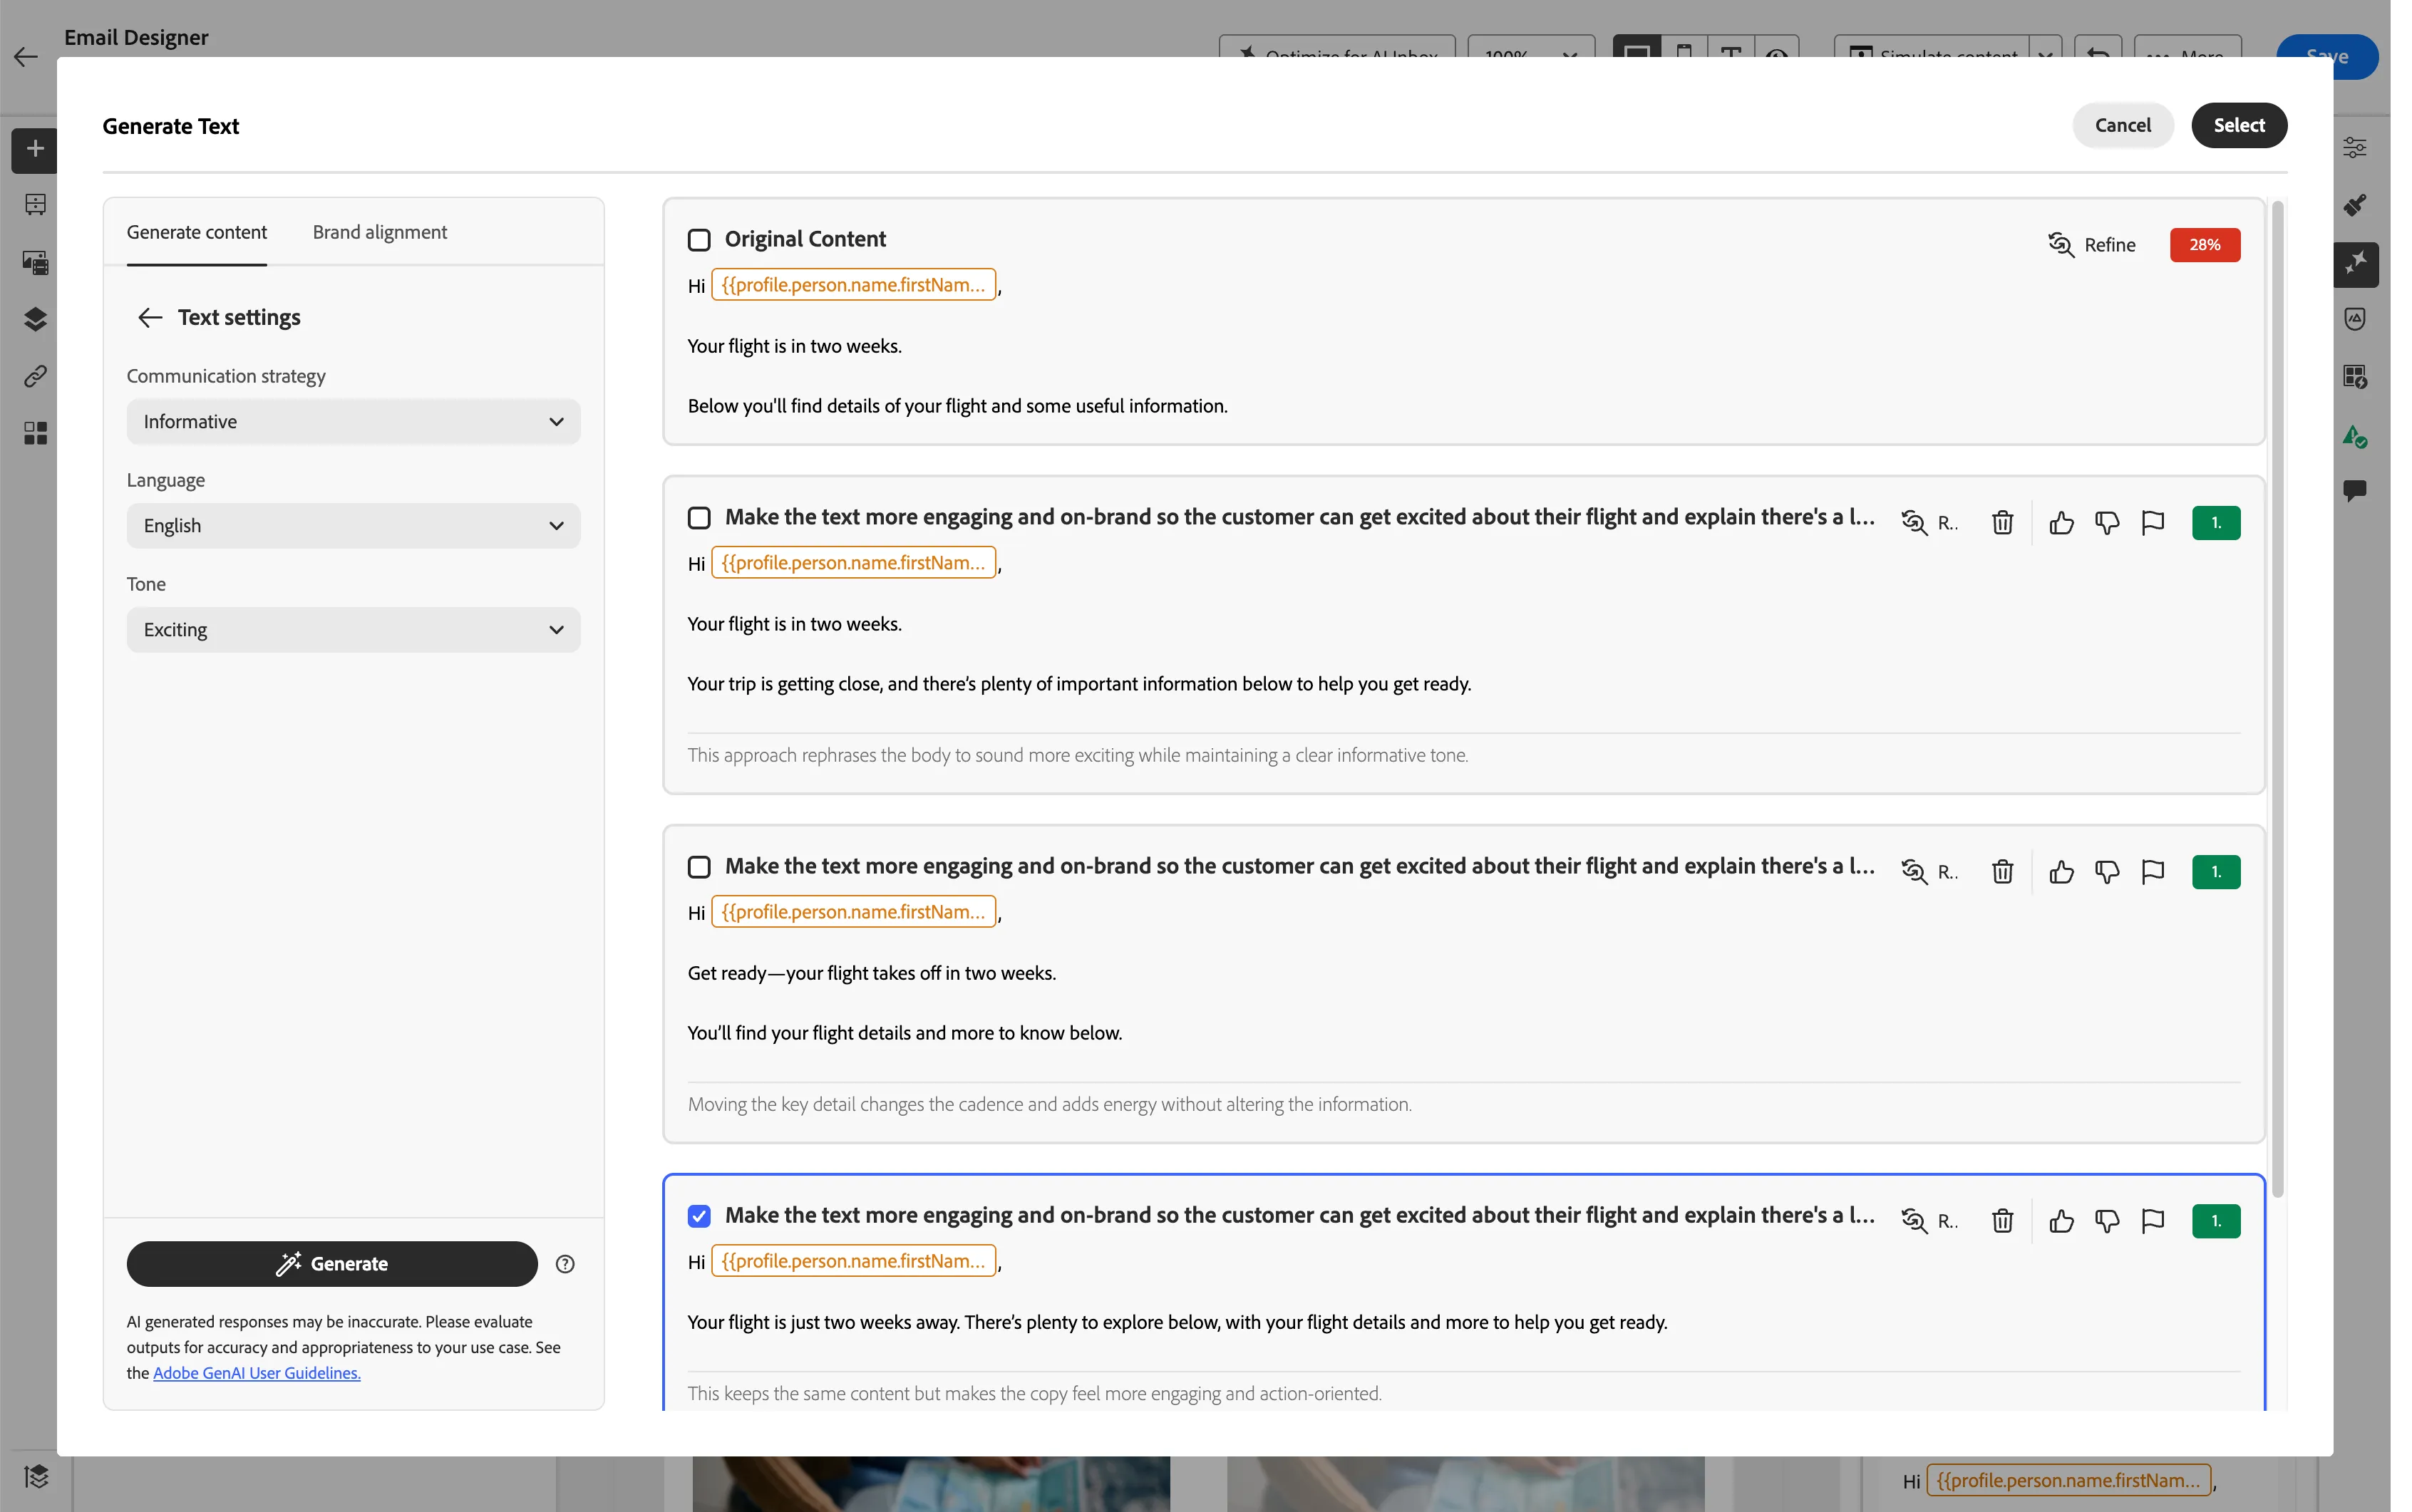
- Look at the variations, select one that increases the brand alignment score or make a feedback to refine. Click Select in the top right corner.
Include personalised offers
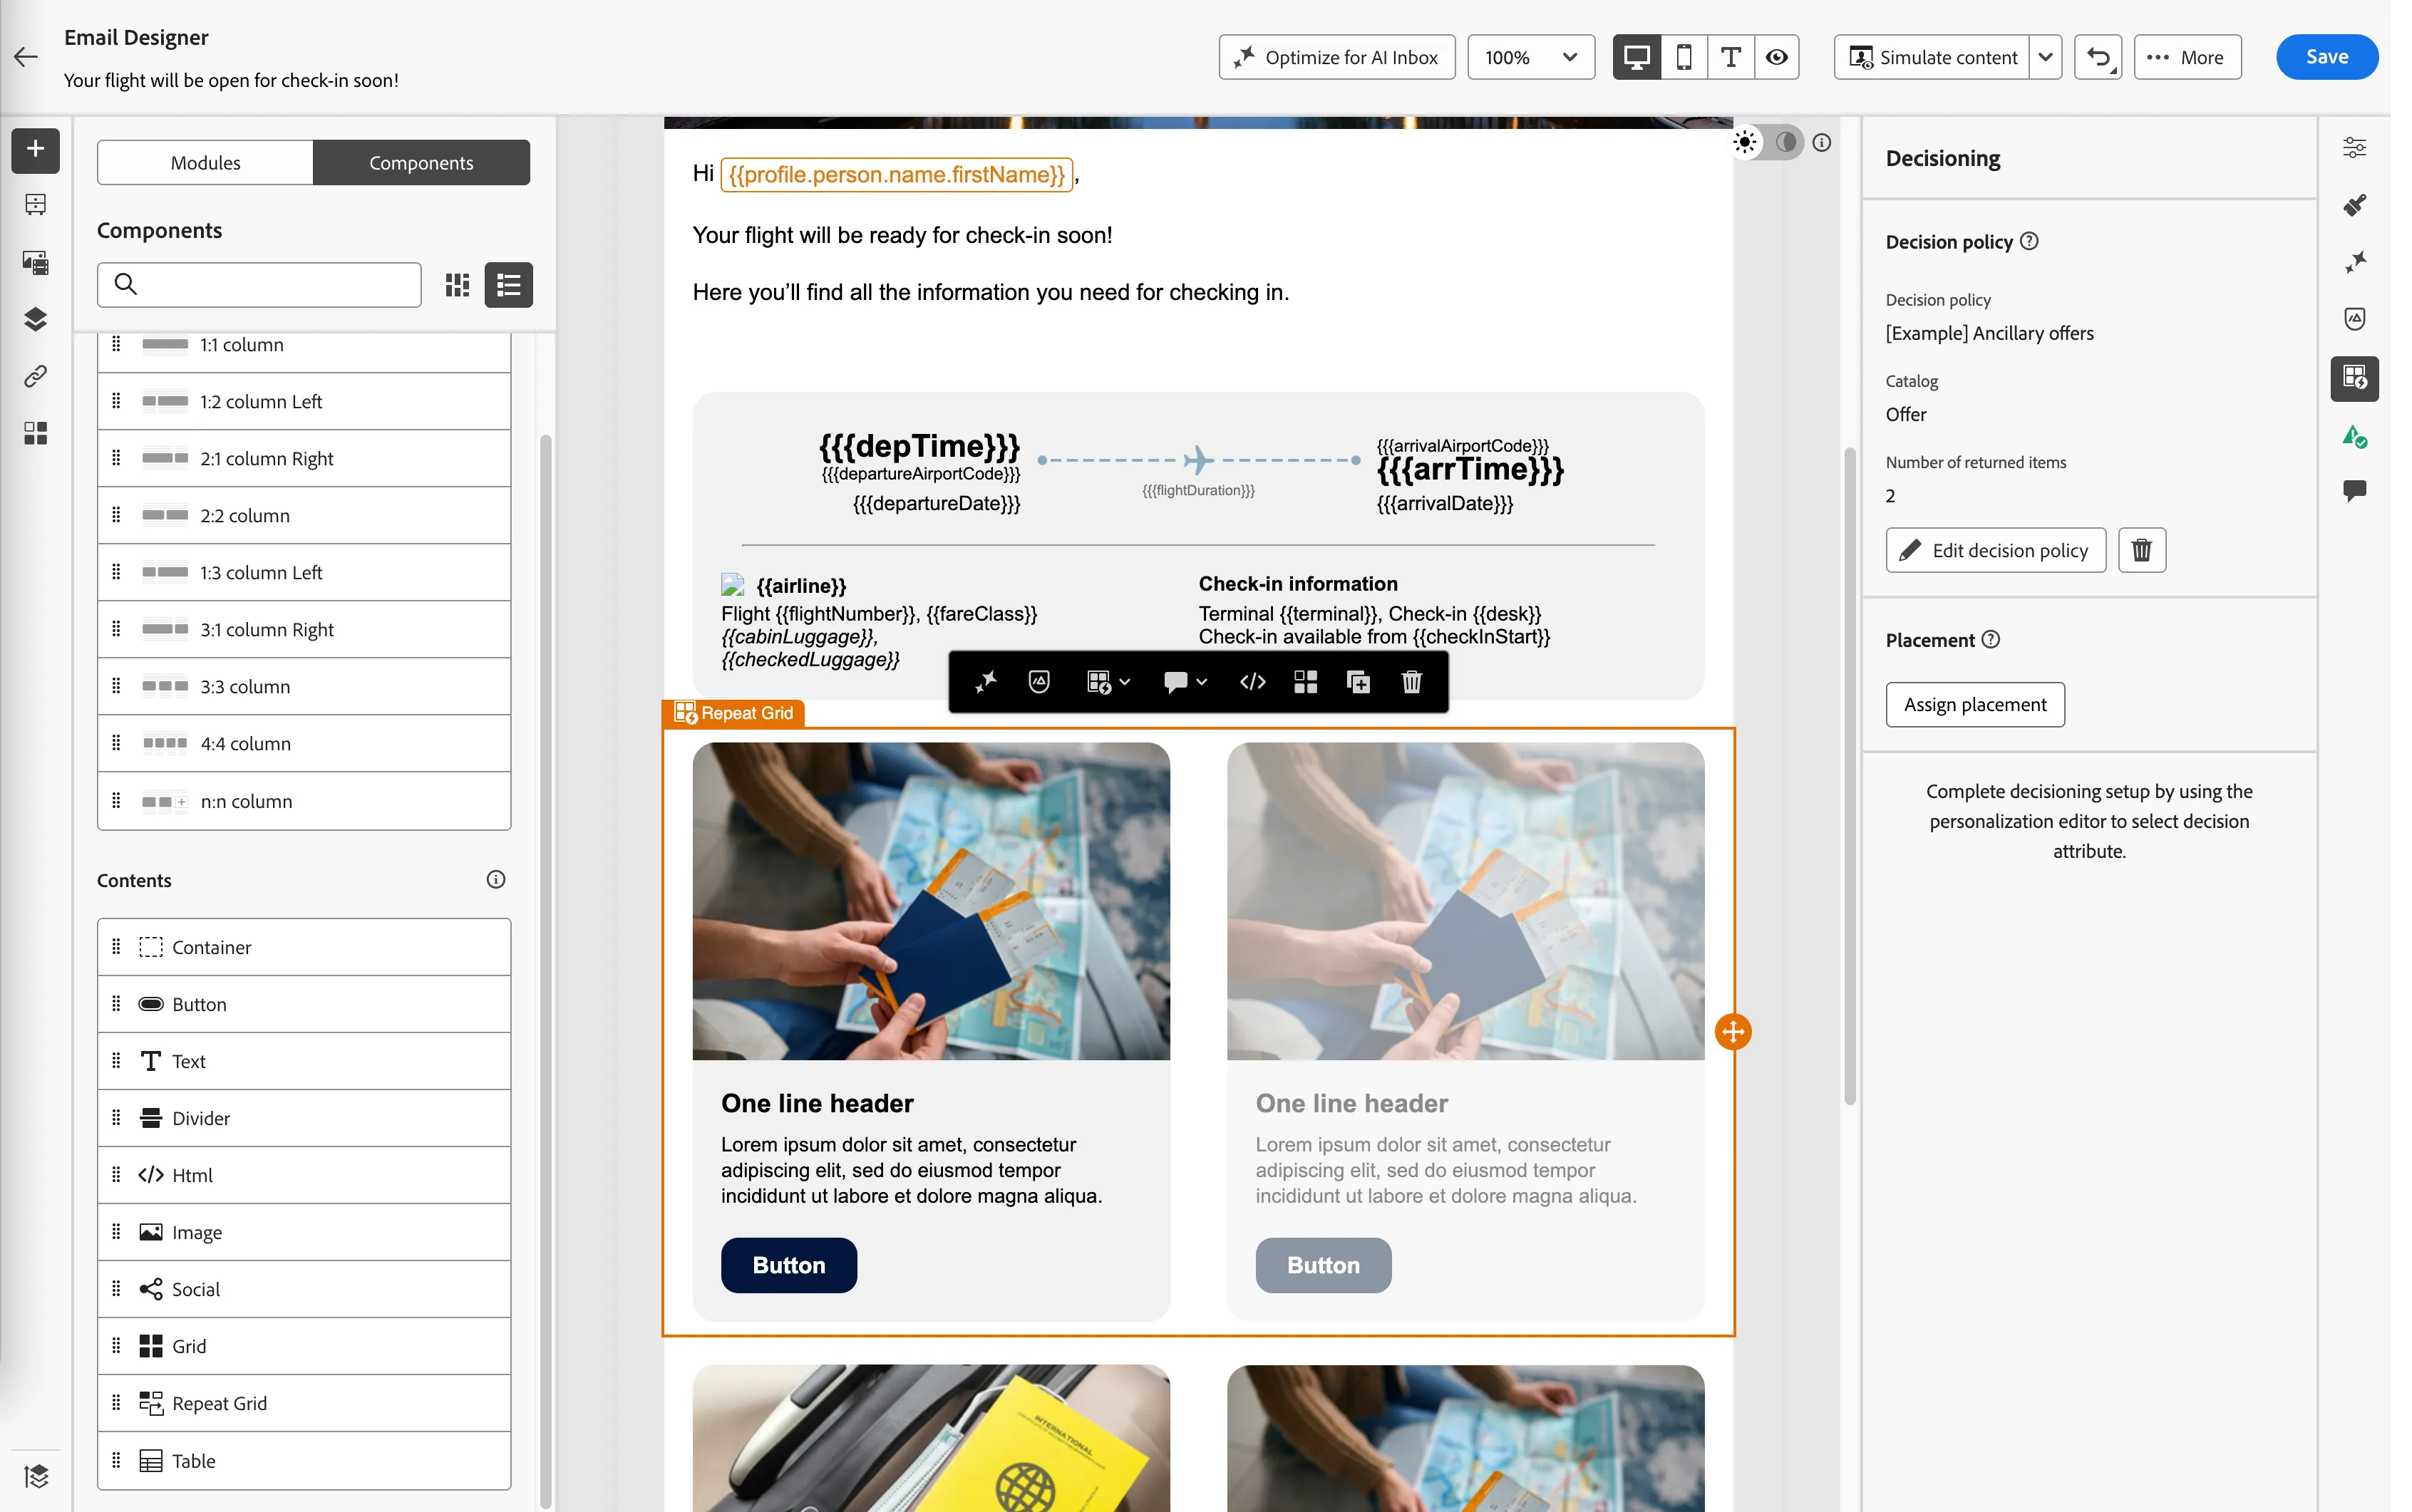
Scroll down to the bottom and click in the white space between the two cards. You'll see a blue border appearing with the label Repeat Grid. Click on it to select it.
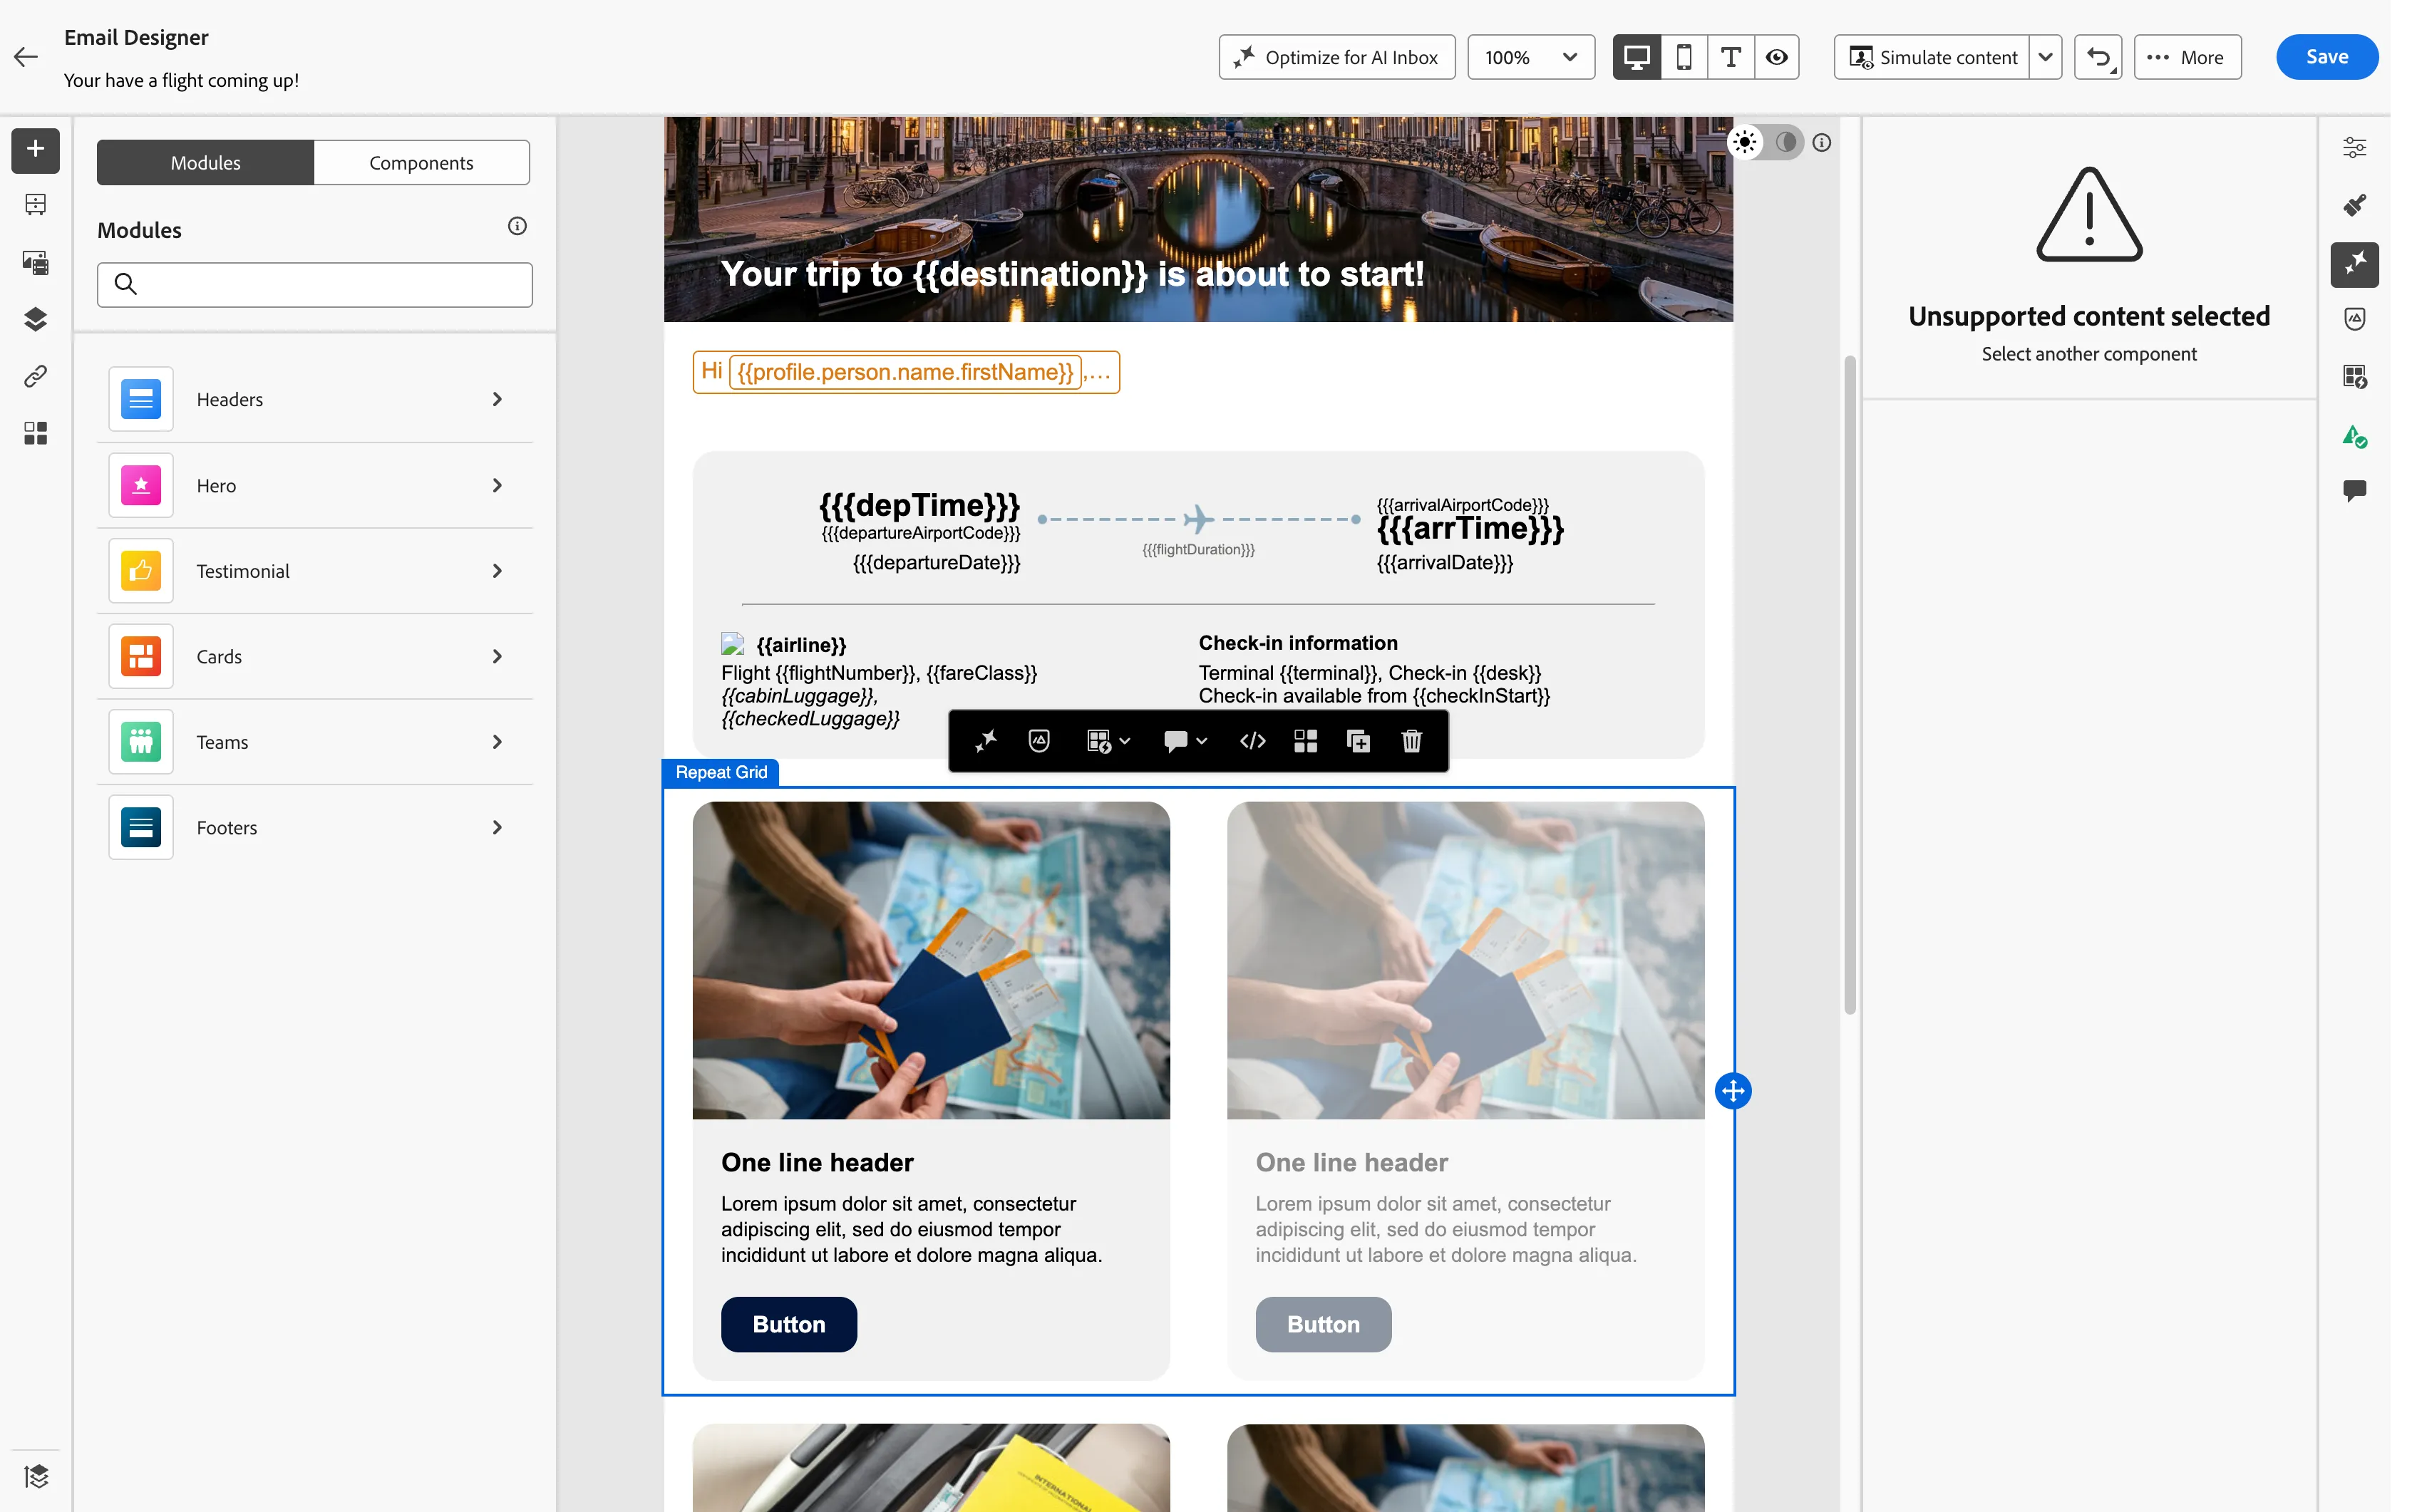
Repeat Grid lets marketers reuse one content pattern across multiple offers or items, making personalized emails faster, more consistent, and easier to scale. In the Repeat grid you configure one element and then it gets repeated for all the offers available in the Decision Policy.
- Click the
 Decisioning icon on the far right hand menu bar
- Click Add Decision Policy >Add new policy
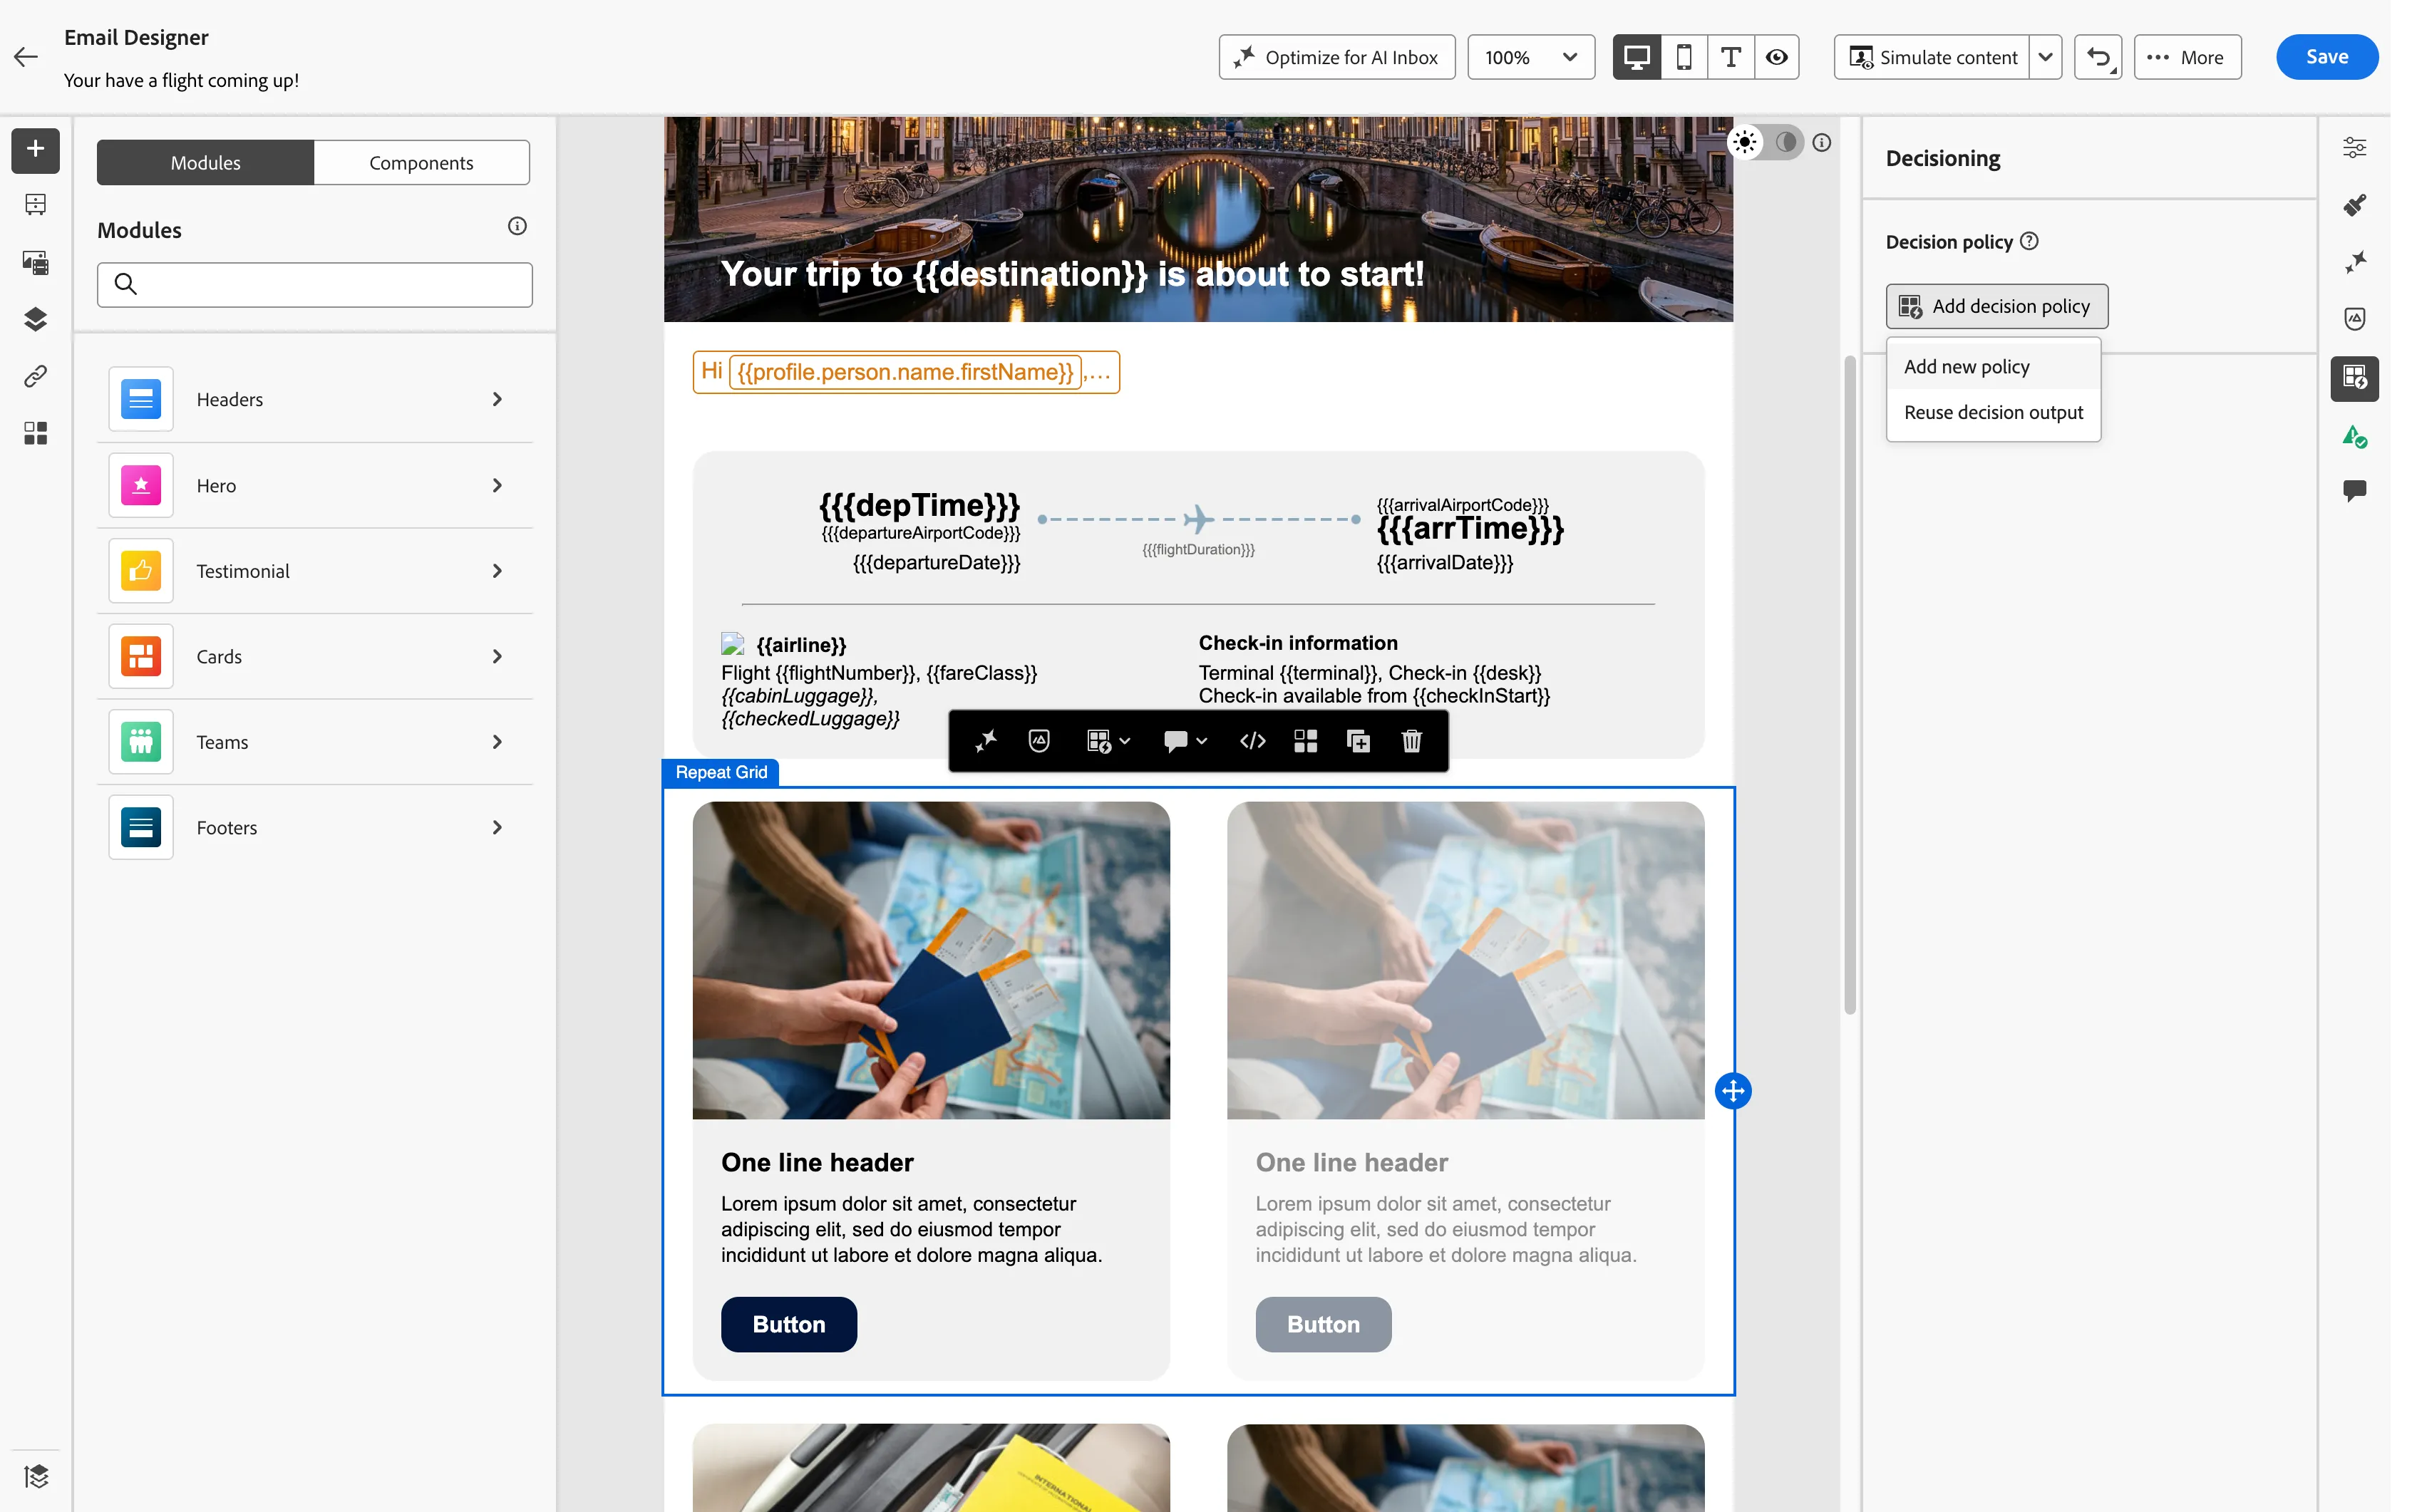
- Set the name of the decision policy to: [{{LASTNAME}}] Ancillary offers.
- Set the number of items to 2.
- Click Next.
- Under Strategy sequence, click Add and choose Selection Strategy.
- Select the [Example] Engage - Selection Strategy from the list.
- Click Save to close the window.
- Click Next and review your decision policy.
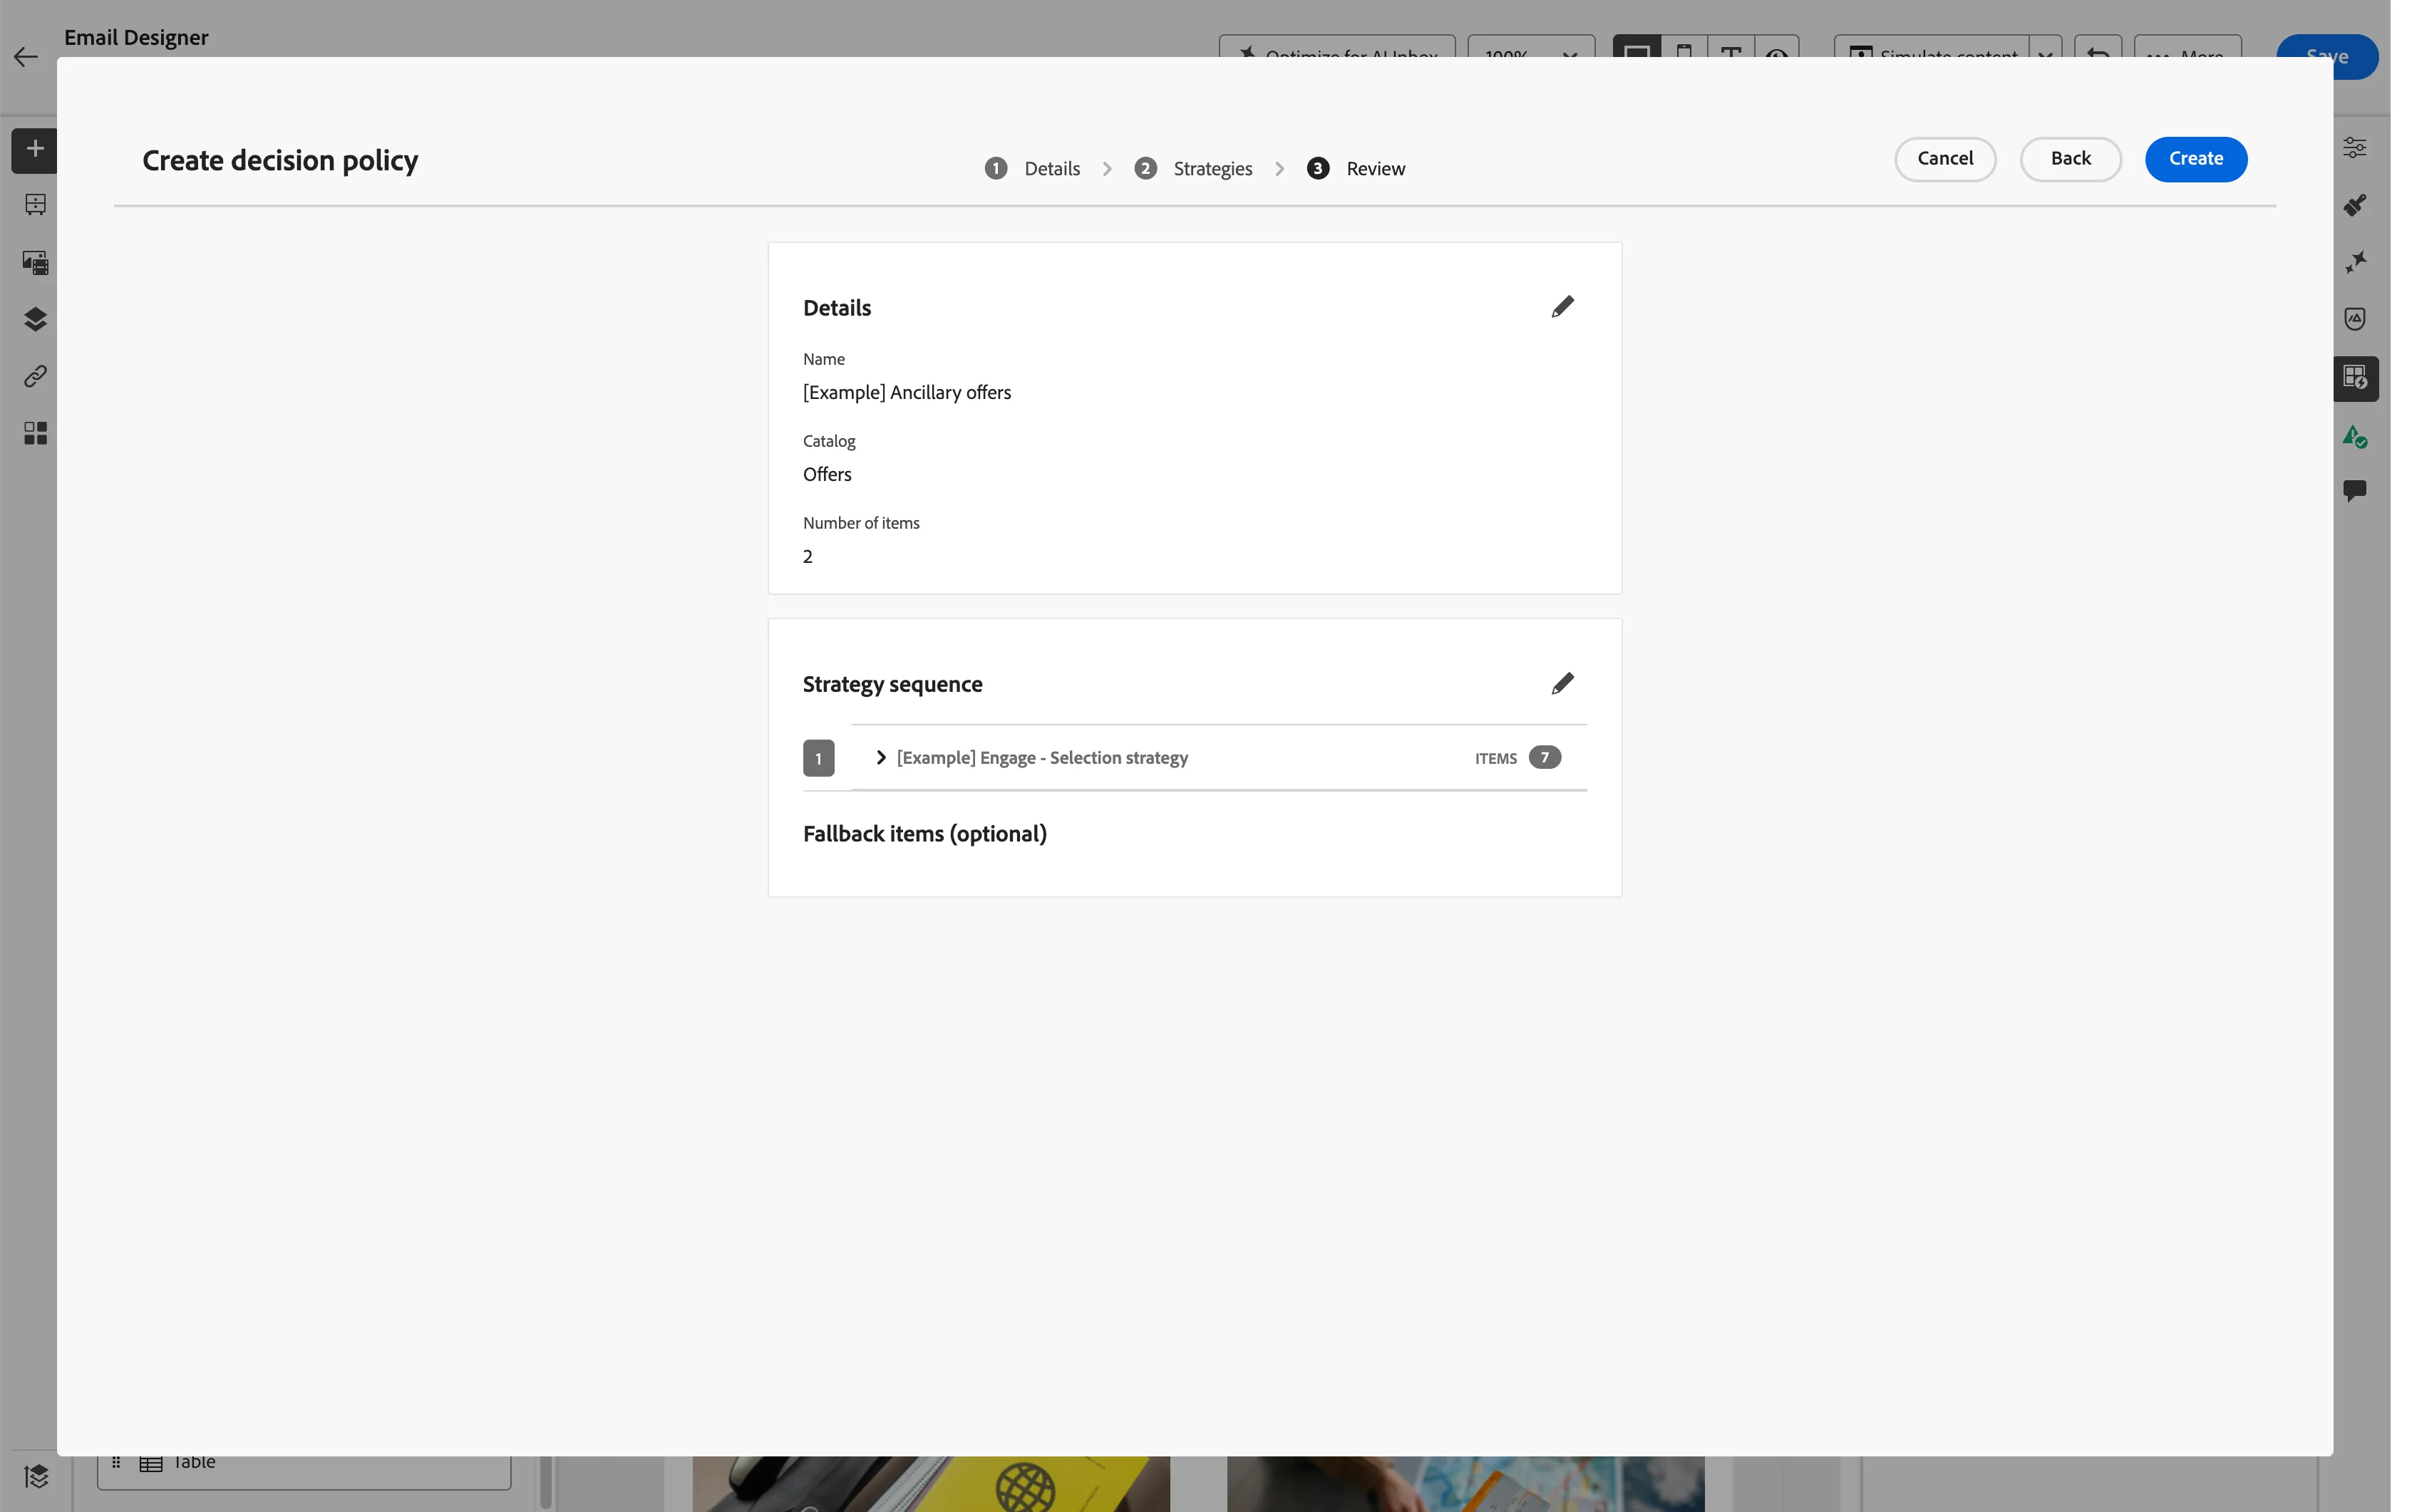
- Click Create. The window will close and the border of the Repeat Grid block will become orange.
To use the decision policy in an email, you have to assign a placement.
- Click Assign Placement in the Decisioning panel.
- Select the text_image_block placement from the list.
- Click Assign.
With the decision policy assigned to the Repeat Grid block you can now use the offer fields to fill the fragment. Click on Settings button  to show the settings menu.
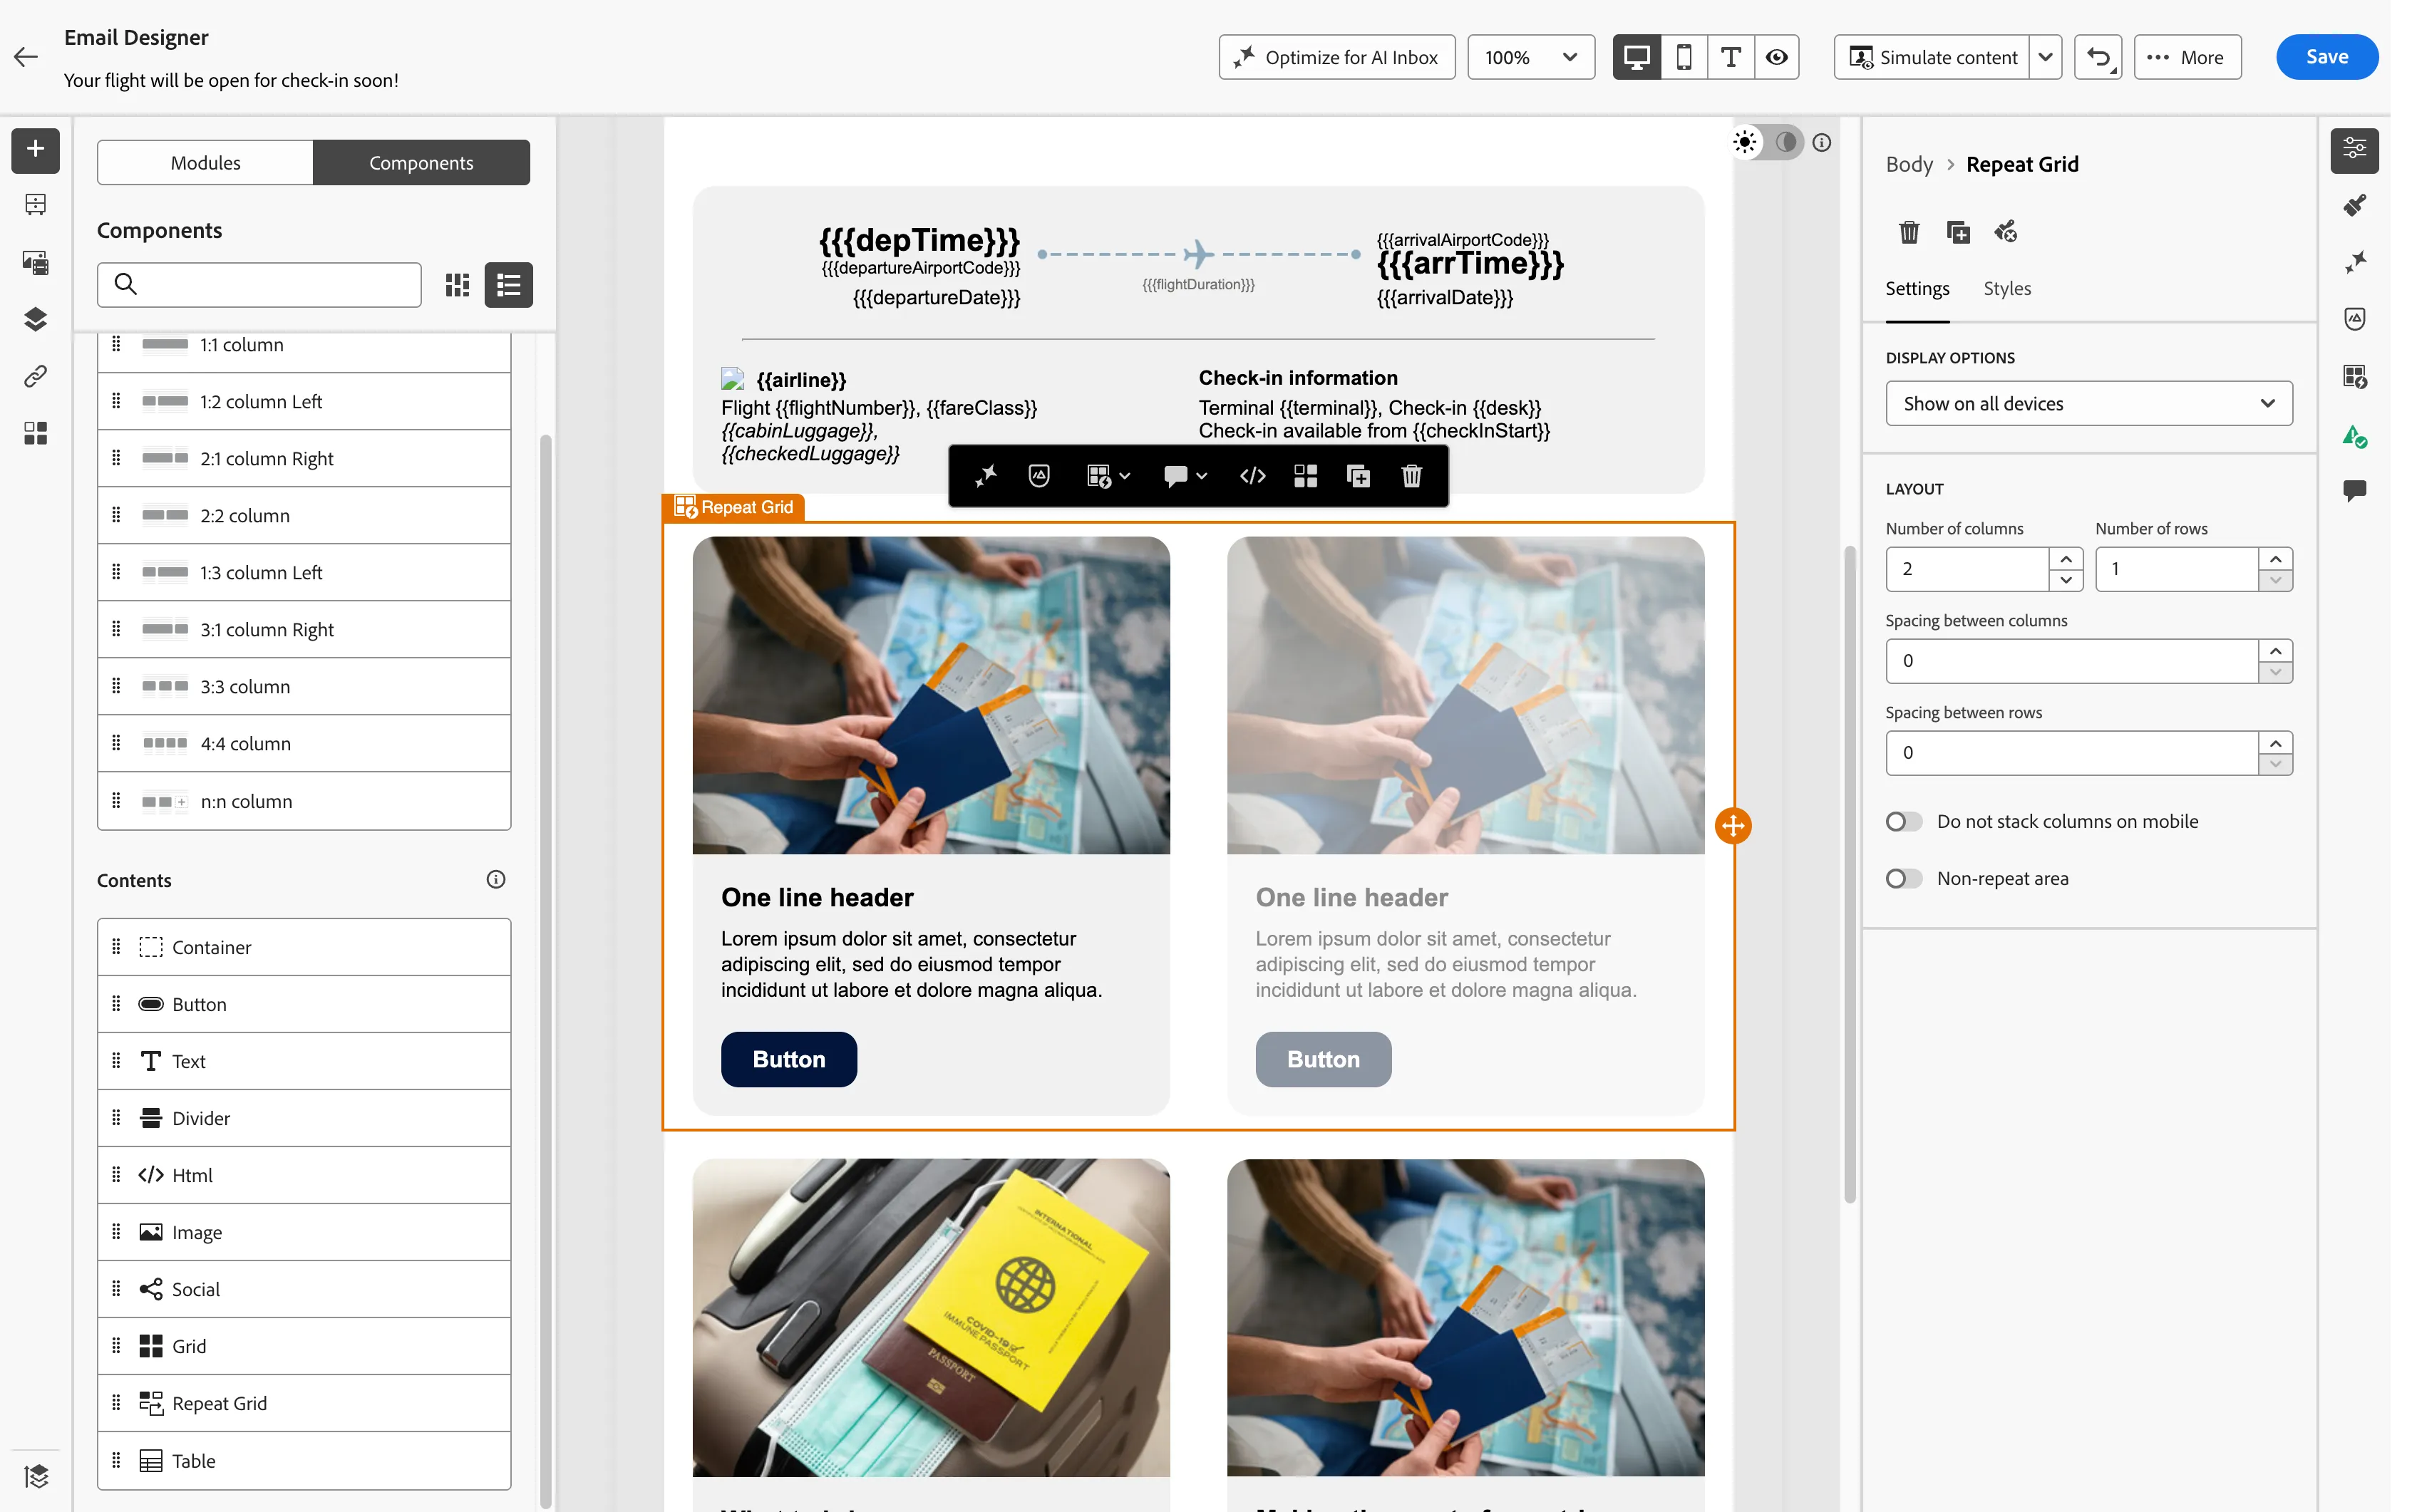
- Click the first image of the block.
- From the image settings on the URL, remove the Source URL by clicking the X.
- Click on the Source text box, type a white space to enable the personalisation menu.
- Click
 to open the personalisation editor.
- On the left menu, click on Decision Policies.
- From the _demopotemea, go in the Offer Content > Media Assets > Image (High Resolution) folder and search for the sourceURL attribute.
- Click + to add the first attribute in the list into the expression editor.
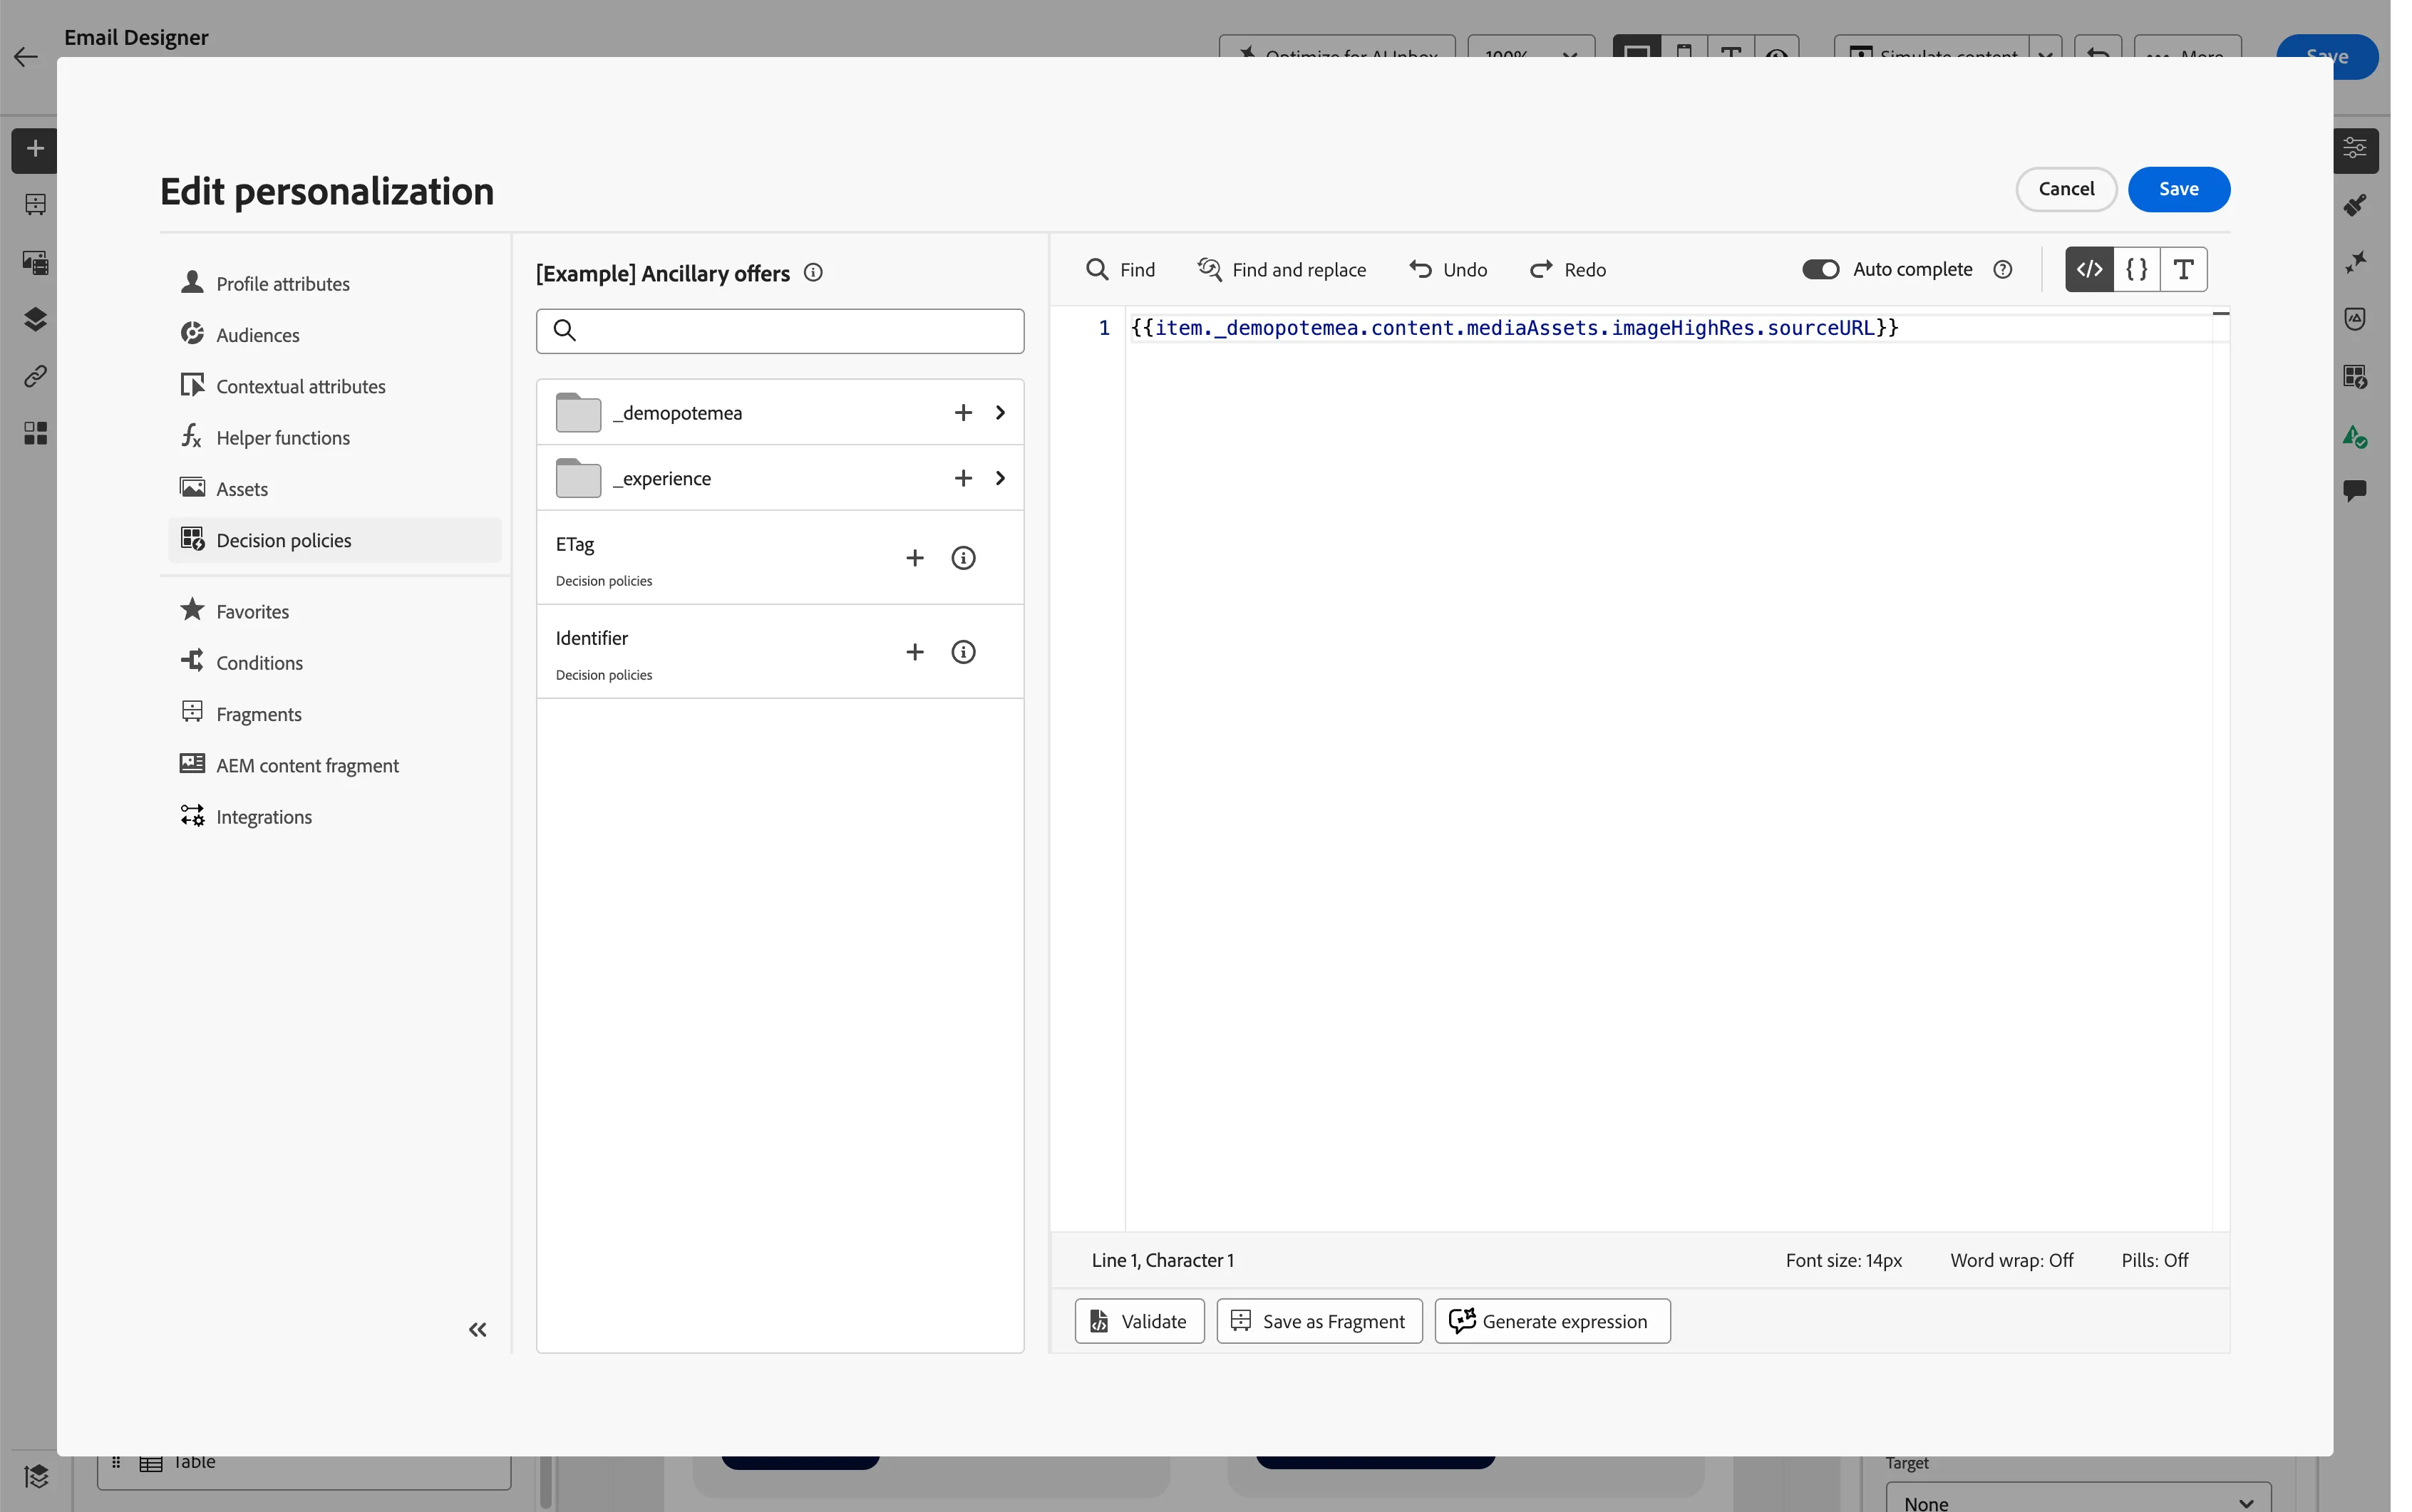
- Click Save.
When the email is sent, the decision policy retrieves the top two offers using the Selection Strategy rules, and will use the sourceURL to fill the image source.
Now you can repeat a similar action to configure the rest of the fields in the block.
Header
- Select the One line header text and click on
 in the top toolbar.
- Select Decision policies from the left menu.
- From the _demopotemea policy, go in the Offer Content > Text Content folder and search for the Compact Title attribute
- Click + to add the attribute in the list into the expression editor.
- Click Save.
Body
- Select the Description text and click on in the top toolbar.
- Select Decision policies from the left menu.
- From the _demopotemea policy, go in the Offer Content > Text Content folder and search for the Compact description attribute.
- Click + to add the attribute in the list into the expression editor.
- Click Save
Button
- Click on the Button.
- From the button options on the right-hand side panel, click on , next to the Url field to open the expression editor.
- Select Decision policies from the left menu.
- From the _demopotemea policy, go in the Offer Content > Navigation folder and search for the Web URL attribute.
- Click + to add the attribute in the list into the expression editor.
- Click Save.
- Now select the Button text and from the top toolbar click on the Add Personalisation icon to open the expression editor.
- Select Decision policies from the left menu.
- From the _demopotemea policy, go in the Offer Content > Text Content folder and search for the Banner Call To Action attribute.
- Click + to add the attribute in the list into the expression editor.
- Click Save.
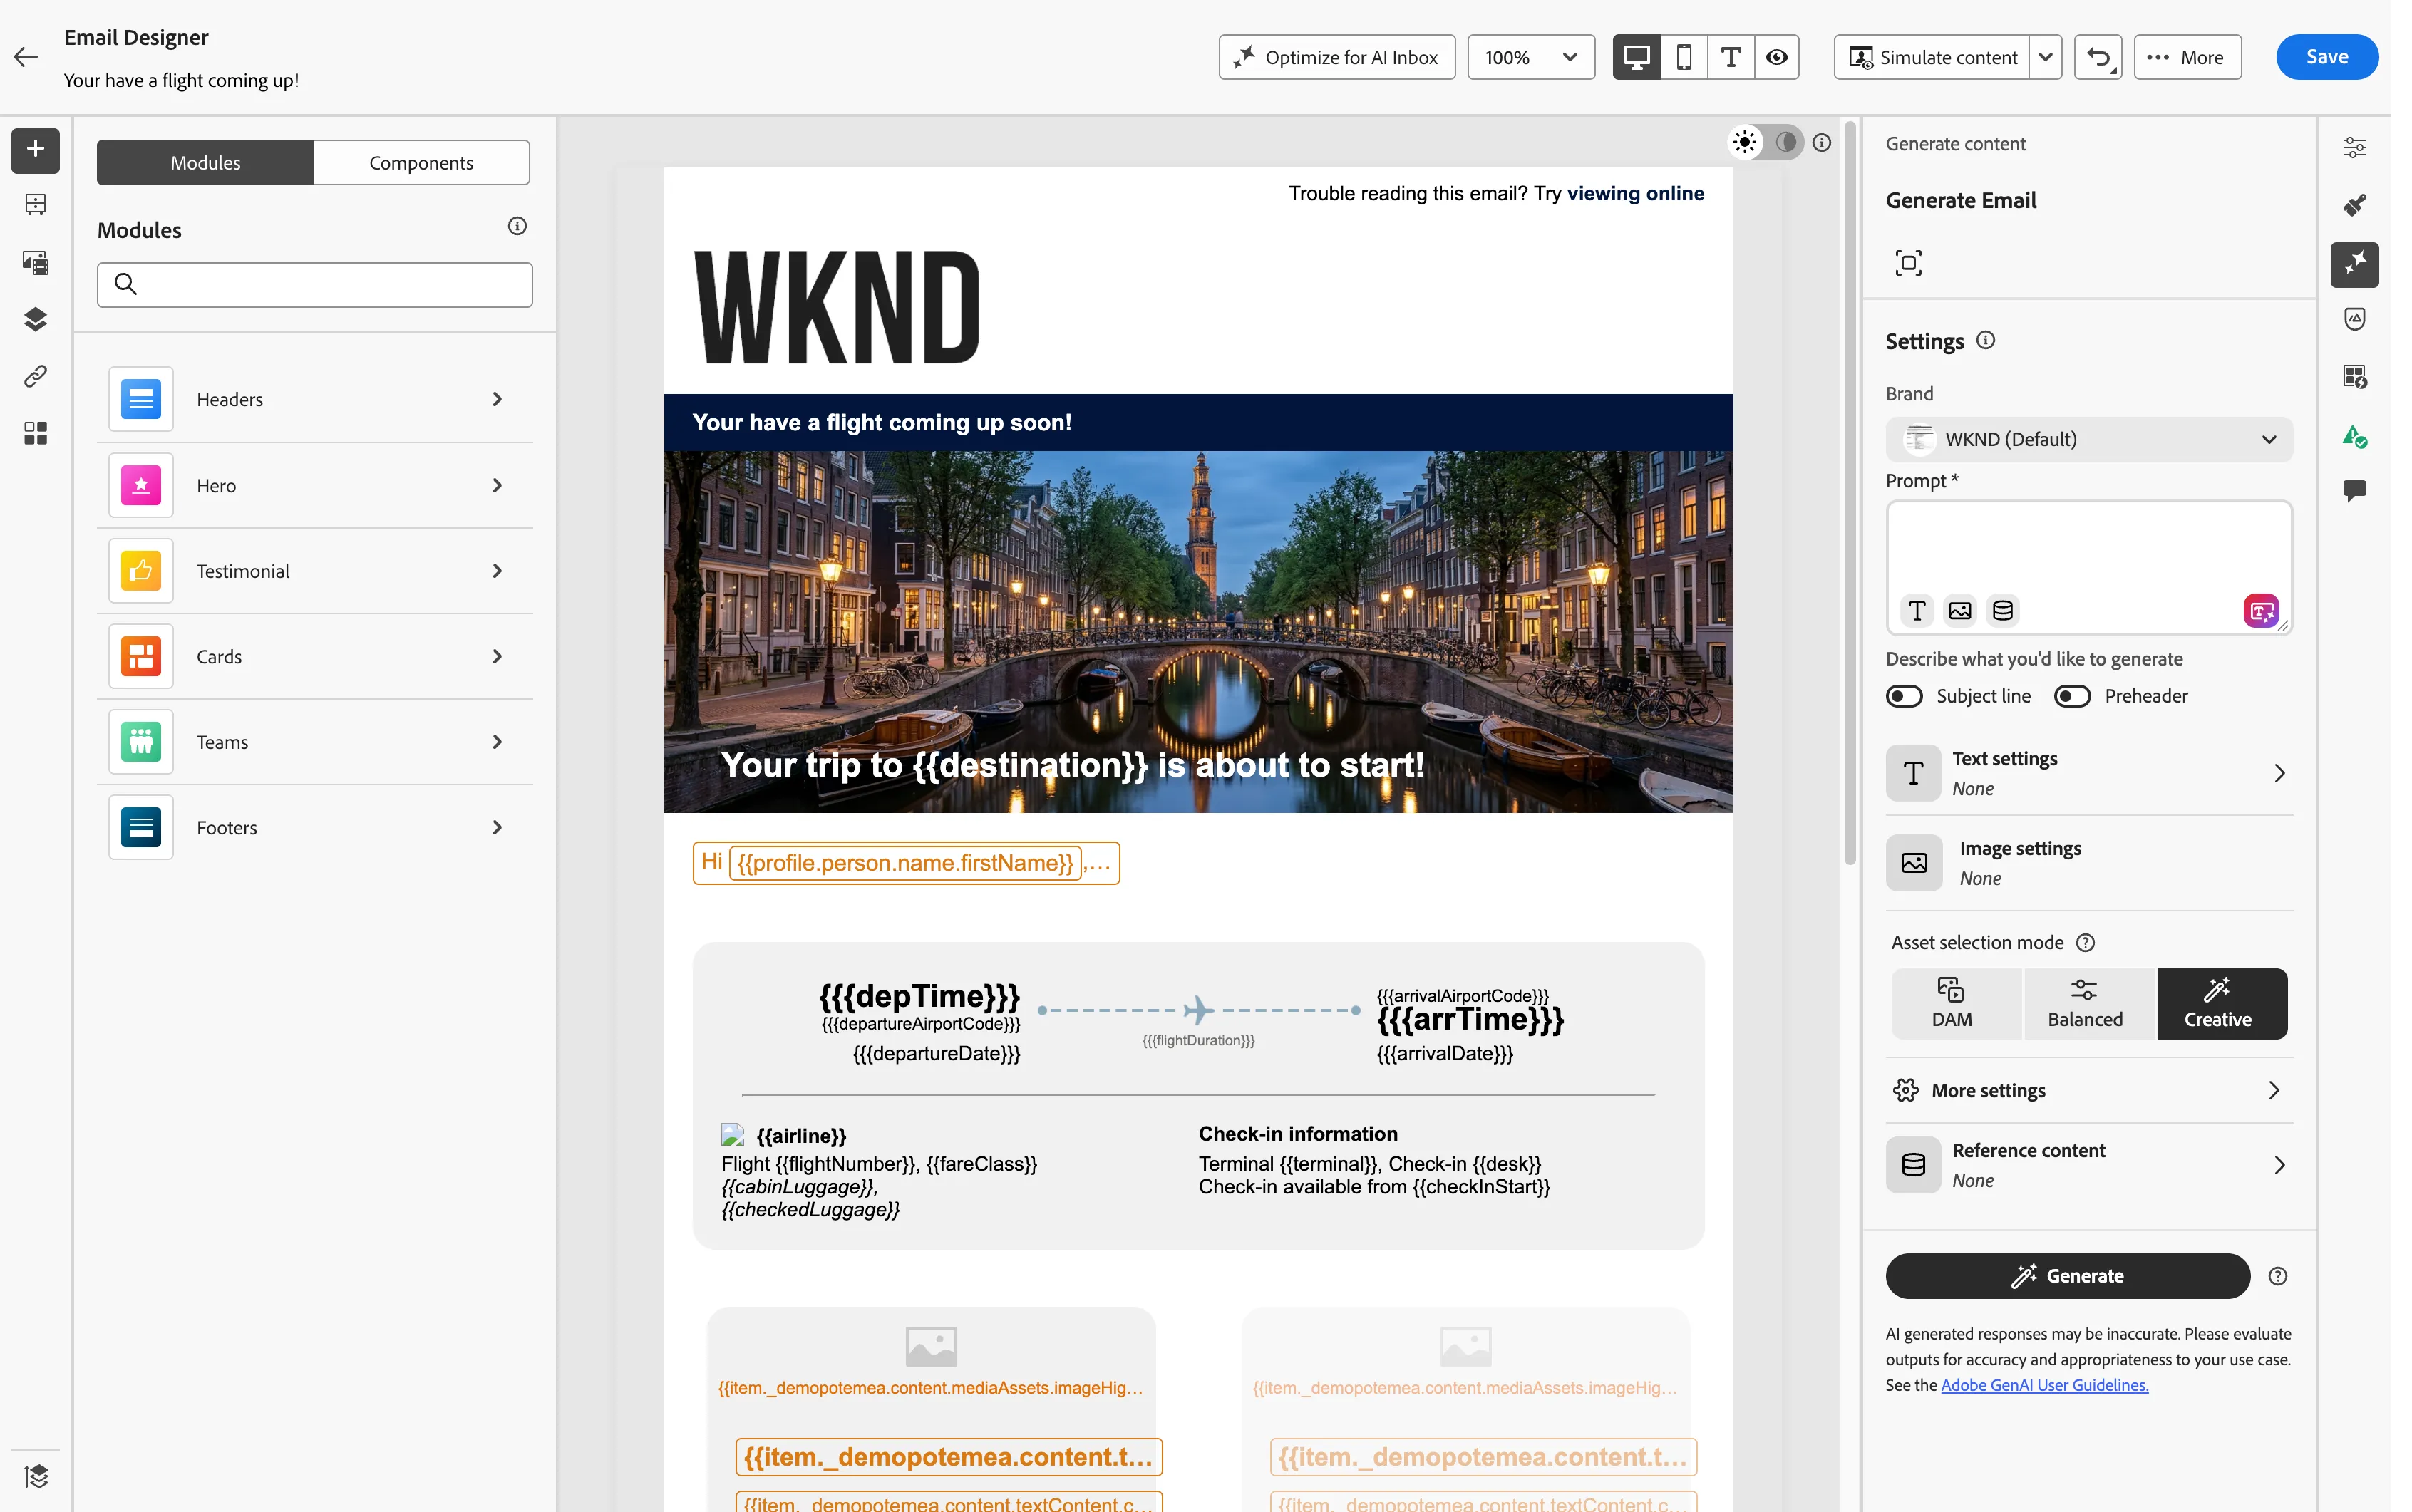
You've added all decision attributes to the email. It should now look like this:
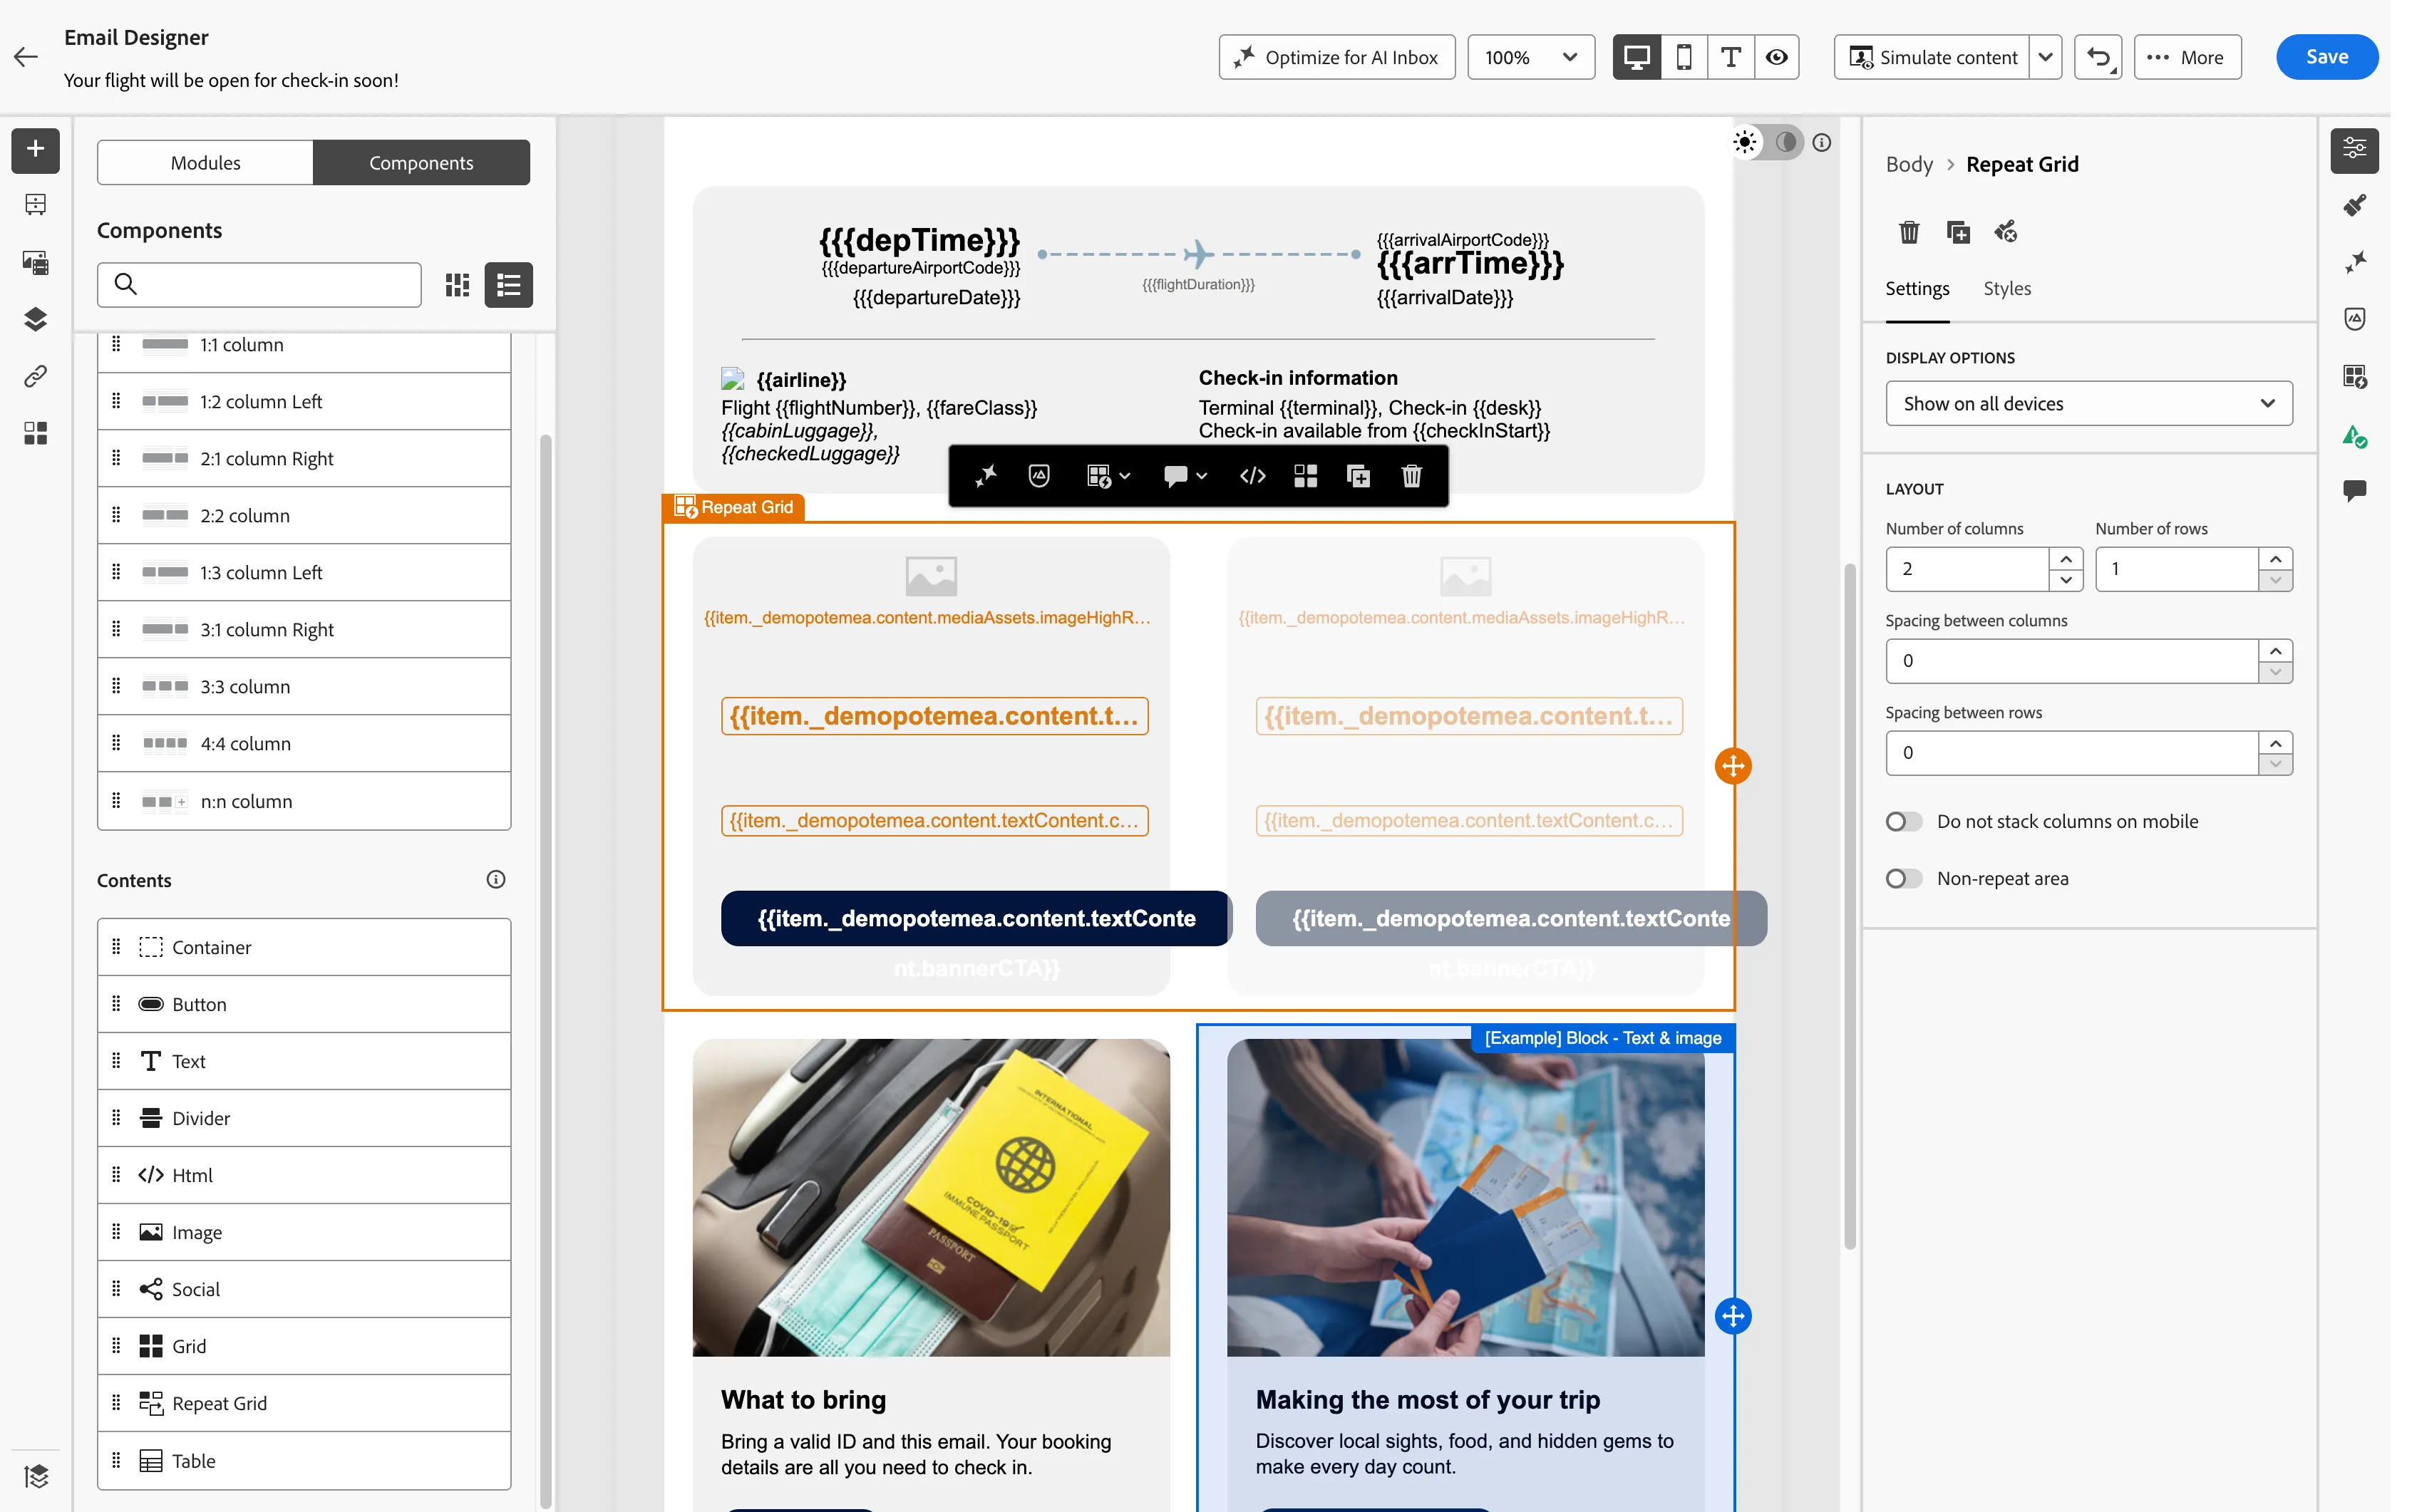
Reminder! Now is a good time to Save your email (top, right Save button).
The personalization editor is the centerpiece of the personalization in Journey Optimizer. It is available in every context where you need to define personalization like emails, push and offers.
In the personalization editor interface, you can select, arrange, customize and validate all the data to create a customized personalization for your content.
In this case, the Banner image source URL will be replaced dynamically with an image of the most suitable ancillary offer for each customer that receives the email.
[Optional] Simulate Email Content
If you want to see how the Offer would render for a test profile with certain attributes, you can simulate content.
- In the top bar, click the icon next to Simulate Content and choose Simulate content (AEP profiles).
- Add a test profile that you want to simulate email content for.
- Click on Manage test profiles.
- In Identity namespace, click on
 .
- In Select identity namespace, click on Email, then click Select.
- Set the Identity value to {{EMAIL}}.
- Click Add profile.
- Click the icon in the top right to go back to the Simulation.
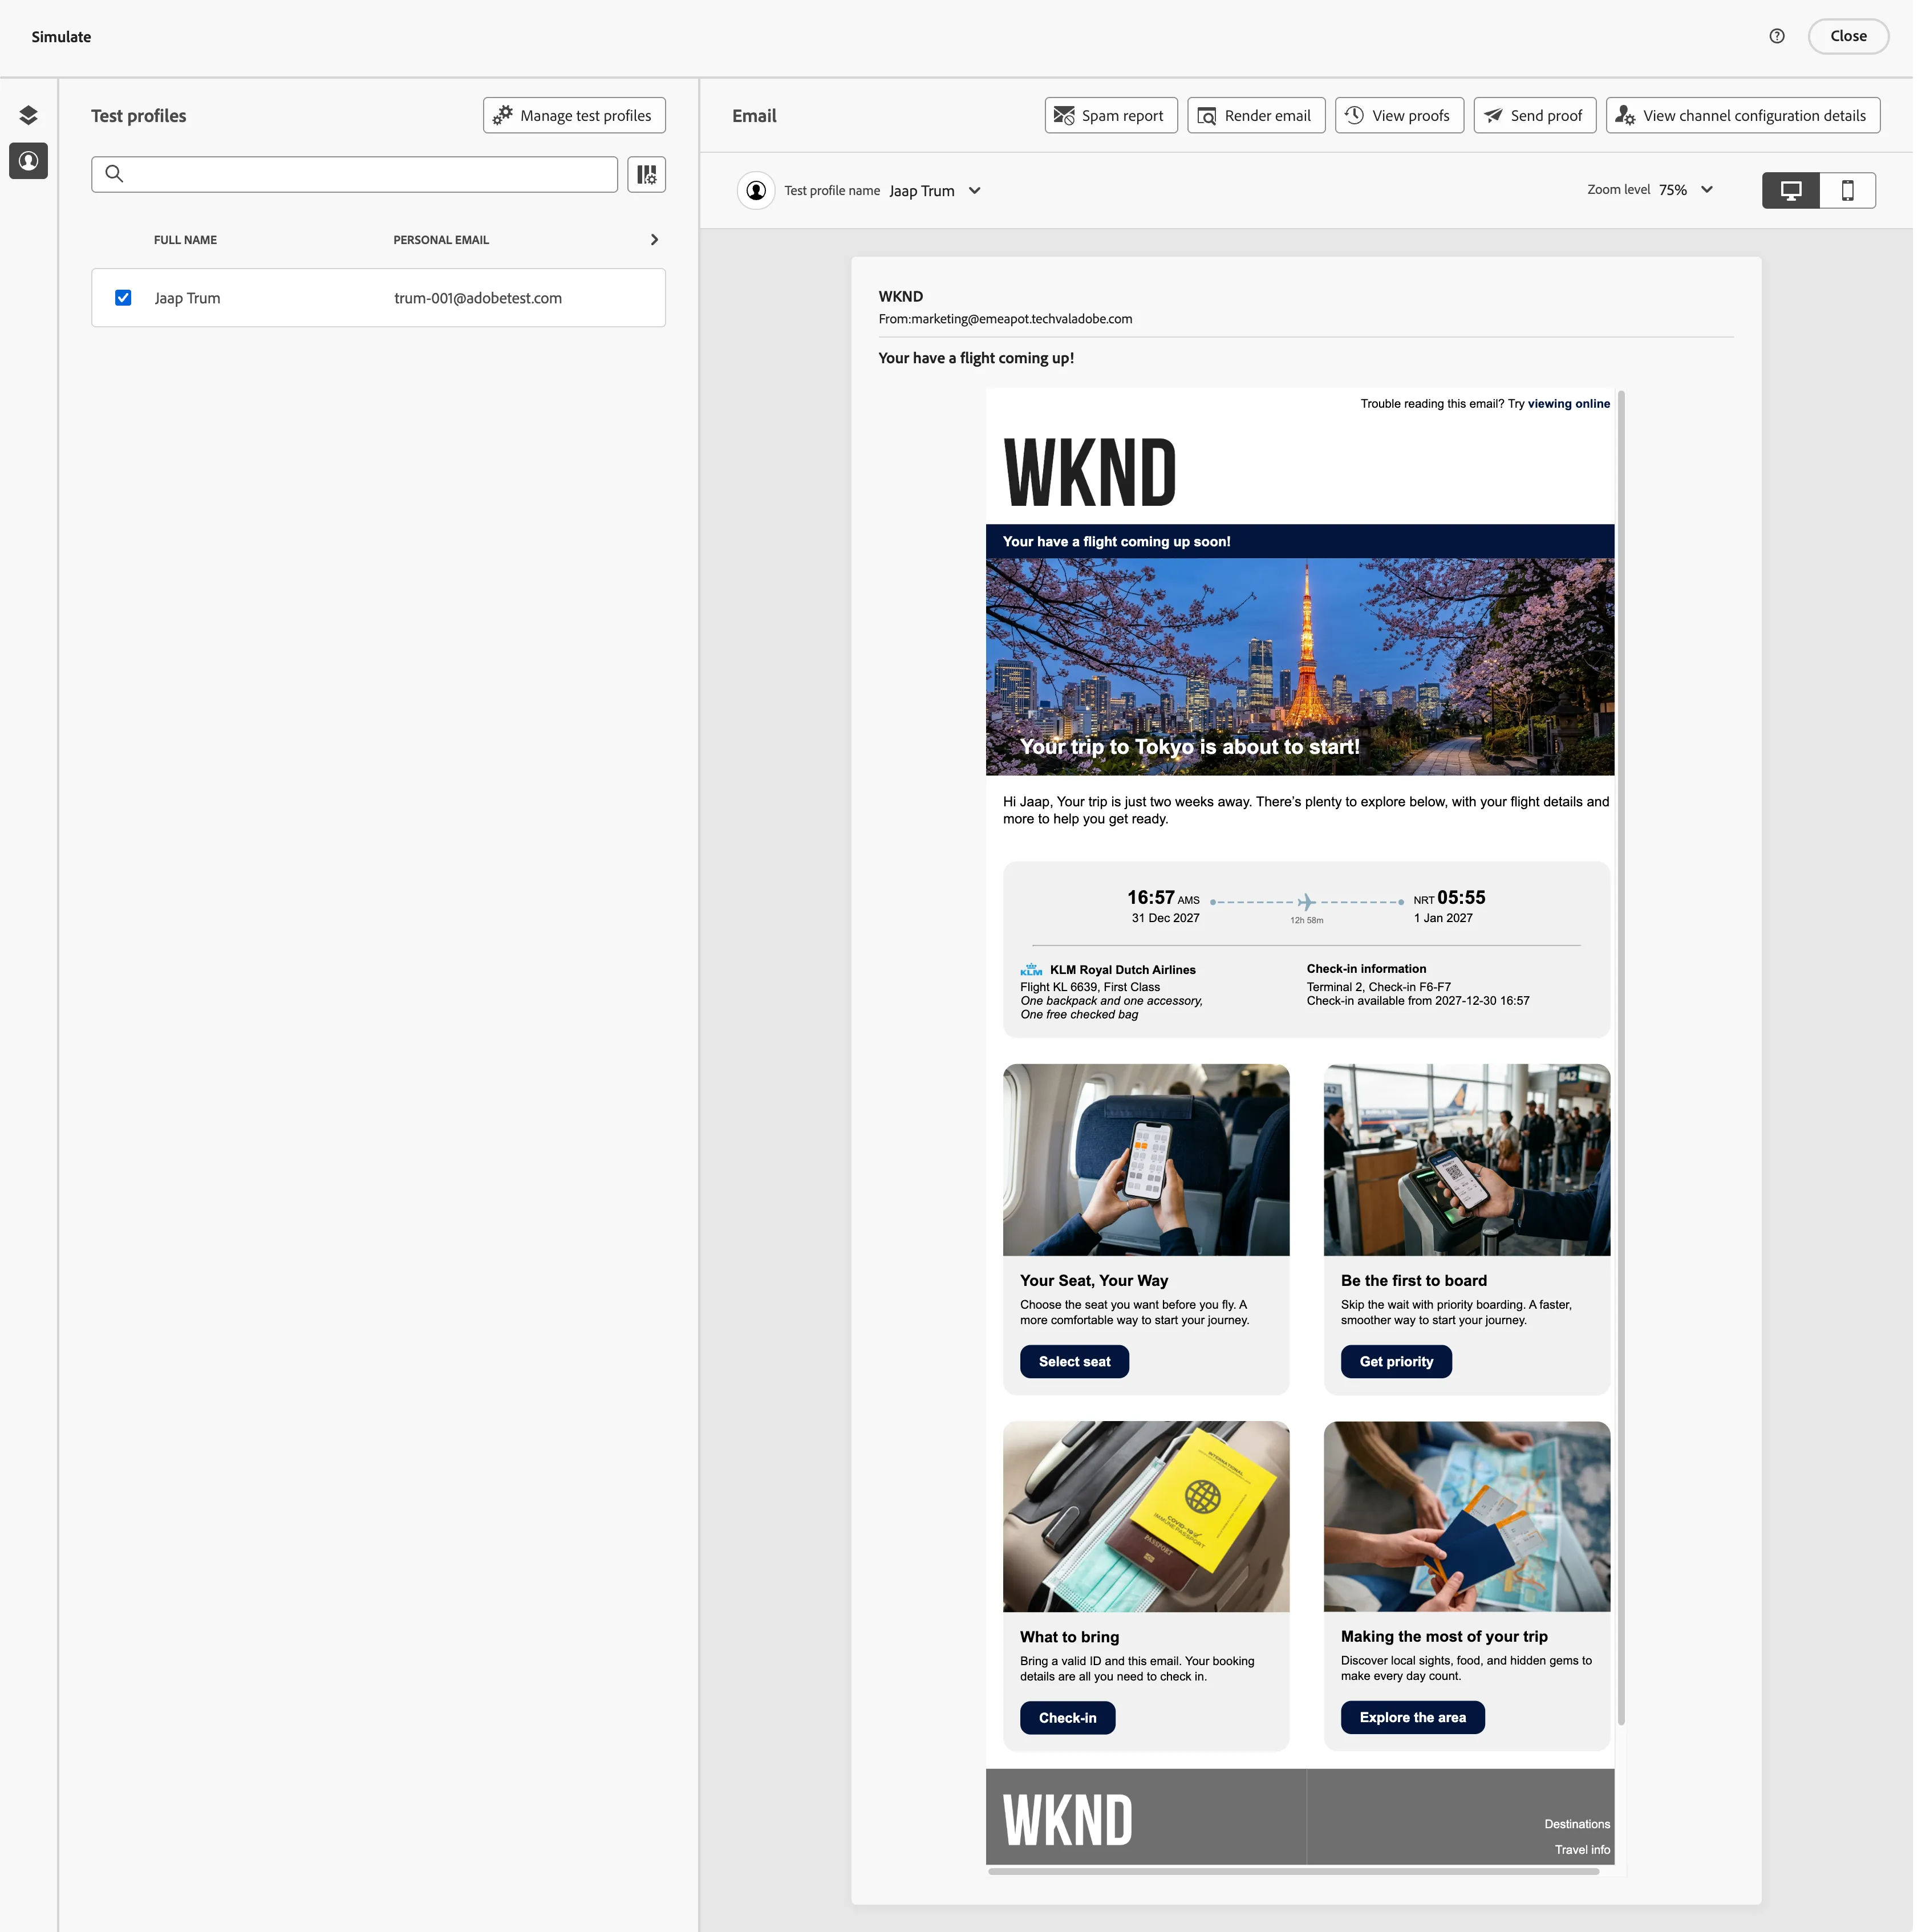
An example test profile rendering is:
- Click Close to return to the Email Designer.
Your email should now look like:
- Click Save in the top right.
- Navigate out of the email designer by clicking the icon in the top left. You'll be taken to the messages overview for your journey.
- Navigate out of the messages overview by clicking the icon in the top left.
- You'll return to the Journey canvas. Click Save in the Actions: Email panel.
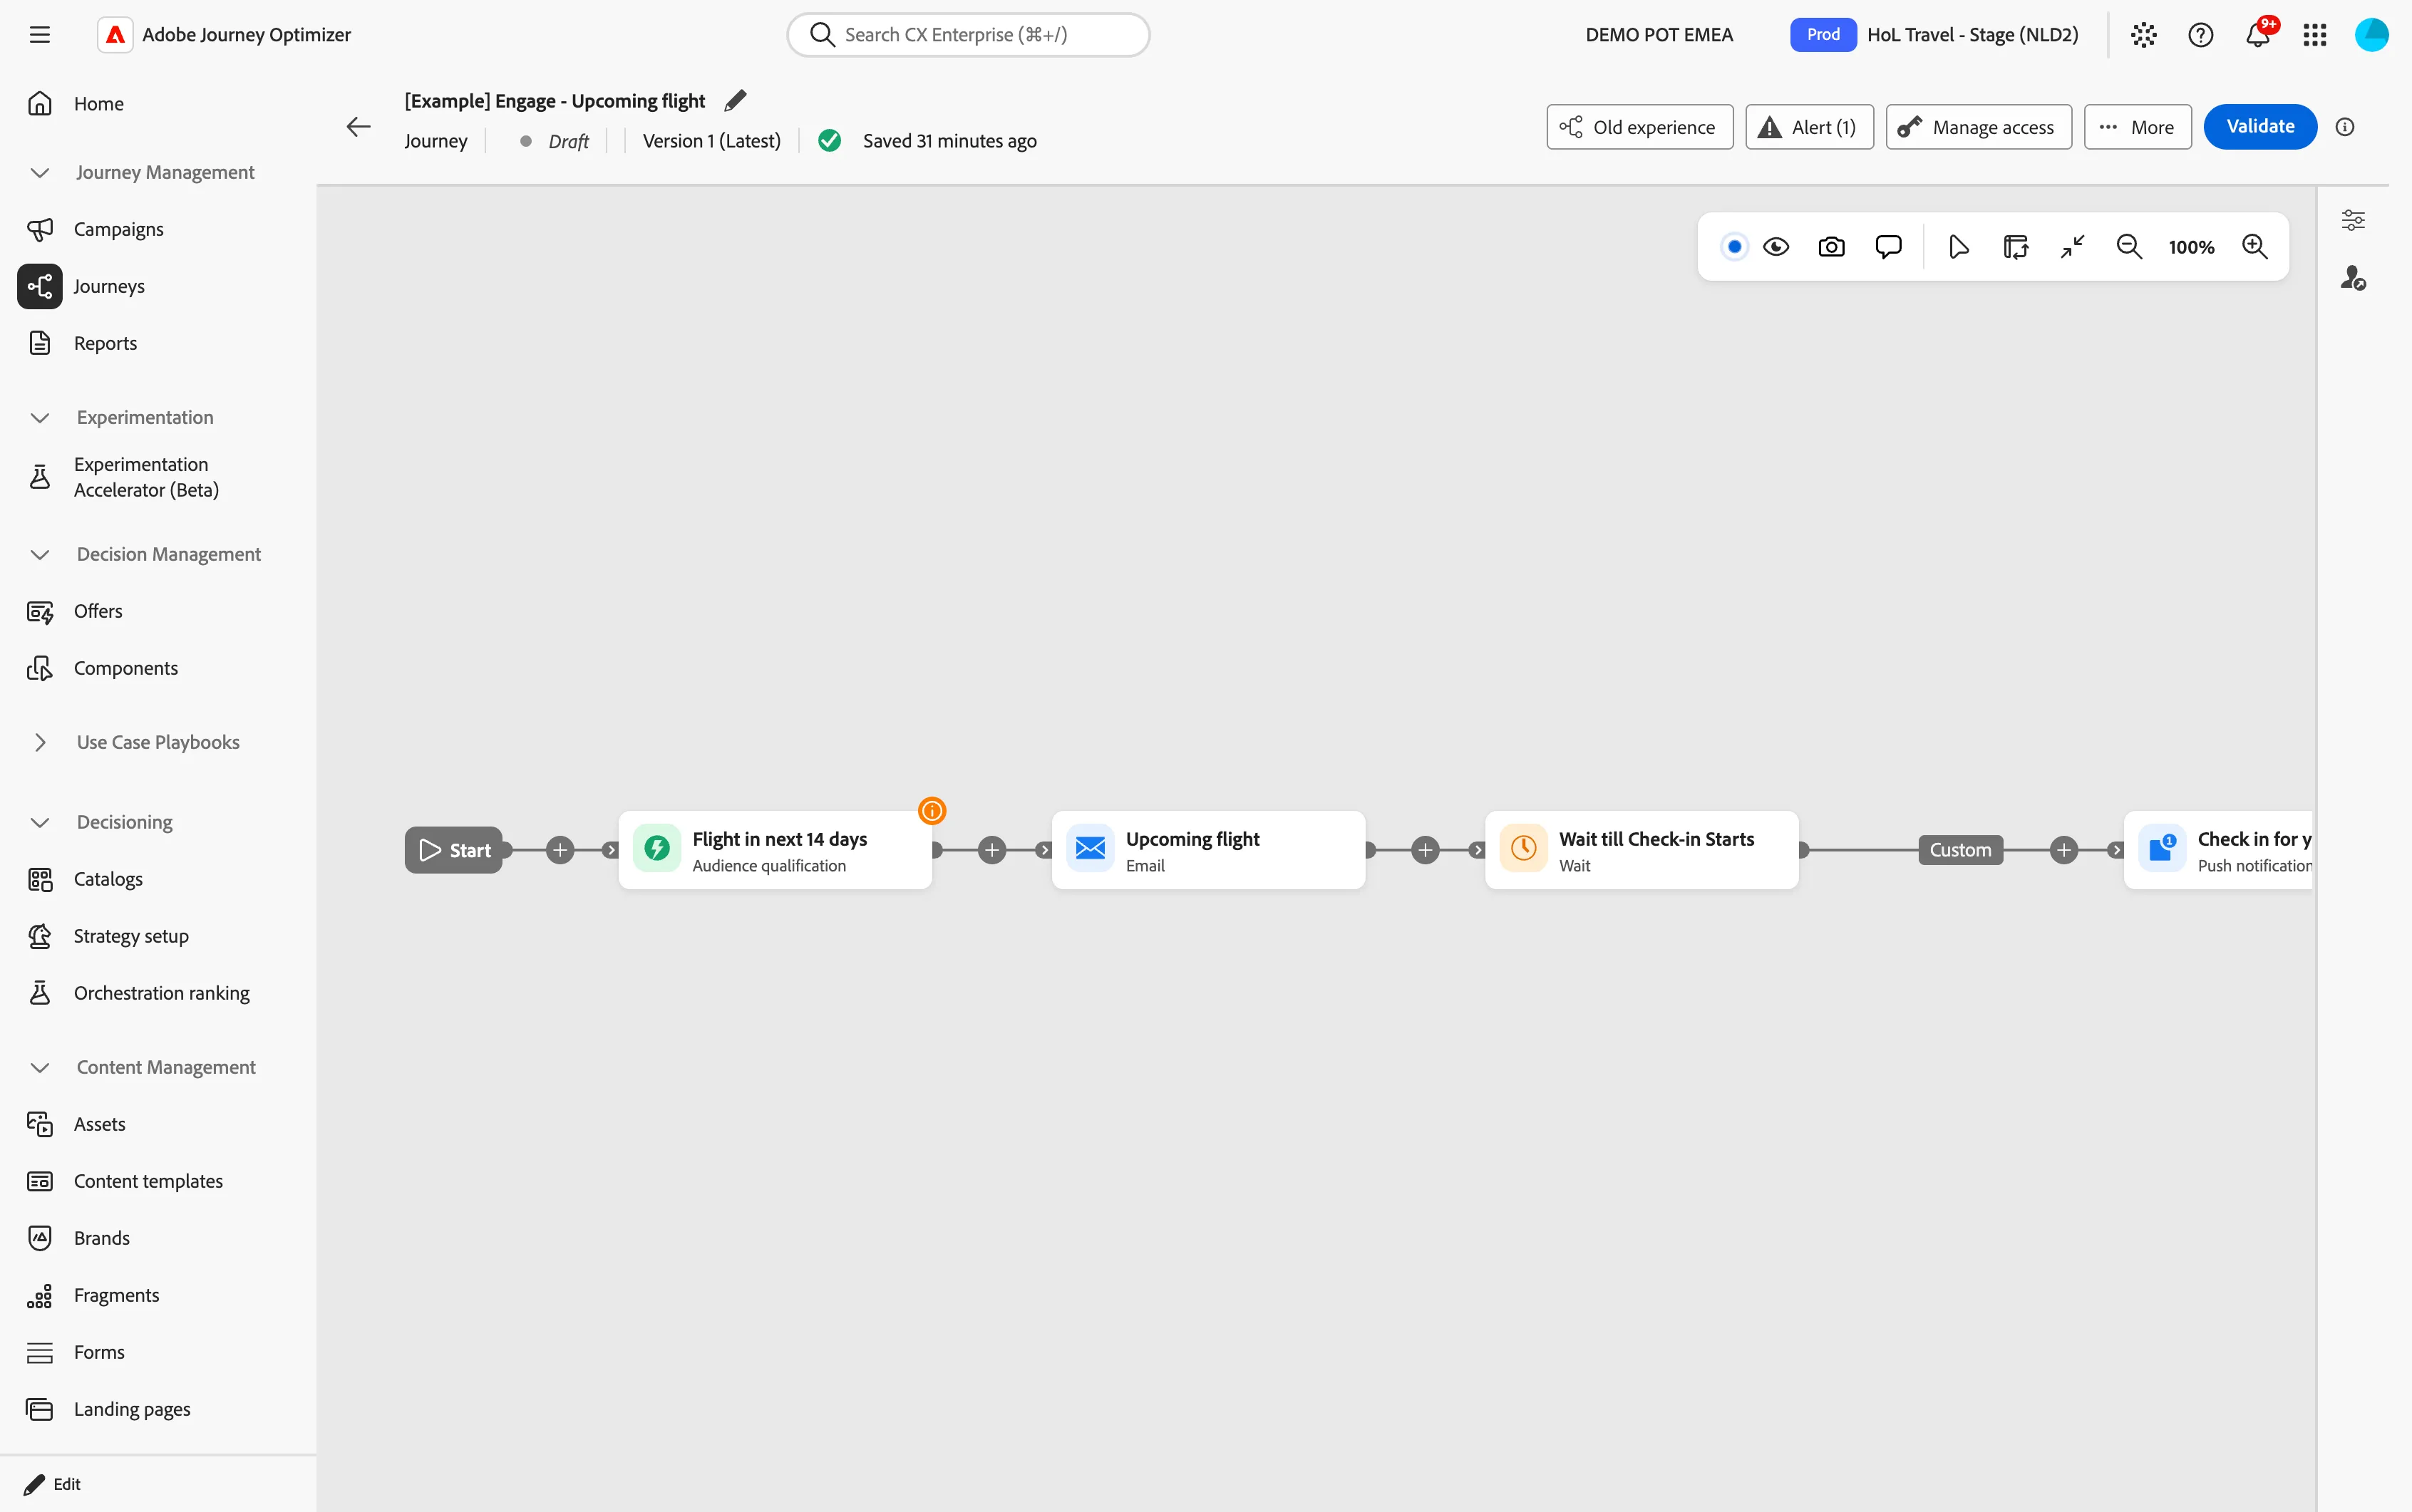
Your journey should now look like:
You've successfully composed a personalised Email Message to be sent to qualifying customers. You've used Decisioning to personalise your email with relevant offers.
Now review what the rest of the journey does.
The rest of the journey
After the Upcoming flight email is sent, the journey waits for the Check-in to start. This is a custom wait that looks at the customer's Check-in start date.
When the Check-in starts, the journey sends a push notification to the customer alerting them that they can now check in to their flight.
Add Exit Criteria
A customer could cancel their flight at any point in their journey.
In these cases, we wouldn't want them to receive any further communication from this Journey. This is where Exit criteria comes into play. With this feature you can define real-time triggers that cause the profile to be removed from the journey.
- On the right side of the canvas you'll find a thin vertical hotbar. Click on the
 icon to Show exit criteria.
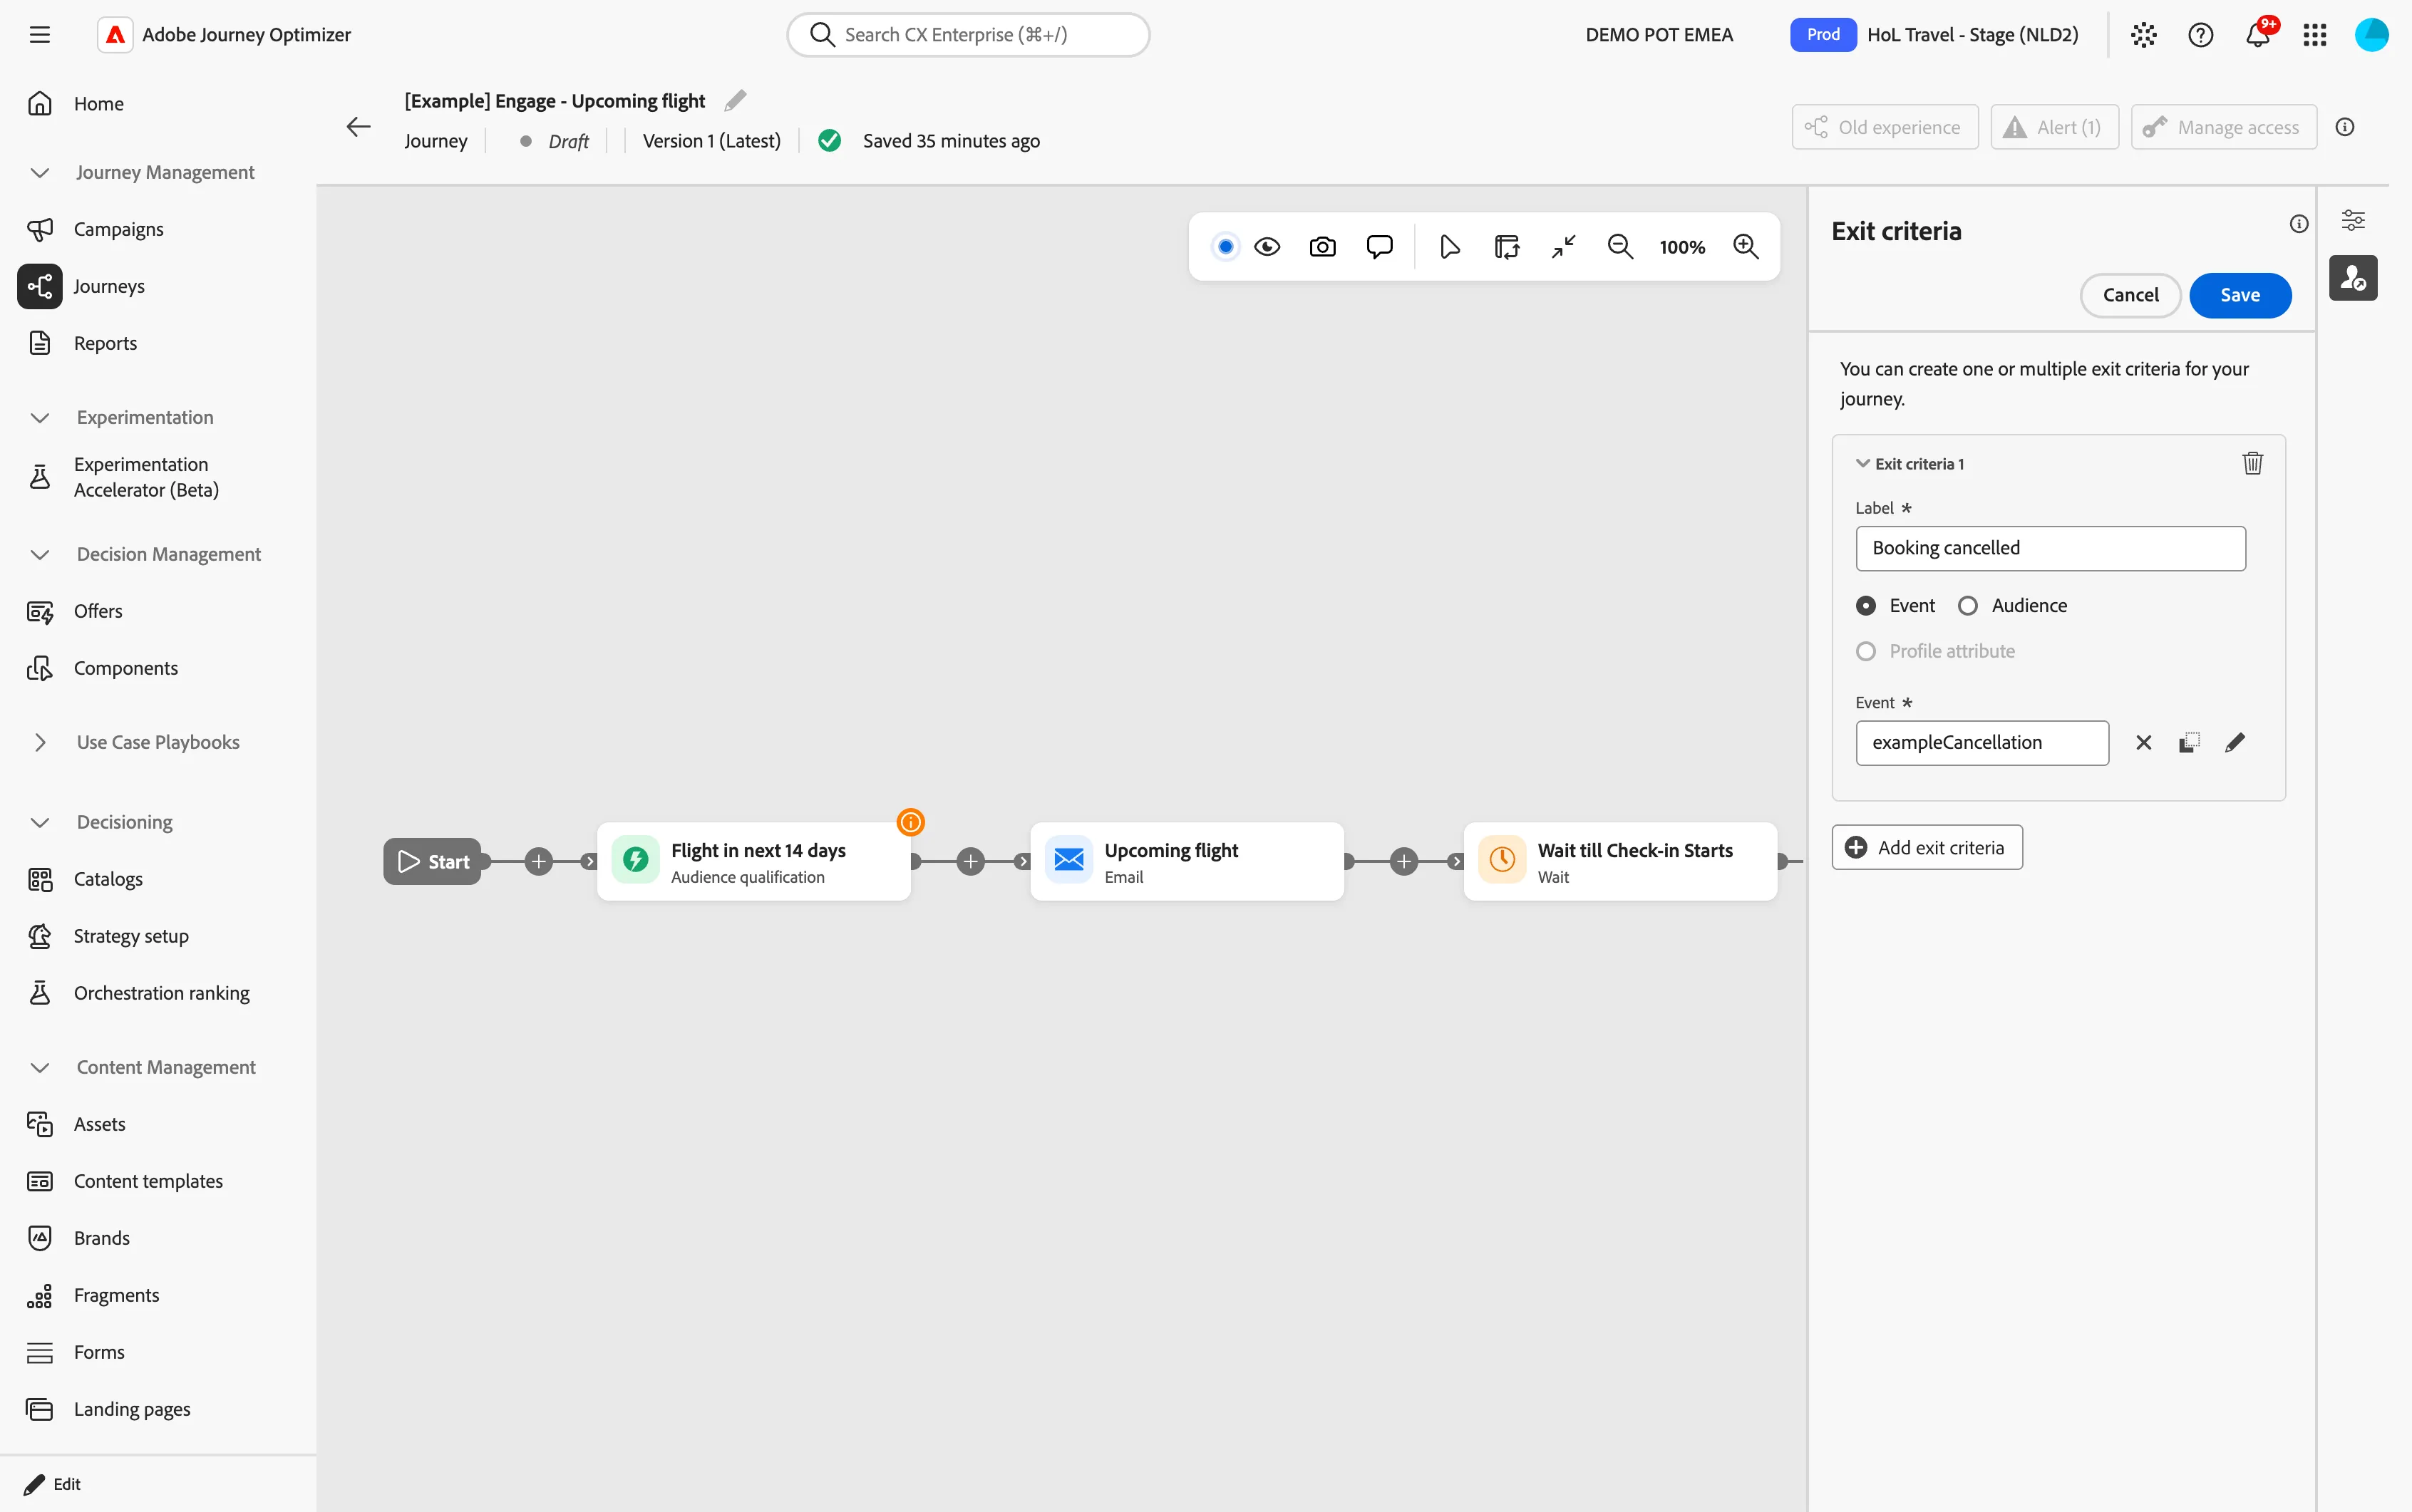
- Click on Add exit criteria.
- Set the label to Booking cancelled.
- Choose Event as the exit criteria.
- Click on the Event input field or on the -icon. A window will open
- Select the Event exampleCancellation and click Save to close the window
- Click Save again to save your exit criteria.
You have now successfully created the Upcoming flight journey using the Adobe Journey Optimizer. Next, we are going to test our journey using Test Mode.